Tag: editing

  • ProWritingAid Review: How to Improve Your Writing With This Editing Tool

    ProWritingAid Review: How to Improve Your Writing With This Editing Tool

    Your writing could always be better.

    It’s an unfortunate reality of this job: No matter how long you do it or how much you learn, everything you write has room for tweaking to get a little closer to elusive perfection.

    You could go cross-eyed re-reading a piece before submitting it. Eventually most of us get used to biting the bullet and sending something that’s — ugh — good enough.

    In search of a way to submit articles and manuscripts with a little more confidence than that, I enlisted a virtual writing coach.

    ProWritingAid is a web editor and plugin for Google Docs, MS Word and other writing tools (excluding Mac’s Pages) that will help you spot errors in grammar, spelling, style and word choice in your writing. They let me try out the tool and write this ProWritingAid review for The Write Life.

    You can think of it like a preliminary writing coach or editor. The tool won’t replace a human editor (I can’t not say that, as an editor myself…), but it can help you polish your writing and strengthen your writing habits.

    ProWritingAid will analyze your document and point out grammar and spelling errors — but it goes way beyond that. It’ll also root out passive verbs, lengthy sentences, hidden verbs, unnecessary adverbs, repeated words and phrases and more common enemies of clear, concise writing.

    [twl_reusable_block post_id=41455]

    Founder Chris Banks originally created ProWritingAid to help his own writing after making the transition from financial analyst to fiction writer. He taught himself to code and wrote a simple program to identify common pitfalls new writers face.

    At first, the tool focused on fiction writing, but now it lets you note whether you’re analyzing academic, business, technical, creative, casual or web writing — because what makes one kind of writing good doesn’t always apply to another!

    How ProWritingAid works

    ProWritingAid has three price points, each of which come with their own set of features and functions. Full details of which can be found below.

    Free

    • $0 per month
    • Basic writing suggestions, everywhere you write
    • 500 word count limit
    • 10 rephrases per day
    • 3 AI Sparks per day
    • Grammar, spelling, punctuation
    • Word explorer and thesaurus
    • Document type setting
    • 100% data security and privacy

    Premium

    • $10 per month
    • Write and edit like an expert. No word limits
    • Everything in Free
    • Unlimited word count
    • Unlimited rephrases
    • 5 AI Sparks per day
    • Advanced style improvements
    • Custom style guide
    • Snippets
    • 25+ writing analysis reports
    • Customisable suggestions
    • Terminology management
    • Author comparison
    • Citations
    • Collaboration
    • Unlimited document storage
    • 1 Critique per day

    Premium Pro

    • $12 per month
    • Unlock extended AI features to spark ideas
    • Everything in Premium
    • 50 AI Sparks per day
    • 3 Critiques per day

    Once you’re in, you can work in your own word processor, or upload or copy and paste your document into the ProWritingAid web editor. It’ll read your writing and use color-coded underlining to call out suggestions.

    Here’s how that looks on one of my recent posts for The Write Life:

    Hover over a phrase to see the suggestion. For example, for my passive phrase above, “writing can be edited,” ProWritingAid suggested I rewrite to use an active verb, such as “We can edit writing.”

    It also catches potential filler or hedging words, including “totally” and “actually” in my selection above. 

    You’ll probably get some suggestions you don’t want to follow or that don’t fit the style of the publication you’re writing for, so read them carefully before clicking to accept suggested changes. You can choose to disable a “rule” if you don’t want to see that kind of suggestion — for example, I disabled suggestions to rewrite split infinitives, because I’m a rebel like that.

    You can also pull up a summary that takes a higher level view of your writing. This includes a ton of information about your writing, from word count to reading level to variety of sentence length.

    Pay attention to this report to learn about — and improve — your writing habits. My reports consistently show I’m a little generous with adjectives…like “consistently” earlier in this sentence. I’ll need to work on that if I want to write something to Stephen King–esque standards.

    See a sample report from ProWritingAid


    Who is ProWritingAid for?

    We all have access to grammar and spelling checkers for free with word processors. And our writing will often go through an editor before publication. So why should you pay for editing software?

    ProWritingAid is best for cleaning up a draft before sending it to the next step. Instead of trusting your aunt or a generous friend to read your writing and tell you “it’s fine,” use this tool to give it an x-ray look and spot clunky wording before an editor does.

    It’s worth the investment for:

    • Authors: Polish your manuscript before self-publishing or submitting to agents.
    • Freelance writers: Tighten your copy before submitting articles (editors will love you!).
    • Students: Get a virtual second eye on your papers before turning them in.
    • ESL writers: Use the tool to improve diction and discover filler words and awkward wording.
    • New editors: Use it to train your eye to hone writing.

    If you regularly work with an editor, for example, as a staff writer in a newsroom or other organization, the tool probably isn’t worth your money. It’ll largely do the job your editor is already being paid to do.

    Things you should know about ProWritingAid

    The free version of ProWritingAid is nice if you just want to check out an occasional bit of your writing. 

    If you want to use it regularly, though, I recommend the Premium version so you can use the tool with your existing word processor. ProWritingAid’s web editor doesn’t offer the kind of tracking changes or collaboration you’ll get with Google Docs or MS Word. Without the integration, you’ll probably duplicate work.

    Also note, you need to connect to the internet for the tool to work, so you can’t do any checks while you’re offline. Kind of a bummer if you like those undisturbed writing hours on a flight or in your own Walden Pond. You might have to leave revisions until you return to civilization.

    Bottom line of our ProWritingAid review: ProWritingAid can’t replace a human editor’s touch, but it’s one of the best grammar checker tools, ideal for polishing your writing while you self-edit.

    It’s a simple and affordable way to uncover your writing habits and ensure you make the best possible impression on every editor or agent when you’re ready to submit your work.

    This post contains affiliate links. That means if you purchase through our links, you’re supporting The Write Life — and we thank you for that!

    Photo via Zofot/ Shutterstock 

  • 3 Metaphor Examples And When You Should Use One

    3 Metaphor Examples And When You Should Use One

    When it comes to succeeding as a writer, there are a lot of rules and techniques you should know and learn how to use. One of them is how to properly use metaphors in your writing.

    We will be going over what metaphors are, taking a look at some metaphor examples, and going through some other tricks and tips in order to use them in the right way.

    Metaphors can make your writing stronger and give readers something to visualize when they are reading. Imagine when you hear the phrase “couch potato” and while it logically does not make sense, you can also imagine what that is in your head.

    Keep in mind, metaphors are not always something you are going to use in your writing. There is a time and a place to use them, but we will be going over when you should avoid using them, too.

    Metaphor Examples

    New call-to-action

    What Is A Metaphor?

    While you might have a vague idea of what a metaphor is, you might not know exactly how to define what it is. Let’s cover the basics and then dive into more of an explanation.

    According to the Dictionary:

    A metaphor is a figure of speech in which a word or phrase is applied to an object or action to which it is not literally applicable.

    A metaphor is a figure of speech that involves making a direct comparison between two seemingly unrelated things to highlight a similarity between them. Unlike a simile, which uses “like” or “as” to make a comparison explicit, a metaphor uses the imagination to create comparisons.

    Metaphors are often used to make descriptions more vivid, engaging, or expressive by drawing on the reader’s understanding of the compared items.

    Metaphors are often used in literature, poetry, and everyday language to create imagery, enhance communication, and convey abstract ideas in a more relatable and understandable way.

    Why Writers Should Learn To Use Metaphors

    Metaphors can help make your writing memorable. It can help you express deeper emotions and spark the readers imagination while they read it.

    It can make your writing stand out, be more creative, or be more memorable. As you can imagine, all of those are important reasons to use them in your writing if you want to become a full-time writer.

    Even if you do not enter a creative writing field, you should still practice using them every now and then so you can improve your overall writing skills.

    However, that does not mean writers should always use metaphors, as there are times and places to do so.

    When To Use Or Not Use Metaphors

    For the most part, you will want to use metaphors when you are doing any type of creative writing.

    You might not want to use them as often in an academic or business context, depending on what you are writing.

    If you are unsure, you will want to think about the person or audience you are writing for and decide if it is a good idea to include creative writing in it. You will also want to consider if the audience is native speakers to your language because sometimes metaphors will translate in a weird way that can be off-putting.

    Here are some other times you might not want to use metaphors:

    • Technical writing – Most technical writing needs to be straightforward and clear-cut, so it is not the time to be creative.
    • Legal writing – For the same reasons above, you will want to avoid metaphors and creative language in legal writing.
    • Sensitive topics – You never want to come across as trivializing or insensitive in these kinds of situations, so keep the metaphors at bay.
    • Overused – You also do not want to overdo it with. metaphors in any creative writing.

    Metaphor Examples

    Now that we have covered the basics, we will dive into some more specific examples and then give a longer list of other ones you might have heard of.

    Example #1: “Time is money.”

    In this metaphor, time is compared to money, suggesting that just as money is valuable and should be spent wisely, so should one’s time.

    Example #2: “Her smile was a ray of sunshine.”

    This metaphor compares the brightness and warmth of a smile to the qualities of sunlight.

    Example #3: “The world’s a stage.”

    This metaphor implies that life is like a theatrical performance, with people playing different roles and putting on a show for others.

    This one also comes from As You Like It by William Shakespeare, a great piece to dive into if you want to learn about extended metaphors, which we will cover below.

    “All the world’s a stage, and all the men and women merely players.”

    Shakespeare

    Some other metaphor examples that are common in our language:

    • Having a heart of gold
    • Money is the root of all evil
    • She is the bomb
    • He’s is a couch potato
    • Time is money
    • Her voice was music to his ears
    • The world is a melting pot of cultures
    • Life is a rollercoaster with its ups and downs
    • His words were a dagger in my heart
    • She’s a shining star in our organization
    • Love is a battlefield
    • The classroom was a zoo after the teacher left
    • The city is a concrete jungle
    • My heart is a lonely hunter
    • His anger was a volcanic eruption
    • The book was a passport to another world
    • The detective had a mind as sharp as a razor
    • The news hit me like a ton of bricks
    • Time is a thief in the night
    • The idea planted a seed in her mind
    • Her laughter was infectious
    • The politician’s promises were empty words
    • The car roared to life
    • His smile was a beacon of hope
    • Life is a highway
    • He is an early bird

    What Is An Extended Metaphor

    While we have now extensively covered what a metaphor is, but you might be wondering what an extended metaphor is or how they work.

    An extended metaphor is a metaphor introduced and then further developed throughout all or part of a literary work, especially a poem.

    Dictionary.com definition of an extended metaphor

    An extended metaphor is a literary device that occurs when a metaphor is prolonged and developed throughout a piece of writing or a speech, often spanning several sentences, paragraphs, or even an entire work.

    Unlike a regular metaphor, which is a brief comparison, an extended metaphor is sustained and elaborated upon, allowing the writer to explore and explain a complex idea or theme in depth.

    In an extended metaphor, the initial comparison is introduced, and then various facets or aspects of that comparison are explored further, often providing a deeper insight or understanding of the subject matter. This technique is frequently used in poetry, prose, and speeches to create a more profound and lasting impact on the reader or audience.

    These are not something you will often start using when you are learning creative writing. It takes time to learn how to draw out the same meaning across a whole piece.

    Need More Writing Help?

    The book editing checklist and guide below will help you make sure you have not only your metaphors but all of your other editing on point throughout your book.

    Pesky typos and other simple errors are enough to turn off potential readers, so having them sprinkled throughout your book can be a huge problem. You will want to make sure you catch all of the errors before your book is published and this guide can help.

    Get your copy today!

    [sps_form_banner_t form_id=”819bff92-fa7e-4c48-bfa1-c7b928136746″ button_text=”SIGN ME UP!” ty_url=”https://learn.self-publishingschool.com/twl-ty-optin-check-your-email”]

    FREE RESOURCE

    BOOK EDITING CHECKLIST & GUIDE

    Grab your FREE guide now and embark on a journey of refining and enhancing your book. Your readers deserve the best – claim your copy today and make your words shine!

    [/sps_form_banner_t]
  • Editorial Freelancers Association Review — Is It Worth Joining?

    Editorial Freelancers Association Review — Is It Worth Joining?

    In this Editorial Freelancers Association review, you’ll learn the basics of what the association is, how it works, how much it costs, and if it’s worth the fee to join.

    The Editorial Freelancers Association, also called the EFA, is a well-known and respected group that helps people within the writing and editing industry umbrella come together to help freelancers grow their careers.

    From how to manage clients, get book deals, grow your career, set your rates, or anything else, the EFA has guides and assistance to help you.

    Let’s dive into why you might want to join an association in the first place and then go through the pros and cons of the EFA.

    Why join freelancer associations?

    Freelancing organizations in general can help you network, meet fellow editors, and potentially find work.

    When you find one that is professionally managed and with a ton of people, it can be exciting to join and build those connections. When you join a great group, you immediately get access to people you would otherwise have to find and network with on your own.

    You also are able to receive feedback and talk to other freelancers about any questions or concerns you have. Freelancing can be a lonely journey since you don’t usually have coworkers or a team so being able to connect with other people on a similar path can help a ton.

    If you’re new to the freelance world, it can be great to get feedback on your plans, your work, how to deal with clients and build your business in general.

    editorial freelancers association review

    What is the Editorial Freelancers Association?

    The EFA is joined by editors, indexers, proofreaders, researchers, translators, writers, authors, and other people in the writing and editing industry.

    From their website:

    The EFA Member Directory and Job List put you in touch with more than 3,000 editorial professionals with a broad array of skills and training—the people you need for self-publishing projects; fiction and nonfiction trade books; website copy; magazine articles; advertising, public relations, and training and education materials; corporate communications; and more. Through the EFA you will find writers, editors, copyeditors, proofreaders, indexers, researchers, translators, and other editorial specialists. There is no charge to use the Directory or the Job List.

    – EFA website

    One great thing about the EFA is that they offer a ton of information on their website for freelancers. Even their resources page is full of informative articles, editorial rates, sample contracts, and more. It shows you that these are professionals who know what they’re talking about.

    If you just choose to use the directory or job list, anyone is welcome to access it at any time without having to pay to join. Many groups hide their job board behind a big paywall, so it’s great they have theirs open.

    How much does EFA cost?

    At the time of writing this article, one year costs $180 and two years costs $295.

    The technical fee is $145 for the first year and $260 for the two year plan, but there’s a $35 processing fee.

    If you’re reading this in the future, check here for the current membership rates to the Editorial Freelancers Association.

    Editorial Freelancers Association Review

    For the most part, the reviews for the EFA membership are positive.

    Joining a professional organization and being able to join a directory can help you improve your reputation online. If you don’t have a big reputation in this industry yet, this can help give your work some legitimacy.

    The fee to join is a little expensive and keep in mind you’ll have to pay for some of the courses and the events with your own money on top of that membership fee. You will receive 20% off on courses due to being a current member, but this is something you should keep in mind if you’re thinking you’ll be able to just join and get access to all the courses.

    People report that most of the job postings are reported to be professional gigs more than anything else and not as many postings for absolute beginners. A large percentage of them also fall under the editing umbrella instead of just pure freelance writing.

    That’s not to say that freelance writing jobs never appear. A few comments just mention that they are less abundant than the editing jobs.

    It seems to be a group where you’ll get as much out of it as you put into it. Meaning, if you want to put the effort in to connect with other people, buy the courses, and apply to the jobs, it should pay off after time.

    Other reviews on EFA

    While the EFA doesn’t have any rating with the Better Business Bureau, it also doesn’t have any negative complaints, either. That’s pretty impressive considering they have been in business for 50 years.

    In this Reddit thread, you can find this comment: “I love the Editorial Freelancers Association! I am a medical writer and whenever I need an editor, I look there, first. For anyone wanting to secure higher pay and more editing work, you may want to align with the organization and others.”

    On another Reddit thread, “I’ve been a member for about six months. I recently landed a project that pays $2,500, so it’s obviously going to be worth it for me. Yeah, it’s a job board, but most of the offerings are professional-level gigs that pay well—not the kind of fluff you see on most freelancing websites. They also offer about a dozen classes on various aspects of editing (professional development), access to an active email listserv, various contract templates, networking opportunities, and a bimonthly newsletter.”

    Lower in that thread, another comment mentions how many inbound links and referrals they receive from having their portfolio in the EFA directory.

    Related articles and testimonials about EFA:

    Pros and cons of joining EFA

    Before you choose to join, let’s go through some of the pros and cons of paying the membership fee:

    Pros of joining EFA:

    • You’ll be connected with other professionals regularly
    • EFA hosts annual meetings you’ll be able to join
    • Members-only discussions to discuss monthly topics and get support
    • Discounted rates on healthcare (including dental) are offered if you’re a member of EFA (certain restrictions apply and only available in certain states)
    • Workshops to improve your craft
    • Job postings from publishers and authors
    • Tons of networking events, both online and in person

    Cons of joining EFA:

    • This yearly fee is higher than some of the other associations and networking groups out there
    • You’ll have to buy some of the other courses on top of the yearly fee
    • If you live outside of the United States you might have a hard time attending the in-person events
    • Not as many job opportunities as other job boards
    • There are a lot of professionals in the group, so you’re in competition on the job boards with people who have been freelancing for a while

    Summary of the Editorial Freelancers Association

    If you’re looking for great networking opportunities and learning experiences, the EFA is a good place to go and is worth the price. However, if you’re looking strictly for jobs and job postings, it might not be the first choice to pick from.

    TWL. CTA. Book Outline Template
  • Best Grammar Checker Tools: These 9 Will Make Your Writing Super Clean

    Best Grammar Checker Tools: These 9 Will Make Your Writing Super Clean

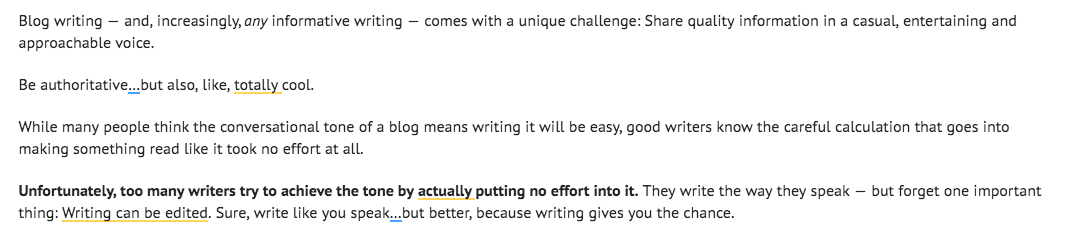
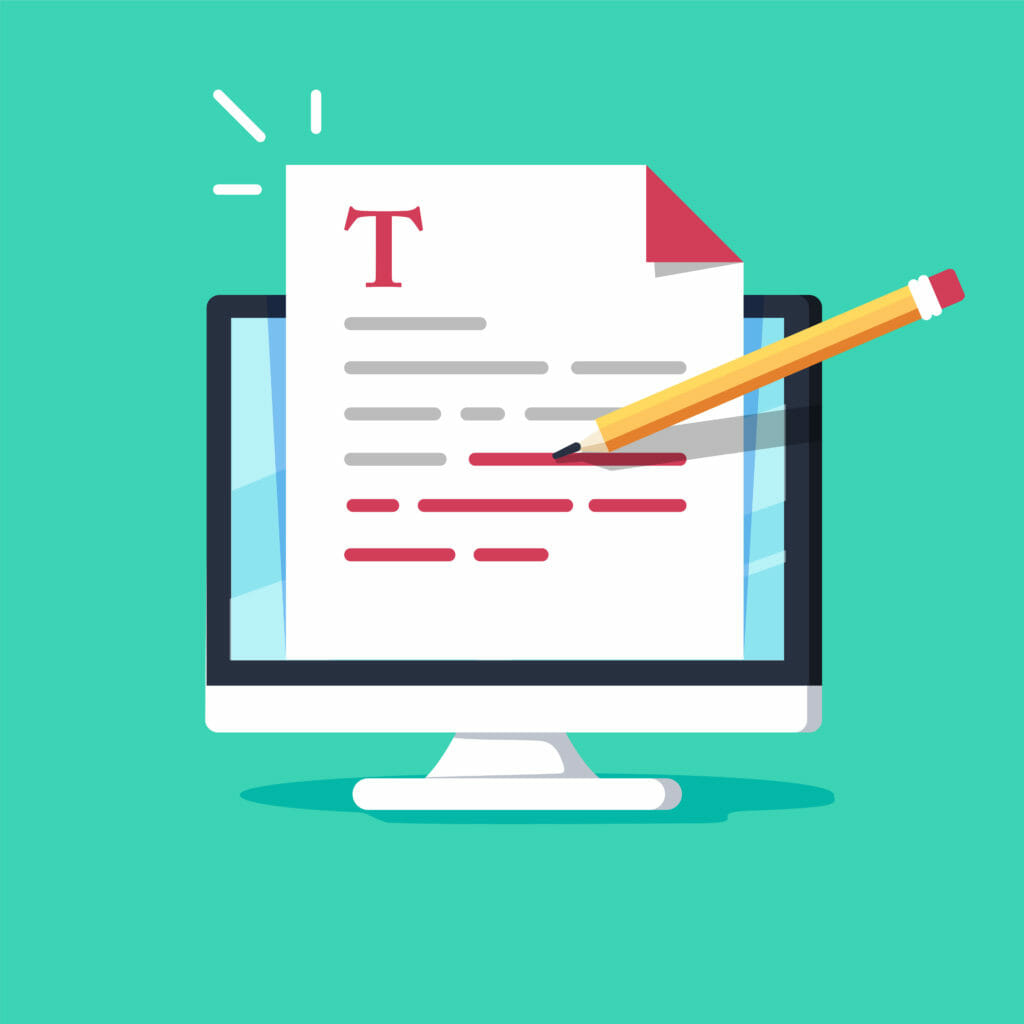
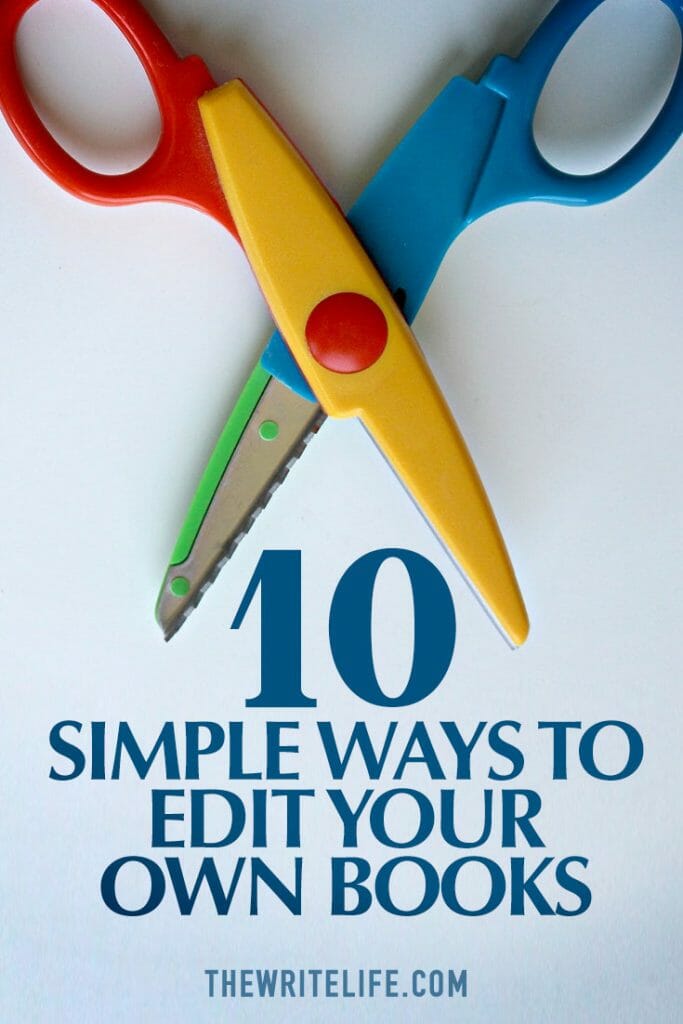
    Have you ever wanted a magical editing wand?

    Just imagine: A flick of the wrist is all that would stand between you and the end of editing your writing. No frustration. Minimal time investment. An amazing manuscript or blog post.

    Alas, no such magic wand exists.

    But we do have grammar checker tools, which are the next-best things.

    Just remember grammar checkers are designed to make editing easier, not to eliminate the work completely.

    [sps_reusable_block post_id=43061]

    Putting the best grammar checker tools to the test

    During self-edits on my latest manuscript, I experimented with editing tools, both free and paid, to determine which could be most beneficial to The Write Life’s audience. Besides being an author, I’m an editor, so I also weighed each tool against what I’d look for when editing.

    Since editing has a broad definition — basically anything that improves your writing — it’s not surprising that the tools I tried had different functions, from checking grammar and style to eliminating unnecessary words, to identifying areas for improvement.

    What you want in a grammar checker or editing tool will influence which one(s) you choose. No one tool can do it all — nor can one of these tools wave away the work and critical thinking necessary for a well-edited blog post, magazine article or book.

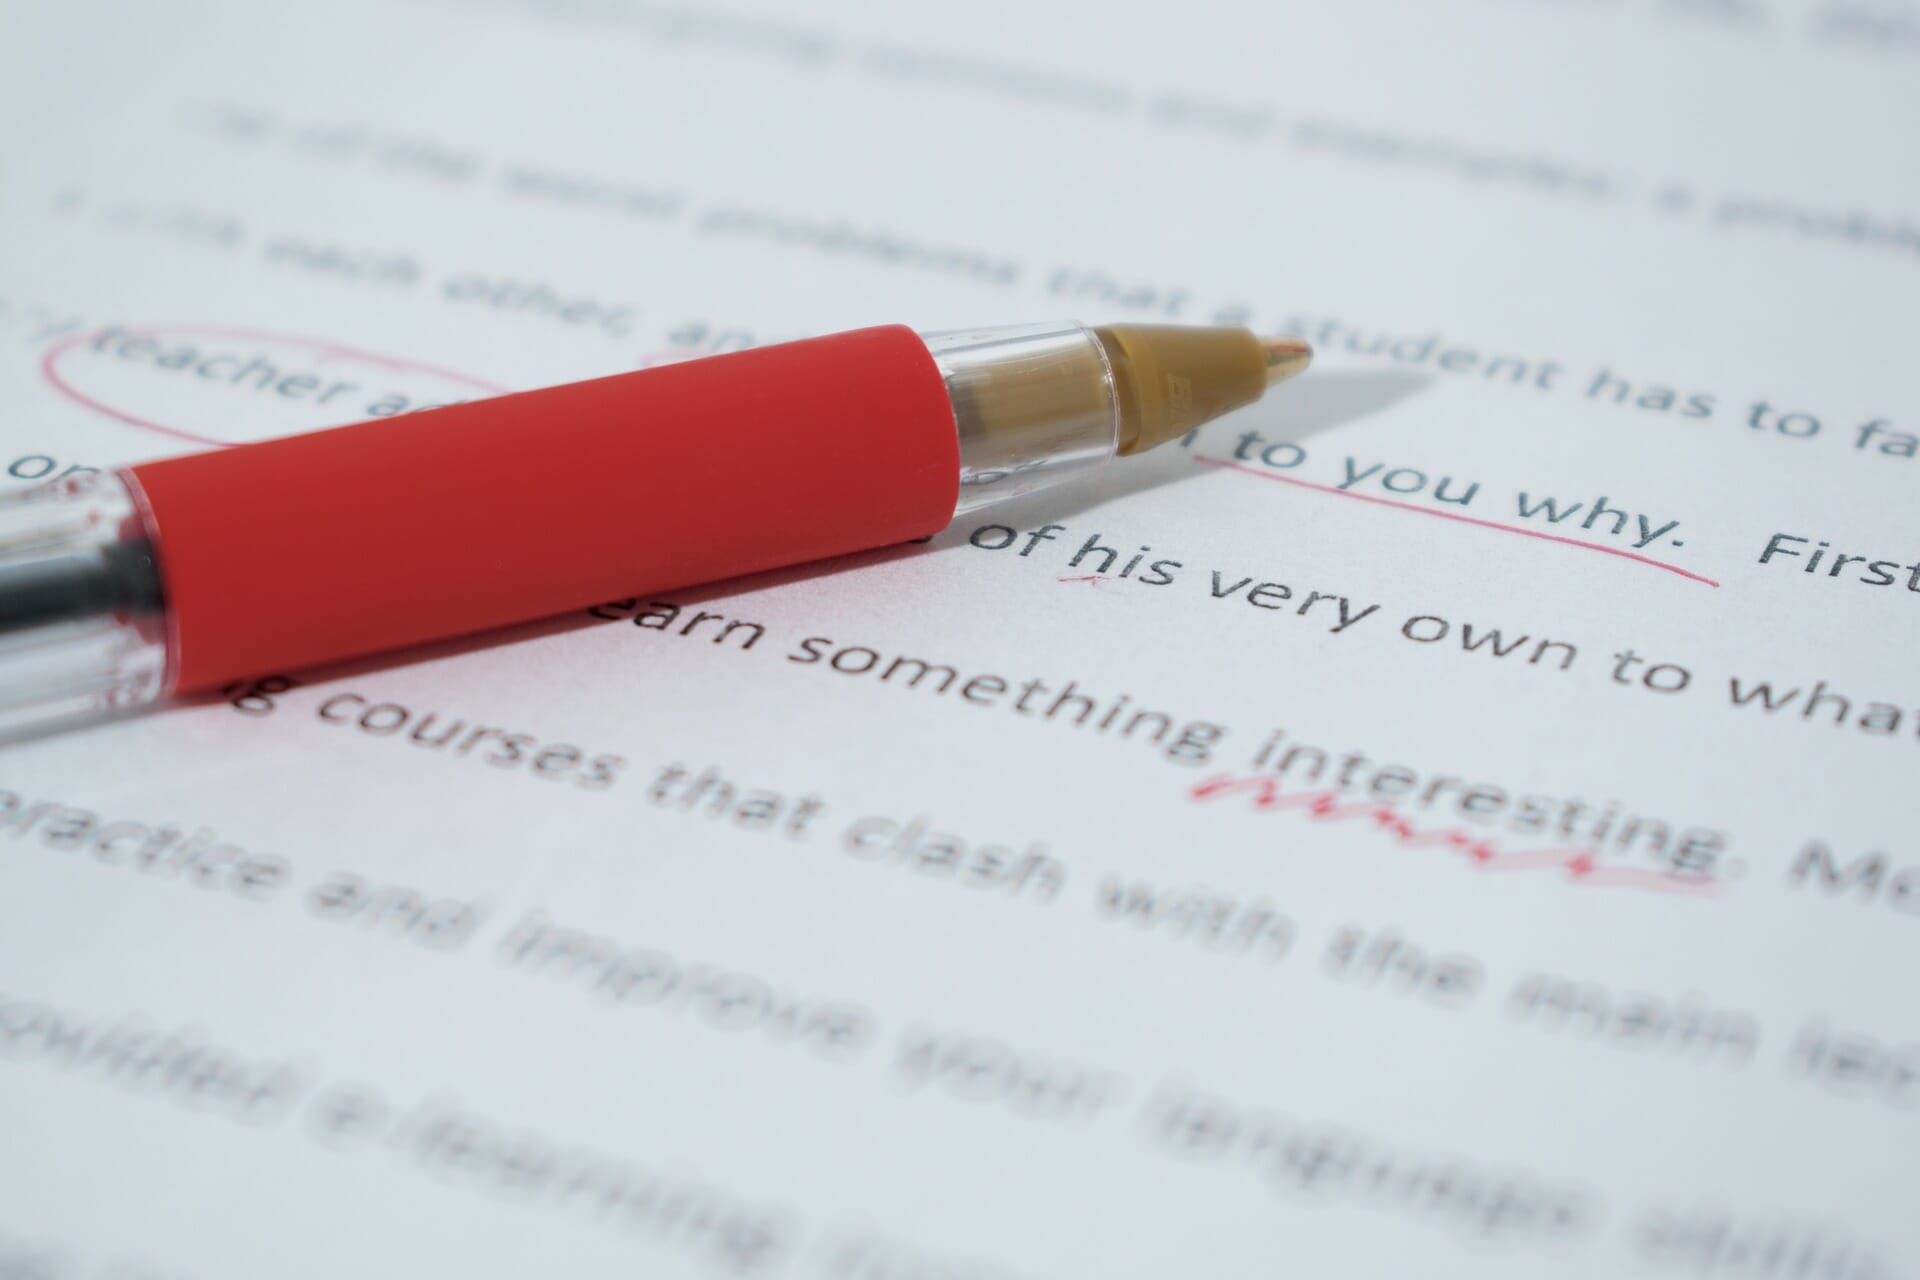
    A grammar checker doesn’t replace a human editor. Because language rules and elements of a good story can be so flexible, human eyes will always be superior to the rigidity of automatic tools.

    Here are 9 of the best grammar checker tools.

    1. ProWritingAid

    What It Does:  ProWritingAid is a web editor and plugin that will clean up your writing by detecting grammar and spelling mistakes, plagiarism and contextual errors. It also analyzes your writing and produces reports on writing style, sentence length, grammar, and repeated words and phrases.

    Price: There’s a limited free version. If you upgrade to the premium membership, you can edit in Google Docs or Microsoft Word, access a desktop app and Chrome add-ins, and — best of all — lose the word-count cap.

    A monthly membership is $20, a year’s membership is $120,  or go the whole hog and buy a lifetime membership for $399.

    Who It’s For: Anyone, including students, authors, freelancers or ESL writers.

    How It Works: Click on “Try the editing tool,” create a free account, then paste in your text.

    The Best Part: ProWritingAid has a premium option, but most of the areas you’ll want checked are available for free.

    What Would Make It Better: Though ProWritingAid checks grammar, I slipped in a your/you’re mistake without getting flagged. I wasn’t overly fond of the tool’s inability to work offline, but its overall functionality is hard to argue with.

    Our Recommendation: Use ProWritingAid in the self-editing stage to guide your edits. 

    More Details: For an in-depth explainer of ProwritingAid’s free and premium versions, check out our full ProwritingAid review.

    2. AutoCrit

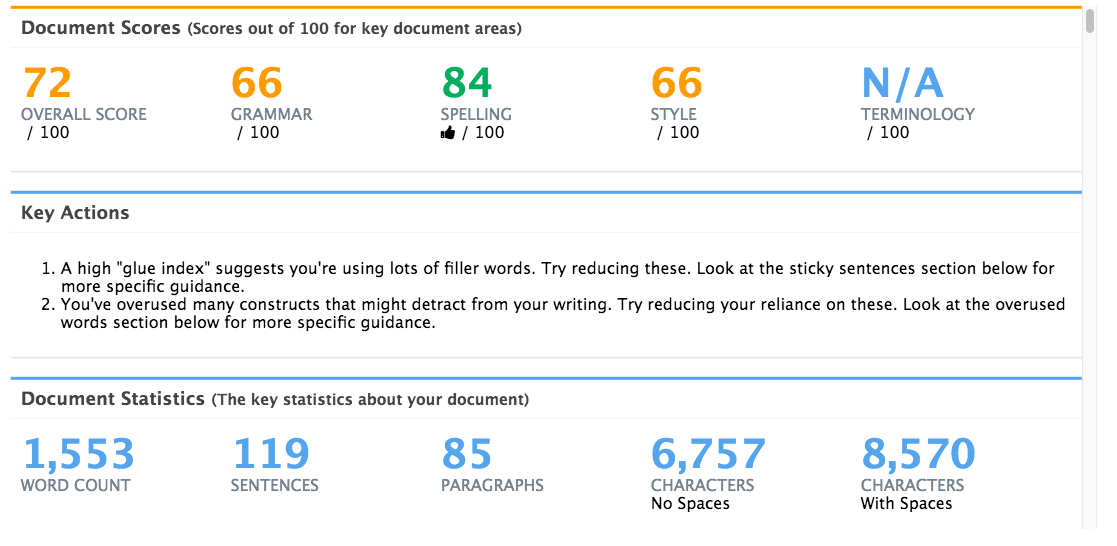
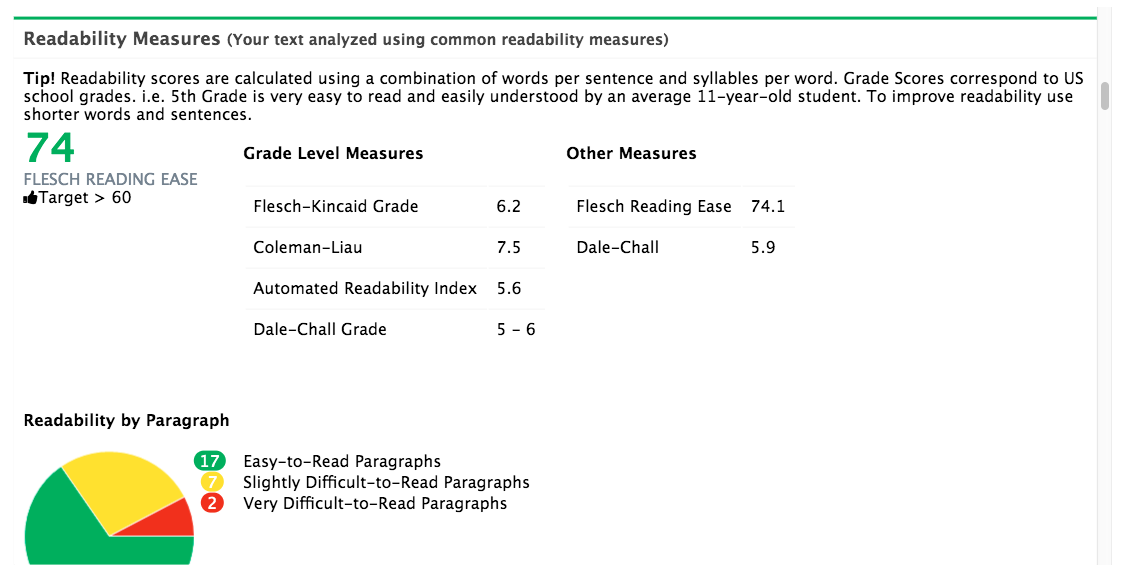
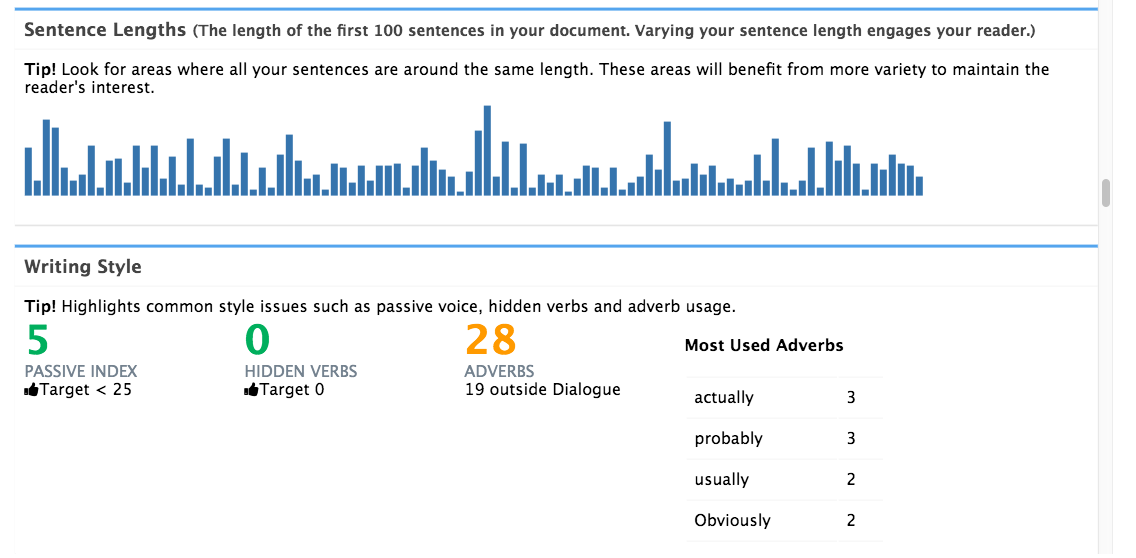
    What It Does: AutoCrit analyzes your manuscript to identify areas for improvement, including pacing and momentum, dialogue, strong writing, word choice and repetition. Depending on what plan you choose, you can also compare your writing to that of popular authors like Danielle Steel or James Patterson.

    Price: Three different plans are available: the “Free Forever” plan, which is free; the “Professional” for $30, or the “Annual Professional” for $297 per year. The latter offers a built-in discount of two months free every year. 

    Who It’s For: Fiction and non-fiction writers.

    How It Works: Paste your text into the online dashboard or upload a document and click on AutoCrit’s tabs to see its analysis. This tool uses data from various genres and more than a million books to provide a word-by-word level analysis of your writing and shows easy ways to improve the readability of your work.

    The Best Part: I spent the most time in the “Compare to Fiction” tab, which provides a comprehensive look at common issues. It highlighted my tendency to start sentences with “and” and “but,” and identified my most repeated words. I felt like I learned something about my writing, and that’s something I don’t think I could say about some other tools.

    What Would Make It Better: A more accurate definition of passive voice. It highlights any use of the “be” and “had” verbs, neither of which fully capture passive voice (you need a past participle in addition to a “be” verb), and many active voice constructions were falsely labeled as passive.

    Our Recommendation: AutoCrit is great to guide your edits in the self-editing stage. It’s best used for developmental edits, rewrites and avoiding common writing no-nos.

    More Details: For an in-depth explainer of Autocrit’s Free Forever and paid versions, check out our full Autocrit review.

    3. Grammarly

    What It Does: Grammarly is a grammar checker and proofreader.

    Price: A limited version is available for free, and Grammarly also offers a number of other free services such as a wordiness checker and tone detection. The business plan starts at $25 per member per month. For the most up-to-date info on Grammarly pricing, see their website. 

    Who It’s For: Anyone, including writers, business people and academics.

    How It Works: Copy and paste or upload your text into the online dashboard and let Grammarly work its magic. It flags potential errors, gives suggestions and provides an explanation so you can learn why it suggests the change. There’s also a free Grammarly Add-in available for Microsoft Word and a Grammarly for Chrome extension that’s also compatible with Google Docs.

    The Best Part: Grammarly is easy to use and pointed out a vocabulary issue or two that none of the other tools did. It’s superior to Microsoft Word’s grammar checker. Its synonym suggestion feature is pretty nifty, too.

    What Would Make It Better: As an editor, I work with many styles of writing, so it’d be helpful if Grammarly provided the option to switch between a few to ensure writers receive fitting suggestions to improve their work. For example, if you don’t use the Oxford comma, the editor will prompt you to do so, which isn’t right for all writing styles. 

    Our Recommendation: Grammarly is best for the final proofreading stage, or for people who want to learn more about the technical aspects of grammar. If you’re an editor or strong writer, you might find yourself ignoring more flagged items than you fix.

    More Details: For an in-depth explainer of Grammarly’s free and premium versions, check out our full Grammarly review. You can dig deeper into Grammarly features and benefits here.

    4. Hemingway Editor

    What It Does: Hemingway Editor is like a spellchecker, but for style. It provides a readability score — the lowest grade level someone would need to understand your text — and analyzes your writing to identify areas for improvement. Because it doesn’t require an internet connection, you can use it anywhere.

    Price: Free online, and a one-time payment of $19.99 for the desktop version, which is available for both Mac and PC.

    Who It’s For: Anyone

    How It Works: Paste your text into the dashboard and scan for highlighted sections of text. The highlighted text is color coded depending on your area of improvement, whether it’s hard-to-read sentences, the presence of adverbs, or passive voice.

    The Best Part: In addition to providing examples on how to fix passive voice or complex phrases, Hemingway Editor also identifies how many “-ly” adverbs and passive voice constructions you’ve used and suggests a maximum number based on your word count.

    In my prologue, for example, I had one use of passive voice, and Hemingway Editor suggested aiming for six uses or fewer — which I nailed. These recommendations reinforce the idea that not all adverbs or passive voice constructions are bad, and that’s something other tools miss.

    What Would Make It Better: Hemingway Editor was the cleanest and easiest to use of the free editing tools, but it’s not a true grammar checker or proofreader. Even though it’s not meant to catch grammar and spelling mistakes, any editing application that catches those mistakes is instantly more attractive.

    Our Recommendation: Use Hemingway Editor to increase the readability of your writing and identify problem sentences during the copyediting stage, but supplement your efforts with a grammar and spell checker.

    5. WordRake

    What It Does: WordRake cuts out the unnecessary words or phrases that creep into your writing. It works with Microsoft Word and Outlook, depending on which license you purchase. I tested the Microsoft Word version.

    Price: The Microsoft Word version is available for Mac or Windows, and you’ll pay $129 for a year or $259 for three years. The Microsoft Word and Outlook package version is only available for Windows, and it costs $199 for a year or $399 for three.

    Who It’s For: Bloggers, authors and editors using Microsoft Word or Outlook.

    How It Works: WordRake is an add-in for Microsoft products and requires you to install the program before using it, though it’s as easy as following the instructions. Select the text you want to edit, then use the WordRake add-in. It uses Track Changes to suggest edits, which you can accept or reject.

    The Best Part: WordRake is as close as you can get to an automatic editor. It appealed to me more as an editor than a writer, but it’s great at eliminating unnecessary phrases and words that bog down your writing.

    What Would Make It Better: I threw a your/you’re mistake in to see if WordRake would catch it. It didn’t, even though Microsoft Word flagged it. If WordRake could catch common writing mistakes like your/you’re or their/they’re/there in addition to unnecessary words, it’d be a hard tool to beat.

    Our Recommendation: WordRake is a great tool for the copyediting stage. Verbose writers, authors wanting to cut down on editing costs or editors looking to speed up their editing process will most benefit from WordRake. Watch out if you’re running Word on a slow computer: WordRake could increase your load time.

    6. Ginger Software

    What It Does: This AI-powered writing assistant and grammar and spelling checker works to improve your style and speed, plus boost your creativity. It also scans full, complex sentences and suggests context-based corrections. 

    Price: Ginger offers a free (but very limited) plan, so you’ll find it to be more effective through its premium offerings: $13.99 per month, $89.88 per year or $167.76 for two years. Heads up: It’s currently running a 30% off promo for all plans, so these prices may increase at any time. For most up-to-date pricing, check this page.

    Who It’s For: Anyone.

    How It Works: Whether you choose to download Ginger to your Chrome browser, as a desktop app or otherwise, all you have to do to get started is follow the setup instructions to install it. As an add-on or app, Ginger will highlight spelling, grammar and punctuation errors, and it’ll even help you rephrase sentences by giving you tons of alternative options.

    The Best Part: One word: cross-compatibility. Writers can download Ginger as a desktop app for Mac or Windows or directly into Google Chrome or Safari, and it works seamlessly with programs like Outlook, Microsoft Word and PowerPoint — you can even download it as a keyboard or app for Android phones and an app for Apple phones. 

    What Would Make It Better: Most grammar checkers offer a plagiarism detector, but Ginger doesn’t. Even if it only added it to premium plans, this would be a helpful feature to include. 

    Our Recommendation: Download Ginger If you have a good grasp of grammar and punctuation, and you need a grammar editor to back up your knowledge. 

    7. Scribens

    What It Does: Scribens is a free grammar checker that corrects more than 250 types of grammar, spelling and stylistic mistakes including nouns, verbs, prepositions, pronouns, homonyms, typography and punctuation.

    Price: Free for everyone.

    Who It’s For: Anyone, including writers, editors and authors of any genre, business people and academics.

    How It Works: Choose which extension(s) where you want to install Scribens, then download it and begin writing. To test it first, click ‘Grammar Check,’ then paste your text or import a file into the editor. Through color-coded suggestions, it’ll check your style, vocabulary, grammar and spelling, it detects patterns in your writing, and it grades readability. 

    The Best Part: You can download the Scribens extension in just about any place you’d need to write — i.e., social networks, websites with text zones (WordPress or forums), email platforms and more. Writers will be sure to enjoy this flexibility and the assurance that they can edit their writing right from any website or application. 

    What Would Make It Better: For a free grammar checker, Scribens offers more than the average free tool, but it’s not as intuitive as others on this list. I tested a simple their/they’re mistake and it didn’t flag it. It’s helpful that it notes bigger grammar errors like compound predicates, but as a grammar corrector, it should also be able to avoid smaller ones from slipping through the cracks.

    Our Recommendation: Use Scribens in the final stages of your copyediting. With minor issues out of the way, you can focus on addressing readability, syntax errors and stylistic elements with Scribens deeper analysis of your work.  

    8. WhiteSmoke

    What It Does: WhiteSmoke is a grammar checker and proofreading software that corrects spelling, word choice, grammar, punctuation and style mistakes. It also offers a translator and dictionary that supports more than 50 languages. 

    Price: WhiteSmoke offers three plans that include a web plan for $5.99 per month, which is compatible with all browsers. Its premium option is $6.66 per month. Its business option is $11.50 per month. For updates on pricing, check this page.

    Who It’s For: Students, professional writers and bloggers, business executives and employees and English learners.

    How It Works: After you register, choose a package and install this grammar checker, WhiteSmoke’s all-in-one English tool will provide grammar, spelling, punctuation and style checks when you click on highlighted text from any application or browser. 

    The Best Part: If you’re unsure about grammar rules during your writing process, check out WhiteSmoke’s handy video tutorials that focus on common writing problems and how to avoid them. Plus, if you need a template, it has more than 100 document and letter templates you can access.

    What Would Make It Better: Unfortunately, this grammar editor isn’t the most intuitive tool on this list, plus it has a limit of 10,000 characters at a time, where each letter, punctuation mark and space counts. (For reference, you can check 150,000 words on Grammarly!) If you write long-form pieces, this may not be the best tool to use to check your work. 

    Our Recommendation: WhiteSmoke offers many innovative features, but it shouldn’t be your main squeeze. Although it uses Natural Language Processing technology to enhance your writing, WhiteSmoke openly warns it won’t catch every grammar mistake, so supplement this checker with another one. 

    9. LanguageTool

    What It Does: A multilingual grammar, style and spell-checking software, LanguageTool is an Open Source application that checks your spelling, grammar, tone and writing style and instantly generates context-aware suggestions for more than 30 languages.

    Price: Besides the free plan that allows basic grammar checks of up to 10,000 words, LanguageTool also offers monthly or yearly plans for individual users. You can expect to pay $4.99 per month or $60 per year. For updates on pricing, check this page.

    Who It’s For: Anyone, including students, authors, freelancers, ESL writers and business people.

    How It Works: Try the grammar checker on the website’s homepage or download it as a Google Docs add-on or a Microsoft Word add-in. Write or paste your text into the editor, and it’ll underline your errors in red, yellow or blue to indicate whether you need to correct your spelling, grammar or style. 

    The Best Part: Similar to Hemingway Editor, you can take advantage of the web-based platform of this grammar corrector without the need to install anything. And because it’s multilingual, it offers a premium feature that detects gender while proofreading, which is super helpful when you’re unsure of how another language structures gender in writing. 

    What Would Make It Better: While they offer fun features like detection of incorrect numbers and of incorrect names and titles in emails, LanguageTool’s premium plans limit you to 60,000 characters per text field. It’s an improvement from the 10,000-character limit in its free plan but still a pain point for long works.

    Our Recommendation: LanguageTool grammar checker is a worthy writing assistant to consider if you write in or for other languages regularly, especially for its value. 

    This post contains affiliate links. That means if you purchase through our links, you’re supporting The Write Life — and we thank you for that!

    This is an updated version of a story that was previously published. We update our posts as often as possible to ensure they’re useful for our readers.

    [sps_reusable_block post_id=43061]

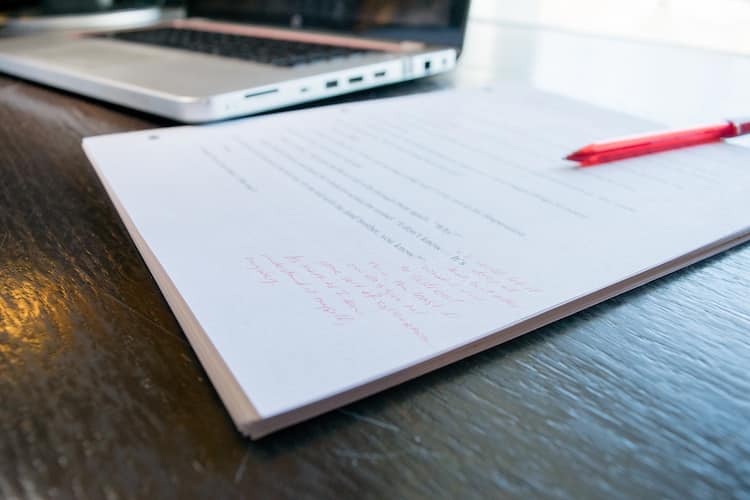
    Photo via rCarner/ Shutterstock 

  • Self-Editing Practices: 6 Ways to Strengthen Your Writing

    Self-Editing Practices: 6 Ways to Strengthen Your Writing

    Editors read for a living. They read all day long.

    Some writing lands on their desk in excellent form, but a lot of it requires serious work with the red pen. Generally, editors are happy to help their writers to develop strong narrative arcs, believable characters, and well-organized structures.

    The most annoying thing, though, is when their writers fall at the most basic technical writing hurdles. They should not spend their time replacing adverbs with strong verbs or changing from passive to active voice. These changes can and should be completed by the writer when they do their own first edit.

    Editors have limited time to spend on your drafts, and that time is expensive. Taking a little time for self-editing can impress your editor and help prove your writing skills.

    Here are six common problems to fix before your editor gets out the red pen.

    6 Self-Editing Practices to Strengthen Your Writing

    1. Replace adverbs with strong verbs

    When you write your first draft, it’s more important to get the story out than to get every word right. Spending too much time wrestling over every word can make you lose momentum.

    So, if you need to write, “Mike drove quickly back to headquarters” while you’re pouring out a scene, then go for it. Your first edit is your chance to figure out how to make it stronger: “The tires screamed on Mike’s beat-up Honda as he raced back toward headquarters.”

    In your first major edit, go back and reassess any adverbs you find. Sometimes an adverb will work perfectly, but more often than not, you will come up with a stronger way to get your idea across when you go back and look again.

    2. Fix repetitive use of initial pronouns

    This used to make my professor crazy. As a master’s student, I had a terrible habit of starting nearly every sentence with a pronoun. He did this. She did that. It is correct. Boring!

    Aim to have fewer than 30 percent of your sentences begin with a pronoun. Vary your sentence structure as much as you can; it keeps your readers’ attention and makes your writing more engaging.

    3. Get rid of cliches

    Editors despise nothing more than unoriginality. Cliches, by their very definition, are unoriginal phrases. When writing fiction, try to come up with your own unique way to describe people or situations.

    George Orwell said in his rules for writing, “Never use a metaphor, simile, or other figure of speech which you are used to seeing in print.”

    Cliches are often the result of lack of imagination or laziness, and as Orwell says, are often “merely used because they save people the trouble of inventing phrases for themselves.” Replace any cliches with your own unique phrasing to touch your reader’s imagination in a whole new way.

    4. Declutter your writing by cutting redundancies

    Redundancies create clutter in your writing by adding more words, but not more meaning. Every word should be there for a reason. If it’s not needed, delete it.

    Some redundancies are so common we don’t even realize it. How often have you heard someone talk about a “free gift”? As opposed to what — the kind of gift you have to pay for? The word “free” is redundant in this case; cut it.

    Or those organizations that undertake a “joint collaboration.” Unlike all those individual collaborations? The word “collaboration” means people working jointly. Cut out the clutter so your editor doesn’t have to.

    5. Eliminate your passive voice

    Overuse of passive voice is one of those things that can jump off the page to an editor as a marker of inexperience. Like adverbs and initial pronouns, sometimes you can use passive voice for a specific purpose and it will be perfect, but overuse will almost always weaken your writing.

    Let’s look at an example:

    Active voice: Dave kicked in the door. He jumped behind the sofa, shouted a warning and then ran through to the kitchen.

    Passive voice: The door was kicked in by Dave. The sofa was jumped on, a warning was shouted and then the kitchen was run through by him.

    In the first example, Dave is the subject and in the second example the door, sofa, warning and kitchen are the subjects. The second example is not grammatically incorrect, but it doesn’t sound right. Your verbs should refer to the doer rather than to the thing having something done to it.

    6. Get rid of sticky sentences

    Sticky sentences are full to the brim with glue words — the 200 or so most common words in the English language — like: is, as, the, that, etc.

    Glue words are the empty spaces in your writing that your readers have to pass through to get to the meaning. Reducing the frequency of glue words increases the clarity of your writing, which makes your editor happy.

    Here’s an example:

    Original: Erica needed to get the key to the car and so she asked for the contact number of the person who was in charge of that department. (Seventeen glue words in a 27-word sentence. Glue index: 63 percent.)

    Edit: Erica contacted the department head to borrow the car key. (Three glue words in a 10-word sentence. Glue index: 30 percent.)

    The first sentence wobbles around searching for the point, whereas the second sentence is concise and clear in fewer than half the words. Learn to recognize sticky sentences and rewrite them before your editor sees them.

  • 5 Quick Proofreading Tips That Have Massive Payoffs

    5 Quick Proofreading Tips That Have Massive Payoffs

    Have you ever been afraid of editors thinking you haven’t proofread your piece, even when you definitely have?

    Do you re-read your posts ad nauseam, only to still feel a sense of dread when sending your draft?

    Yeah, proofreading isn’t fun.

    Writing comes with a creative payoff. Editing gives you an authority edge. But proofreading? It’s tedious, boring and never feels like you’re doing it right.

    The problem with proofreading is that we seldom look past grammar and spelling. And that’s what most tips for proofreading seem to focus on, but the reality is there’s so much more to it.

    Sure, we read through guidelines and try to follow certain styles, but that’s about it. In fact, on a surface level, those do sound like the only things you could do.

    Otherwise, you’d just be aimlessly rewriting, no?

    Well, what if I told you there’s another level — or five — to proofreading?

    This might sound like we’re entering editing territory, but I promise you we aren’t. This deeper proofreading is still an incredibly contained system, meaning you won’t feel tempted to rewrite everything (as often happens when you edit your own work).

    Quick and Easy Proofreading Tips to Improve Your Writing

    These 5 proofreading tips are genuinely quick and painless, but the payoff will be massive.

    1. Hidden spelling and grammar mistakes

    While we’re all fond of squiggly lines in grammar checkers (ProWritingAid is our favorite on The Write Life), it doesn’t mean they are necessarily 100% accurate, nor are they the be-all and end-all.

    Word processors and proofreading tools can miss language nuances, like a mix-up between “where” and “were” or “in” and “on.”

    Catching these blunders is easier when you’re actively on the lookout for them.

    Some proofreading tips say to read a post backwards. Others suggest reading the piece out loud (preferably the next day). Both are great moves. I’d also add running your post through multiple processors — maybe Word and Google Docs, for example. You could potentially use multiple proofreading tools like ProWritingAid and Grammarly to take this a step further.

    In my experience, one tool will often pick up what the other might have missed.

    2. Unintended repetition

    Repetitive adjectives, adverbs, and even verbs are a commonly overlooked factor for writers.

    This phenomenon isn’t as pervasive when the piece is short, and you’re writing it in one sitting. However, when you’re writing long-form or returning to a piece you started working on hours or days prior, you often forget your pre-existing arsenal of words.

    You can start by using the “find” feature on Word or Google Docs (Command+F/Ctrl+F) to see how many times you’ve used a specific phrase.

    The reader can tell when you use the same adjective. It makes them stop and question if they’re re-reading the same line or if you accidentally duplicated a paragraph. Your reader’s undivided attention could be just a synonym away.

    3. Loss of voice

    You know how they say reading is the best writing teacher (or something along those lines)?

    I’m not saying you’ve been lied to, but I am saying that sometimes your favorite writer — or a motivating post — can creep their way into your writing. Inspiration can turn into mimicking, so make sure your writing retains its unique flow.

    If you want a sort of measuring stick for loss of voice, try reading out loud a line from the beginning and a line from the end. Do they sound like they were written by the same person (you)?

    If they do, compare to a line from the middle.

    If they don’t match, don’t panic. All you have to do is re-read from start to finish. Trust me, you’ll be able to tell where it all went wrong.  

    [twl_reusable_block post_id=41455]

    4. Generic lines

    A similar issue is relying on conventions of the genre. Be it a sci-fi novel, a post for a yoga blog or a poem for your lover: don’t fall prey to the siren’s call of clichés.

    Not sure what I’m talking about?

    Generic lines sound like everything you’ve ever read before. They usually contain buzz words and try to incorporate a lot of jargon. The problem is: they aren’t genuine, and usually don’t say a whole lot.

    Nine times out of 10, all you have to do is pluck out these filler sentences. Removing them will not only alleviate your writing from the perils of inauthenticity, but will also make the finished product cleaner and more concise.

    5. Run-on arguments

    Nothing kills like overkill.

    Every topic has a built-in stretch meter (AKA how long you can rant about it before running out of things to say). One of the most important tips for proofreading is to double-check that you haven’t exceeded the mark.

    Do your final paragraphs sound pretty much the same? Consolidate them into one.

    You can also avoid rambling by assigning a specific detail or argument to each of your paragraphs. If you limit each sentence to their unique purpose, it’ll become that much harder for an idea to appear more than once.

    Take Your Writing to the Next Level

    Will these proofreading tips make the process more fun? Not necessarily, but they will certainly give you a better command of your writing.

    Although it’s unavoidable to miss a spot here and there, these tips will ensure you’re handing in your best work at all times.

    Here’s to dreading the “submit” button a little less!

    This is an updated version of a story that was previously published. We update our posts as often as possible to ensure they’re useful for our readers.

  • The Ultimate Guide to Working with Beta Readers

    The Ultimate Guide to Working with Beta Readers

    Is there a better feeling in the world than writing “The End” in your manuscript? It’s a moment to be celebrated: you’ve done it. You’ve written and completed an entire book. Not everyone can say they have.

    But you’re not finished. No, not even after you wrap up your self-edits.

    It’s time to pass your manuscript off to beta readers — volunteers who provide feedback on your book. If you’re thinking about skipping this stage and just hitting “Publish,” you might want to reconsider.

    The ultimate guide to working with beta readers

    In this guide, we’ll explain what a beta reader is, and why you need beta readers to make your work-in-progress stronger.

    What is a beta reader? (And why do you need one?)

    Software companies release beta, or test, versions of their programs to work out kinks and bugs before releasing to the general public. Businesses offer beta versions of their courses so they can tweak the content to ensure it serves the needs of their students.

    Authors need beta readers to understand how people read their book and, like software companies and businesses, to identify confusing or irrelevant spots. Every author has weaknesses. You do too — but you’re blind to them.

    Beta readers won’t be. And soliciting feedback from beta readers is your chance to address the weak spots of your manuscript before you publish and share it with the world.

    Who do you want as a beta reader?

    As easy as it is to get them to help, best friends, significant others and family members are the worst beta readers. They know and love you, so they’re predisposed to loving whatever you write — no matter how good it is. While you might enjoy their glowing comments on your work, it won’t be the feedback you need to improve your manuscript.

    Here’s who you want to enlist:

    • An acquaintance or a friend of a friend. People close to you can muddle through confusing sections or sentences to guess what you meant. That won’t give you useful feedback. Pick someone who doesn’t know you well enough to figure out your meaning.
    • A member of your target audience. If your book doesn’t resonate with your readers, you’re not going to sell copies.
    • Someone who’s not afraid to be honest. You need positive and constructive feedback.
    • Someone who’s reliable. This seems obvious, but people can overcommit. Be conscientious of your betas’ time and priorities.

    You need more than one beta reader. There’s no set number, but three to five is a good start. If you’re bootstrapping your book, find even more betas: good beta readers can mean forgoing the cost of a developmental editor.

    You might send your first beta reader draft to two or three people. Then you’ll implement their feedback and send the next draft out to the following group two or three people. Do this a few times depending on how much work the book needs.

    The reason we don’t recommend sending out your manuscript to all your beta readers at once is because even after the first batch of feedback comes through, there might still be kinks to catch.

    Also, let’s say you rearrange scenes, add an epilogue or rewrite some parts of the book. You’ll want to get feedback on the new version, too.

    After you have an idea of who you want, it’s time to find them. Look at your network. Reach out to people already in your community who fit the criteria. Consider posting in writing groups or on your social media channels. You can even hire betas on Fiverr, or join Facebook or Goodreads groups. Don’t be afraid to ask. Many people will be honored you want their help.

    Why should you always work with new beta readers?

    As beta readers become more familiar and comfortable with your writing, it can be difficult for them to see the flaws.

    Try to add a few new people to your team each time, preferably one or two who have never read your work before so you get fresh eyes on your work. You can connect with new people by asking your current beta readers for suggestions. They probably know a friend or two who’s willing to help out.

    For people you stop working with in the beta reader stage, consider moving them to your Advanced Reader Copy (ARC) team. They’ll still get a free copy of your book, but it will be closer to finished, and won’t need the same in-depth feedback. Instead, your ARC readers will help you gather reviews for release day.

    The beta reading stage can be long and sometimes difficult if you don’t already have a team in place. That said, it’s definitely worth it, and your beta readers can do wonders for your story.

    How do you prepare your manuscript for a beta reader?

    Even though betas help you edit, that doesn’t mean you can skip the self-editing step. Your betas can only raise the quality of your manuscript, not perfect it. That means you need to hit all types of editing (developmental, copy and proofreading) before handing it off to them.

    As you edit, create a “needs-to-be-fixed” list. It might be something like “add character” or “move section to a different chapter” or “add description to opening scene.” Ask your betas to pay close attention to these items because they’ll be able to determine whether you’re on the right track — or not.

    When you get ready to hand your manuscript over, ask your betas which format they prefer. Microsoft Word lends itself best to receiving feedback because it’s easy to add and delete comments, and most people have access to the program. Even if you prefer not to write in Word, converting to .doc from Scrivener or Google docs is simple. Some readers may prefer a hard copy, especially if your manuscript is long. Make it easy for them — they are donating their time to help you.

    If you send Word documents, create and save a document for each person. Give it a specific name, like ManucriptNameBetaReader’sName.doc. You can merge these documents into one, but when you start incorporating edits and throwing everything together, it’s easy to accidentally delete a comment you need. If you preserve the originals with comments individually as well, you’ll be able to recover any lost feedback.

    What do you want from your beta readers?

    Feedback, yes. But don’t be vague: give your betas clear instructions about what feedback you need.

    Remember that “needs-to-be-fixed” list you created during self-edits? Use that to guide what you need from your betas. Here’s a basic formula for instructions:

    • Have betas comment with their thoughts or take notes as they read, even if it’s to say, “Ooh, I like this” or to make predictions about what will happen next. This shows you how people read your book. It also helps you pinpoint where changes need to be made and gives you a feel for how they reacted while reading.
    • Specify what kind of feedback you’re looking for. My betas looked for:
      • Areas they felt were missing something or weren’t developed enough
      • Sections or scenes superfluous to the story
      • Any part of the story, dialogue, or narrative they didn’t understand or found confusing
      • The flow and pace of the chapters
    • Ask them to focus on certain aspects of your book. My manuscript had weak worldbuilding, so I had them pay close attention to it.
    • Tell them to supply “whys,” not “shoulds.” “I’m confused here because…” or “I don’t like this because…” will be more helpful than “You should do…” statements.
    • Set a due date. But build in cushion — if you want it back in three weeks, tell them you need it in two.

    Another idea is to send your beta readers a list of questions. Since beta readers aren’t professionals, they don’t always know what to look for in your manuscript. Ask them questions to help guide their experience.

    Those who have beta read before — either for you or another author — will have a good idea, but if they’re new to beta reading, asking smart questions helps to give them some guidance.

    Some generic questions you might ask include:

    • Did the opening scene capture your attention? Why or why not?
    • Did you notice any inconsistencies in setting, timeline or characters? If so, where?
    • Did the dialogue keep your interest and sound natural to you?
    • Was the ending satisfying and believable?

    If you have specific concerns about your story, be sure to ask about that, too.

    I suggest keeping your list of questions short (about 15 or less). Too many questions might turn some people off.

    Remember, your readers are doing this for free. I never require anyone to answer my questions or take notes, but making the suggestion helps guide them and improves the type of feedback you receive.

    How do you deal with feedback from a beta reader (without freaking out)?

    It’s both exhilarating and terrifying to share something you’ve poured effort into. What if they hate it? The trick to dealing with feedback without freaking out is your mindset. Here’s what you need to remember:

    • Your goal is to make your book better, and you can’t do that without constructive criticism.
    • Your betas are nice people who want to help you write a better book, not tear you down.
    • Having something to fix doesn’t mean you’re a bad writer or that your book isn’t worth publishing.
    • You don’t have to accept every piece of advice you get.
    • You can do it.

    Dealing with beta feedback is where many writers give up. Don’t be one of them. Sorting through feedback — especially if it’s conflicting advice — gets overwhelming quickly. I had more than 500 beta comments on my novel. Cue the panic!

    When you feel that panic and overwhelm — and you will — stop and take a deep breath. Remember: this isn’t about you; it’s about your book. They’re not the same. Pull your ego out of the equation and focus on writing the best book possible.

    And if that means deleting 7,000 words from the end of your book and rewriting it, gird your fingers and hit the delete key. That’s what happened to me, and look: I survived.

    Image: Beta Feedback

    How do you implement beta reader feedback?

    Once you’ve beaten the inevitable freakout, you have to evaluate each piece of feedback to decide what to revise. Think critically about what your betas said and how it fits into what your book, characters or plot needs to accomplish.

    If your book is about how you started your business, for example, and your beta says, “I want to know about your childhood,” but your childhood has nothing to do with the beginning of your business, you can ignore the comment. Yes, ignore. As the author, you have the power to accept or reject feedback.

    Because I asked my betas to comment as they read, I created a new Word document with all 531 comments. New documents are important: If you decide your original wording is better, you want to be able to revert back. Tracking changes and creating new files makes this easy.

    But before I changed anything in my manuscript, I went through each comment and made one decision: keep or delete.

    Comment #1: “I like the disjointedness of the beginning.” Delete.

    Comment #5: “You’ve used ‘eyes’ three times in two sentences.” Keep.

    Comment #7: “The others didn’t notice the door?” Comment #8: “She’s been there how long, and she’s just now going through the door?” Keep. Keep.

    Comment #13: “At what point does frostbite become an issue?” Though this is a good question, only one beta pointed it out, and she’s never experienced cold weather. Delete.

    Once I’d gone through the entire document and deleted comments, the remaining ones became my new “needs-to-be-fixed” list. These items can range from tasks like copyediting (comment #5) to adding information (comments #7 and #8) to rewriting entire chapters (the last 7,000 words).

    Don’t take feedback at face value — dig deeper. Notice how two comments expressed disbelief at the door. That’s a red flag. But it’s not just about answering their questions — it’s about understanding the missing story elements.

    From their comments, I knew I had to flesh out the setting (why the door is hard to notice) and how the setting affects my characters (why one girl would wait to go through the door and why the others didn’t notice it). Confusion means you’re missing something, and it’s up to you to figure out what it is and how to fix it.

    When you implement feedback, get in touch with your author gut. Your instincts will tell you what needs to be fixed and what’s fine as is. Listen to it. Not sure what a beta meant by a particular comment? Don’t be afraid to follow up with them to ask for clarification.

    Once you’ve incorporated your beta feedback, you’re one step closer to hitting “Publish.” Congratulations — and best of luck with the final stages of the process!

    Don’t forget to thank your beta readers

    Finally, remember to thank your beta readers. Unless you paid them, your betas volunteered their time and effort to help you produce a better, stronger manuscript, so make sure to show your appreciation. 

    I’ve found that all the beta readers I’ve worked with have been more than happy to simply receive a book for free, even if that means they have to leave feedback on it. Most are surprised and excited when I tell them they’ll also be receiving a print copy of the book when it’s finalized.

    You don’t have to send out print books, but do make sure your beta readers feel appreciated for the time they put into helping you. If your betas are writers as well, you could even offer to be a beta for their future writing projects.

    Have you worked with beta readers — or been one?

    This is an updated version of a story that was previously published. We update our posts as often as possible to ensure they’re useful for our readers.

    Photo via Impact Photography / Shutterstock 

  • How to Track Changes in Google Docs: Using the Suggest Edits Feature

    How to Track Changes in Google Docs: Using the Suggest Edits Feature

    Do you do most of your writing in Google Docs?

    From collaboration to easily checking word count in Google docs to its Suggest Edits feature, many writers rave about this free word processing software. (Here at The Write Life, we’re big fans of Google docs!)

    Since its emergence in 2014, Google Docs’ Suggest Edits feature has had editors everywhere rejoicing because of its almost-seamless ability to make content collaboration a whole lot easier. 

    That wasn’t the case at first, though. Initially, Google Docs dropped a track changes add-on that came with a few quirks and kinks that needed to be ironed out, making the editing process more clunky than desired. 

    Within the last few years, however, the process of tracking changes in Google Docs has immensely improved. It’s since been a great way for multiple people to access and revise the same document in real-time without the frustration of wondering if you’ve got the “latest” version or if someone’s working off a different draft than you — I’m looking at you, Microsoft Word. 

    If you haven’t taken the ever-evolving Suggest Edits feature for a ride to see how it’s been updated, we’ve taken several trips for you, and here’s what we found.

    How to track changes in Google Docs

    While Google’s new editing collaboration tool is called Suggest Edits, many writers still refer to it as Track Changes, and not just because that was the name of Google Doc’s previous editing tool. “Track Changes” is the name of Microsoft Word’s editing tracker, which many writers used long before transitioning to the more collaborative Docs.

    Unlike Google Doc’s old Track Changes, which was somewhat clunky in that it required the installation of an add-on, Suggest Edits is now a built-in feature in Google Docs. That means you can use it immediately, whether you’re working on a new doc or you’ve created one from scratch.

    It’s simple and easy to use. When you’re in a doc, you’ll see a pencil icon button on the upper right-hand corner of the screen. (It’s underneath the “Comments” and “Share” buttons.)

    Click this button and you’ll see a drop-down menu that allows you to switch between several modes:

    • Editing, or straight-up working on the doc, where your changes are not tracked
    • Suggesting, whereby revisions are visible via tracked changes and
    • Viewing, which allows you to see what the doc will look like in its final state

    The mode you’re currently in will appear next to the pencil icon.

    To suggest an edit, simply select Suggesting mode and make changes in the text of the doc — add words, change fonts, add subheadings, delete paragraphs, etc. Your changes will be highlighted and a revision box (that looks just like a comment box) will pop up next to them showing the date and time you made these changes and what specific changes were made.

    If you want to add an explanation or further notes to your changes, you can “reply” to the revision box just like you’d reply to a regular Google Docs comment.

    For more information on this feature, check out Google’s help page.

    Pros of Google Docs’ Suggest Edits tool

    Overall, I’m a huge fan of using this new tool to track changes in Google Docs. Here’s why:

    Huge improvement over revision history

    Before Track Changes and Suggest Edits came along, the only way you could tell which changes had been made to a Google Doc was via the less-than-stellar “revision history” setting. This allowed you to see everything that was different between your current doc and its previous versions, but you had to play compare-and-contrast to guess which specific changes had been made between versions, a tedious and imperfect process. Now all the changes are highlighted individually and you can see them all at a glance.

    Eas(ier) to use

    Like most Google tools, Suggest Edits is super simple to use. Once you know where to find Suggesting mode on the navigation bar, you’re good to go. And Suggest Edits’ in-text revision boxes are much easier to scan and work with than the old Track Changes add-on, which displayed all revisions that had been made to a doc in one long sidebar you were forced to scroll through.

    “Accept all” option

    This long-awaited feature is finally here, and it’s as useful as it was anticipated to be. If you’re working on a Doc with numerous changes and you want to accept or reject everything a previous user suggested, hit the “Tools” button on your toolbar, then select “Review Suggested Edits” from the drop-down menu. From there, you can either accept or reject all, or even make your selections individually from the neat pop-up box without having to scroll through the page.

    Ability to preview your suggested changes

    Remember when Google Docs Track Changes required you to accept/reject each individual change if you wanted to see the final product? Those days are long gone. While you’re in “Tools” > “Review Suggested Edits,” you have three options you’ll see in a drop-down menu: “Show Suggested Edits,” “Preview ‘Accept All’,” or “Preview ‘Reject All’.” Preview the accepted version and edit a clean page that doesn’t contain highlighted or crossed out text everywhere. Your eyes will thank you.

    Easy to share and collaborate

    With Word’s track changes, you still have to trade documents back and forth, updating them as you go and hoping everyone is working off the same draft. This Google Docs feature allows you to work in the same document as your peers and view changes as they happen, keeping everyone on the same page and storing that page conveniently in the cloud where anyone can access it at any time.

    Ability to differentiate editors

    Track Changes didn’t demarcate which revisions had been made by which users, which could prove troublesome if you were working with a team of people and needed to know who’d done what to your doc. Thankfully the comment-like format of Suggested Edits addressed that issue and it’s now clear to see who’s made which changes.

    Manage your suggestions

    Sometimes you need to share a document with multiple clients or other users, but only some of them have editing privileges. You can update document users and permission levels as often as you’d like and at any time as you see fit — users you’ve given “can comment” permission can suggest edits but not approve or reject them; those with “can edit” permission can do both; and the “can view” permission prohibits users from making any changes to the document.

    Added dialogue potential

    Sometimes you need to explain why you’ve made a certain change, or you want to add extra comments or questions for your team to see when they’re considering your revisions. With Suggest Edits, you can make these notes right underneath your revision box, making dialogue and discussion much easier than in the old static sidebar.

    Synchronization with Word docs

    Still got that one guy on your team who hasn’t gotten on board with Google Docs and insists on sending you his revisions via Word attachment? Now when you convert a Word file to a Google Doc, any track changes in the Word doc will automatically be converted to suggested edits on the Google Doc.

    And when that same guy takes your Google Doc and converts it back into Word? Any suggested edits are automatically converted back to tracked changes.

    Mobile access

    It used to be that you needed an actual computer to take advantage of prevalent Doc functions, but not anymore. Gotta edit and track changes on-the-go? No problem! Whether you’re #TeamAndroid or #TeamiPhone, all you need is the Google Docs app to suggest edits, accept/reject edits, add comments, share the document with others and more. At the top right-hand corner of your screen, you’ll see three black dots. When you click that option, a drop-down menu will reveal all of the editing options you can access.

    Cons of Google Docs’ track changes

    While there are many pros to using Google doc’ track changes feature, there are a few minor cons to consider.

    You need to plan ahead for offline use

    A big difference between Microsoft Word and Google Docs is accessibility. If it’s installed on your computer, you can access and edit a Word document just about anywhere. Google, on the other hand, requires a bit more finagling. Working on a Google Doc without setting up offline access means your work won’t save automatically and you’ll lose all of it. To avoid this sticky situation, set up your offline access beforehand, or only set it up for certain Drive files. 

    You lose access to edits once you accept them

    Before you reject or accept all suggested edits, make sure you’re absolutely sure, because there’s no going back (…ish). Once you implement changes into your document, they’ll disappear from your revision history and you won’t be able to access them under “Review Suggested Edits.” Though, all hope is not lost. Here are two silver linings that weren’t available with Google Docs Track Changes:

    1. Alternatively, you can click the comment box icon (next to “Share”) to see all the suggested edits and comments in one place. It’s not the greatest view, but it’s better than losing access to all the suggested edits entirely.
    2. Say you’re doing a final edit of a document whose owner has already edited the copy under the “Suggesting” mode, and you go through accepting/rejecting each one. While the edits disappear from your revision history, it doesn’t from theirs! Since you’re not the document owner, your final decision isn’t so… well, final. 

    The verdict on tracking changes in Google Docs

    Google Docs’ first attempt at offering an editing feature with its Track Changes add-on had a decent amount of pros and just a few cons.

    But the product keeps improving, and has even more pros and two cons that come with solutions. In other words, it’s a serious step up, and a feature many editors now can’t imagine living without.

    Whether you’re working with an editor on your ebook, collaborating with another writer on a series of case studies or working with a blog management team to get content ready for publication, Suggest Edits is definitely worth checking out.

    Have you used Google Docs’ Suggest Edits feature? What do you think about it? Share your thoughts in the comments!

    This is an updated version of a story that was previously published. We update our posts as often as possible to ensure they’re useful for our readers.

    Photo via Roman Samborskyi / Shutterstock 

  • Self-Editing Basics: 10 Simple Ways to Edit Your Own Book

    Self-Editing Basics: 10 Simple Ways to Edit Your Own Book

    Writers’ victories are short-lived indeed.

    For a brief moment after completing a first draft, writers sit back, breathe a sigh of relief, post a self-congratulatory humblebrag about finishing our manuscript, and then immediately think about that one character whose arc we forgot to complete, or that we’re pretty sure we overused the word “that,” or that those squiggly red lines scattered throughout our manuscript are surely incorrect.

    In other words, the joys of #amwriting give way to the trials of #amediting.

    As a strong (and biased) believer that every author needs an editor, your first line of literary defense shouldn’t be a professional editor. Rather, you need to learn how to edit —and really, how to self-edit — before sending your manuscript off to be edited by someone else.

    Book editing at its best

    As a full-time editor, I witness dozens of simple mistakes authors constantly make. If only they’d take the time to learn and incorporate better self-editing techniques, they would become better writers, endear themselves to their editors, and maybe even save money on a professional edit.

    Furthermore, beta readers and early reviewers will be grateful for the creation of a readable early draft.

    If you’re ready to self-edit your book, consider these 10 tips for book editing.

    [twl_reusable_block post_id=41455]

    1. Rest your manuscript

    “Not that the story need be long, but it will take a long while to make it short.” — Henry David Thoreau

    When you’ve finished typing the last word of your masterpiece, set it aside for a few days. If you can stand it, set it aside for a week or more. In On Writing, Stephen King relates that he places his finished drafts in a drawer for at least six weeks before looking at them again.

    Why rest your draft for so long? You want to try to forget everything you’ve written so that when you do come back to self-edit, the book almost seems as if someone else wrote it. You want fresh eyes, and the best way to do that is to rid your mind of what’s been filling it for so long.

    2. Listen to your manuscript

    “So the writer who breeds more words than he needs, is making a chore for the reader who reads.” — Dr. Seuss

    Hearing your words spoken makes mistakes glaringly obvious. You can enlist a (patient) friend to read it to you, or you can go the friendship-saving route, which has the benefit of being free: use your computer’s built-in speech synthesis function.

    If you’re a Mac user, click the Apple logo at the top left of your screen, select System Preferences, click Accessibility, then click Speech. Choose a System Voice and Speaking Rate you can tolerate, then select “Speak selected text when the key is pressed.” If you want to change the keyboard combination, click “Change Key” and follow the directions. I prefer Option+Esc.

    Once you’ve enabled your preferred shortcut key, simply highlight any text (within any program) that you want to hear read aloud. Then hit your shortcut keys and follow your words on-screen as your computer reads them aloud.

    For PC users, make use of Narrator, part of the system’s Ease of Access Center. Press “Windows+U” and click “Start Narrator.” Since the program is intended for blind users, it will automatically begin to read any text your mouse encounters. To turn this off, hit “Control.” To have Narrator read a paragraph, place your cursor at its beginning and type “Caps Lock + I.” To have Narrator read an entire page, press “Caps Lock + U.”

    3. Search for troubling words

    “Writing is easy. All you have to do is cross out the wrong words.” — Mark Twain

    All writers have specific words and phrases that (which?) always cause them to (too?) second-guess whether (weather?) they’re (their?) using them correctly. If you know what your (you’re?) troubling words are, use your word processor’s search function to locate every possible variant of that word or phrase.

    To help you consider what your troubling words might be, here’s a good starting list, excerpted from the first chapter of Grammar Girl’s Quick and Dirty Tips for Better Writing:

    • a lot/alot
    • affect/effect
    • can/may
    • further/farther
    • good/well
    • i.e./e.g.
    • into/in to
    • it’s/its
    • lay/lie
    • less/fewer
    • that/who
    • their/they’re/there
    • then/than
    • who/whom
    • your/you’re

    If you’re unsure of how to properly use these words, there’s no shame in looking them up. Grammar Girl likely has the answer, or check The Write Life’s post on how to edit for invaluable tips.

    edit books

    4. Remove or replace your crutch words

    “I can’t write five words but that I change seven.” – Dorothy Parker

    Do you know the top 10 words you use most frequently in your manuscript?

    Outside of necessary articles and prepositions, you may be surprised at what words you tend to use over and over. One client of mine used “suddenly” too often, making every action seem unnecessarily rushed. Personally, my crutch words tend to fly in the face of the age-old encouragement for all writers to “eschew obfuscation.”

    In other words, I tend to cash in ten-dollar words when five-cent words suffice.

    Scrivener makes it simple to discover your crutch words and is available for Mac, iOS, and Windows users. In Scrivener’s top menu, go to “Project > Text Statistics,” then click on the arrow next to “Word frequency.” If necessary, click the “Frequency” header twice to sort your words by frequency. You’ll then be presented with what could be a jarring list of the words you might be overusing. (To include your entire manuscript in the frequency count, be sure to have your entire manuscript selected in Scrivener’s Binder.)

    For Microsoft Word users, there’s a free Word Usage and Frequency add-in, but other, less technical online solutions may also help, like TextFixer.com’s Online Word Counter or WriteWords’ Word Frequency Counter.

    No matter how you determine your crutch words, go back through your manuscript and see where you can remove or replace them.

    5. Remove all double spaces at the end of sentences

    “I try to leave out the parts that people skip.” — Elmore Leonard

    If tapping two spaces following your sentences is an age-old habit ingrained into you since before the dawn of modern digital typography, may I suggest ingraining another practice?

    Conduct a find-and-replace search after you’re done writing. In Word, type two spaces in “find” and one space in “replace” and hit enter.

    Voila! You just time-traveled your manuscript into the 21st century. (If you’re interested in why you should only use one space, read Slate’s Space Invaders: Why you should never, ever use two spaces after a period.)

    6. Search for problematic punctuation

    “An exclamation point is like laughing at your own joke.” — F. Scott Fitzgerald

    Are you a comma chameleon, adapting that otherwise innocent punctuation mark to do work it was never meant to do? Or does your manuscript need a semicolonoscopy — a thorough check-up on proper semicolon and colon placement?

    If you know you have trouble with certain punctuation marks, conduct a search for that mark and figure out whether you’re using it correctly. If you’re still unsure, let your editor fix it, but make a note to ask him why.

    7. Run spell check or use an automated editing program

    “Be careful about reading health books. Some fine day you’ll die of a misprint.” — Markus Herz

    Writers sometimes become too accustomed to the colorful squiggles under words and sentences on their digital pages; I know I do. In an effort to get ideas on the page, we might run rampant over grammar and usage.

    Yet those squiggles mean something. At the very least, run spell check before sending your manuscript to an editor or beta reader. It’s a built-in editor that I’m not sure every writer uses to their advantage. You may not accept every recommendation, but at least you’ll save your editor some time correcting basic errors.

    You might also consider trying out automated editing programs; The Write Life provides an overview of the best grammar checkers. I have yet to try them all, but I’m a fan of Grammarly.

    8. Subscribe to The Chicago Manual of Style

    “To write is human, to edit is divine.” — Stephen King

    When an editor returns your manuscript, they may cite particular sections of The Chicago Manual of Style. If you’re unfamiliar with this Bible of the publishing industry, you may not be aware of precisely why the editor made a certain change.

    By subscribing to CMOS (it’s only $39 a year), you’ll be able to look up issues on your own before sending your manuscript off to an editor or beta reader. Sure, you shouldn’t get too hung up on some of the issues (editors have their jobs for a reason), but learning more about the mechanics of writing can only help you become a better writer.

    You can also buy the hardcopy version of The Chicago Manual of Style, but I recommend the online version for its ease of use.

    9. Format accordingly

    “The Real-World was a sprawling mess of a book in need of a good editor.” — Jasper Fforde

    While preferred styles may differ from one editor to the next, you can show your professionalism by formatting your manuscript to conform to industry standards.

    Such formatting makes it easier for beta readers to consume, and editors prefer industry-standard formatting, which allows them more time to edit your actual words instead of tweaking your formatting. Here are some basic formatting tips:

    • Send your manuscript as a Word document (.doc or .docx).
    • Use double-spaced line spacing. If you’ve already written your book with different line spacing, select all of your text in Word, click Format > Paragraph, then select “Double” in the drop down box under “Line spacing.”
    • Use a single space following periods.
    • Use black, 12-point, Times New Roman as the font.
    • Don’t hit tab to indent paragraphs. In Word, select all of your text, then set indentation using Format > Paragraph. Under “Indentation” and by “Left,” type .5. Under “Special,” choose “First line” from the drop down menu. [Note: Nonfiction authors may opt for no indention, but if they do so they must use full paragraph breaks between every paragraph.]
    • The first paragraph of any chapter, after a subheader, or following a bulleted or numbered list shouldn’t be indented.
    • Use page breaks between chapters. In Word, place the cursor at the end of a chapter, then click “Insert > Break > Page Break” in Word’s menu.

    10. Don’t over-edit

    “It is perfectly okay to write garbage — as long as you edit brilliantly.” — C. J. Cherryh

    Set aside an hour or two to go through this list with your manuscript, but be careful about over-editing. You may start seeing unnecessary trees within your forest of words, but you don’t want to raze to the ground what you’ve toiled so hard to grow.

    A middle path exists between exhausting yourself in a vain attempt for perfection and being too lazy to run spell check. Do yourself and your book a favor and self-edit, but be careful not to go overboard.

    If you’re creating a professional product, your self-edits shouldn’t be your last line of defense against grammatical errors. In other words, I don’t offer this post to write myself out of a job. Even in going through the self-editing steps above, you’ll still need an editor to ensure that your manuscript is as polished as possible.

    Plus, going through the editing process with a professional editor will help you become a better self-editor the next time you write a book.

    Do you self-edit? What tips and tricks work best for you?

    This is an updated version of a story that was previously published. We update our posts as often as possible to ensure they’re useful for our readers.

    Photo via GuadiLab / Shutterstock 

  • How Grammar-Savvy Are You? Take This Quiz to Find Out

    How Grammar-Savvy Are You? Take This Quiz to Find Out

    You know you’ve got a knack for words, but being a strong writer doesn’t necessarily mean you’re a strong editor.

    But who really cares if your writing has some mistakes here and there? Isn’t that what editors are for?

    Wrong!

    Poor grammar will stand in the way of your writing career whether you realize it or not. If you want to make a good first impression in your pitches and become a publication’s go-to writer, your writing needs to be nearly flawless.

    It may have been a while since your last English class, so we created a short grammar quiz to put your editing skills to the test. Find out if you’re a grammar pro or if you could use some time brushing up on your editing skills.

    The Write Life’s grammar quiz for writers

    Each of these sentences features one common grammar or punctuation mistake.

    Give it your best shot, then scroll down to see how you did!

    1. Local media is calling for the mayor’s immediate resignation following recent reports of his embezzlement scheme.
    1. It may be counterintuitive, but if your child is struggling with separation anxiety, quickly saying goodbye to them is the best short-term solution.
    1. Without having her address, it was hard to find her house.
    1. No one objects to the library’s closing more than me!
    1. “Have you seen my book? I left it lying on the table last night, but now it’s gone.”
    1. Your sister is still obsessed with Twilight—she showed up to the Halloween party wearing a blood red dress and pointy vampire teeth.
    1. My favorite Chinese restaurant doesn’t deliver, however, the one across town does.
    1. The editor-in-chief is retiring next May, meaning one of the senior editors are going to be up for the job.
    1. My doctor recommended I get the flu shot only in October.
    1. We’d like to publish your article, and pay you $1 per word.

    Answer key

    Feeling confident? Let’s see how you did!

    Each correction appears in bold, followed by a brief explanation.

    1. Local media are calling for the mayor’s immediate resignation following recent reports of his embezzlement scheme.

    “Media” may sound singular, but it’s actually plural! (The singular form is “medium.”) This sentence represents a common error in subject-verb agreement.

    2. It may be counterintuitive, but if your child is struggling with separation anxiety, quickly saying goodbye to her is the best short-term solution.

    This sentence has a problem with pronoun-antecedent agreement. Because “child” is singular, it should take a singular pronoun like “he” or “she.”

    AP has recently accepted the use of “their” as a singular pronoun in limited cases, such as when non-binary people prefer to be referred to with a gender-neutral pronoun, but in most instances, you’ll want to choose a singular pronoun or rephrase your sentence.

    3. Without having her address, I had a hard time finding her house.

    This sentence is a prime example of a dangling modifier. In the original sentence, the phrase “without having her address” is modifying the subject “it.” Except “it” isn’t referring to anything!

    The corrected sentence clarifies who exactly was missing the address and struggling to find the house.

    4. No one objects to the library’s closing more than I.

    I’ll admit this is an ugly sentence that should be rephrased before being published anywhere. Ugly or not, “I” is the correct pronoun here because it’s the subject of the sentence, so it requires the subjective case (rather than the objective “me”).

    Issues with case are some of the most common problems editors come across. The rules are confusing even for professional writers! If you’re having trouble, try flipping the sentence around: “I object to the library’s closing more than anyone.”

    5. “Have you seen my book? I left it laying on the table last night, but now it’s gone.”

    Is there any case of mistaken word identity more prevalent than lay/lie?

    In short, “lie” means to recline, while “lay” means to put or place an object somewhere. To make matters even more confusing, “lie” becomes “lay” in past tense!

    6. Your sister is still obsessed with Twilight—she showed up to the Halloween party wearing a blood-red dress and pointy vampire teeth.

    Hyphens can be tricky little buggers. The general rule is to hyphenate compound modifiers before a noun but not after (“Her dress was blood red”). There are plenty of exceptions, though, so be sure to consult a dictionary and your preferred style guide if you’re in doubt!

    7. My favorite Chinese restaurant doesn’t deliver. However, the one across town does.

    This run-on sentence is trying to slide under your radar by using the word “however” to connect two independent clauses (clauses that could stand on their own as complete sentences). The only words with that power are called coordinating conjunctions: “for,” “and,” “nor,” “but,” “or,” “yet,” and “so.”

    8. The editor-in-chief is retiring next May, meaning one of the senior editors is going to be up for the job.

    Subject-verb agreement strikes again! Don’t let the plural “editors” fool you. “One” is the singular subject here.

    9. My doctor recommended I get the flu shot in October only.

    “Only” is the culprit behind many misplaced modifier errors. There are even more options for this sentence depending on what the writer meant:

    • Only my doctor recommended I get the flu shot in October. (No one else advised this, just your doctor.)
    • My only doctor recommended I get the flu shot in October. (You have one doctor, not many.)
    • My doctor recommended I get only the flu shot in October. (Your doctor recommended you get the flu shot but no other vaccinations during October.)

    Context is everything! When using modifiers like “only” or “just,” you can avoid confusion by placing them as close as possible to the word they’re modifying.

    10. We’d like to publish your article and pay you $1 per word.

    Many writers get in the habit of using commas where they’re not needed with conjunctions like “and” and “but.”

    No comma is necessary if a dependent clause follows the conjunction (in other words, it couldn’t stand on its own as a full sentence).

    Now that you know which tricky grammar errors to watch out for, make your writing even better with these 25 editing tips to tighten your copy!

    How did you do? Let us know your results (and any other common editing errors we didn’t cover) in the comments.

    Photo via panitanphoto / Shutterstock