Gone are the days when your edited manuscript returns to you covered in the blood-red slashes of your editor’s unforgiving pen. Today, your edited manuscript most often returns as a Word document covered in the bewildering lines and challenging comments within Word’s Track Changes feature.
Whether Microsoft meant it as an ode to tradition or a reminder to every writer about the seriousness of editing, these edits are still, by default, set to show up in blood-red starkness.
Thanks, Microsoft.
Regardless of your feelings about using Word, it behooves every writer to learn how to use Track Changes.
When the success of your edit relies on knowing this useful aspect of the world’s most-used word processor, you’ll want to know exactly what you’re doing before diving into your edits.
What is Track Changes?
Track Changes does exactly what it says: it tracks the changes made to a Word document.
Every deleted space, every added word, every formatting change and more is meticulously tracked so that any parties working on a document can see the document’s evolution over time as well as who made what change.
For better or worse, Track Changes is the de facto digital editing tool of choice for editors.
While Google Docs offers a worthy alternative, especially considering its automatic versioning history, Word’s Track Changes is a stalwart of the editing business for its robust features and relative ease of use.
How do I use Track Changes?
First, a note about any tutorial for a major piece of cross-platform software: specific differences abound based on whether you’re using the Windows, Mac, Android or iOS applications and what version number you’re using.
The screenshots below show the most recent version of Microsoft Word for Mac, and the tutorials speak specifically to Word for Mac users. However, this quick introduction to Track Changes should lead you in the right direction on any platform for the basics of using this editing tool.
Let’s assume you’ve received an edited manuscript back from your editor, but when you open the Word file they’ve sent, you don’t immediately see anything different. What gives?
The editor may not have saved the file with Track Changes still turned on. (It happens!) But there are a few simple steps you can take to fix the problem — if you’ve actually been sent an edited file.
Reviewing this process will also help you understand the basics of working with Track Changes, even if you only plan to use Track Changes for your own first few rounds of self-editing.
How to turn on Track Changes
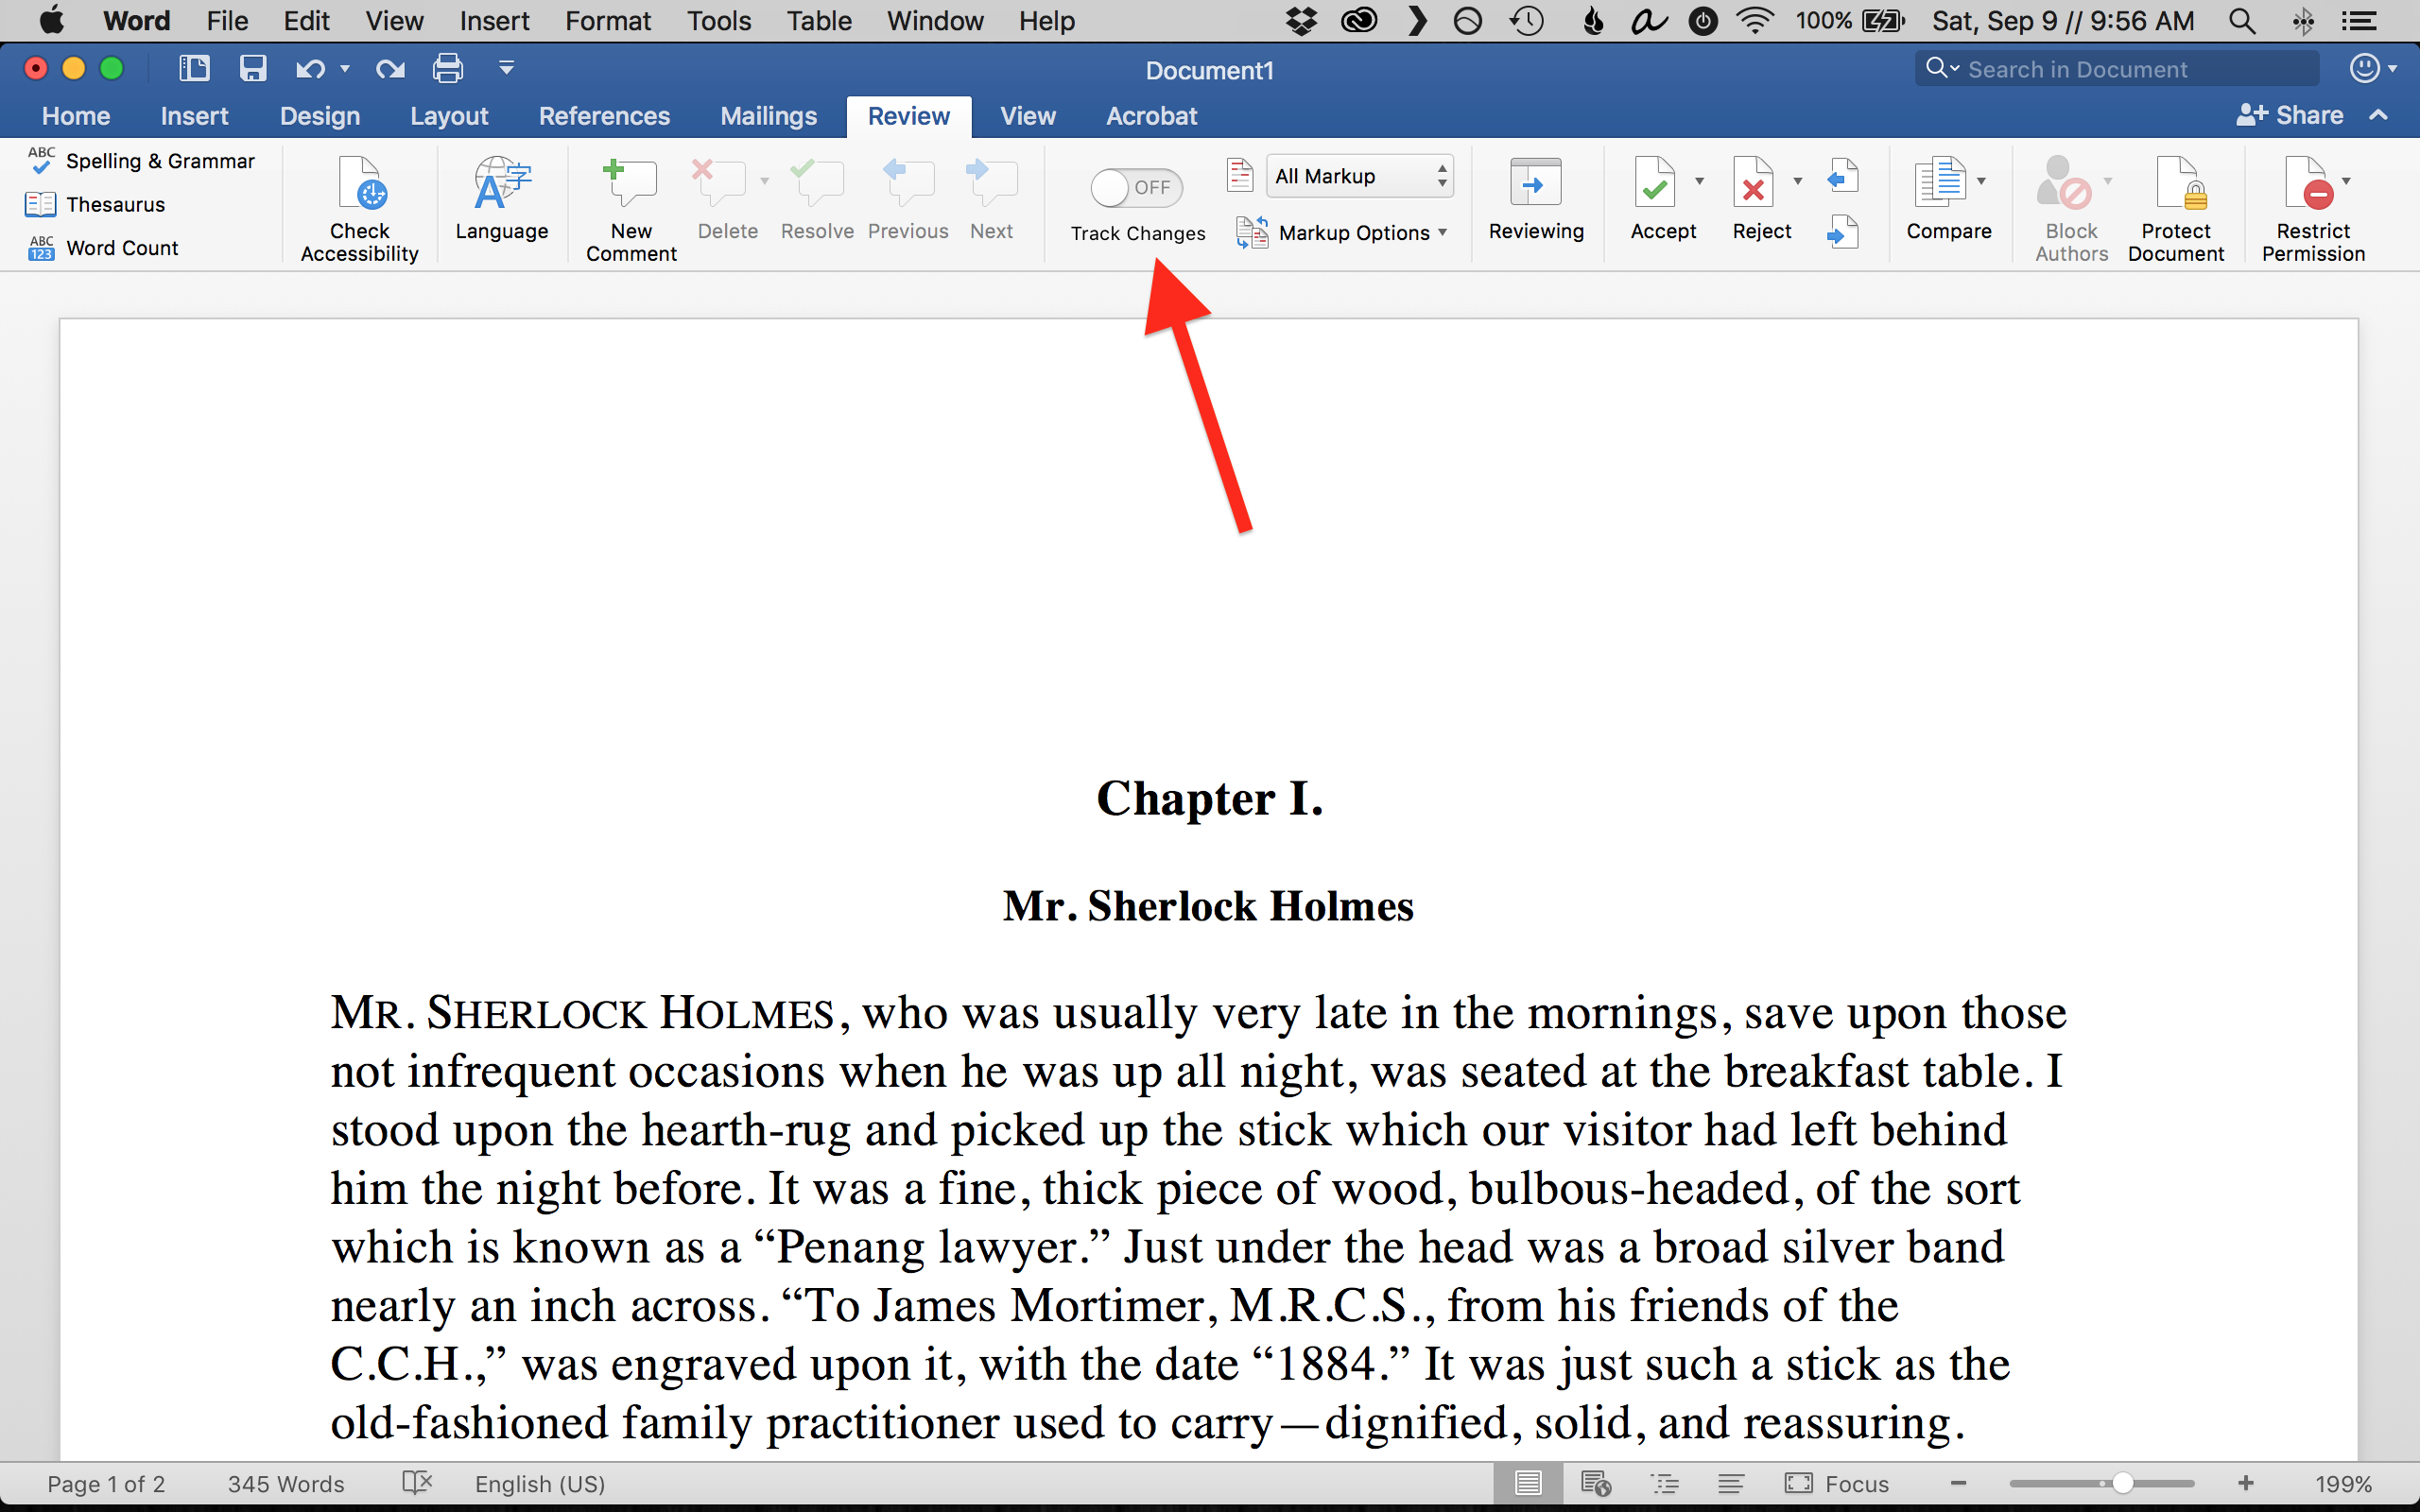
To see what work your editor has accomplished, click the Review tab, then locate the toggle button titled Track Changes. Click that button to turn Track Changes on.
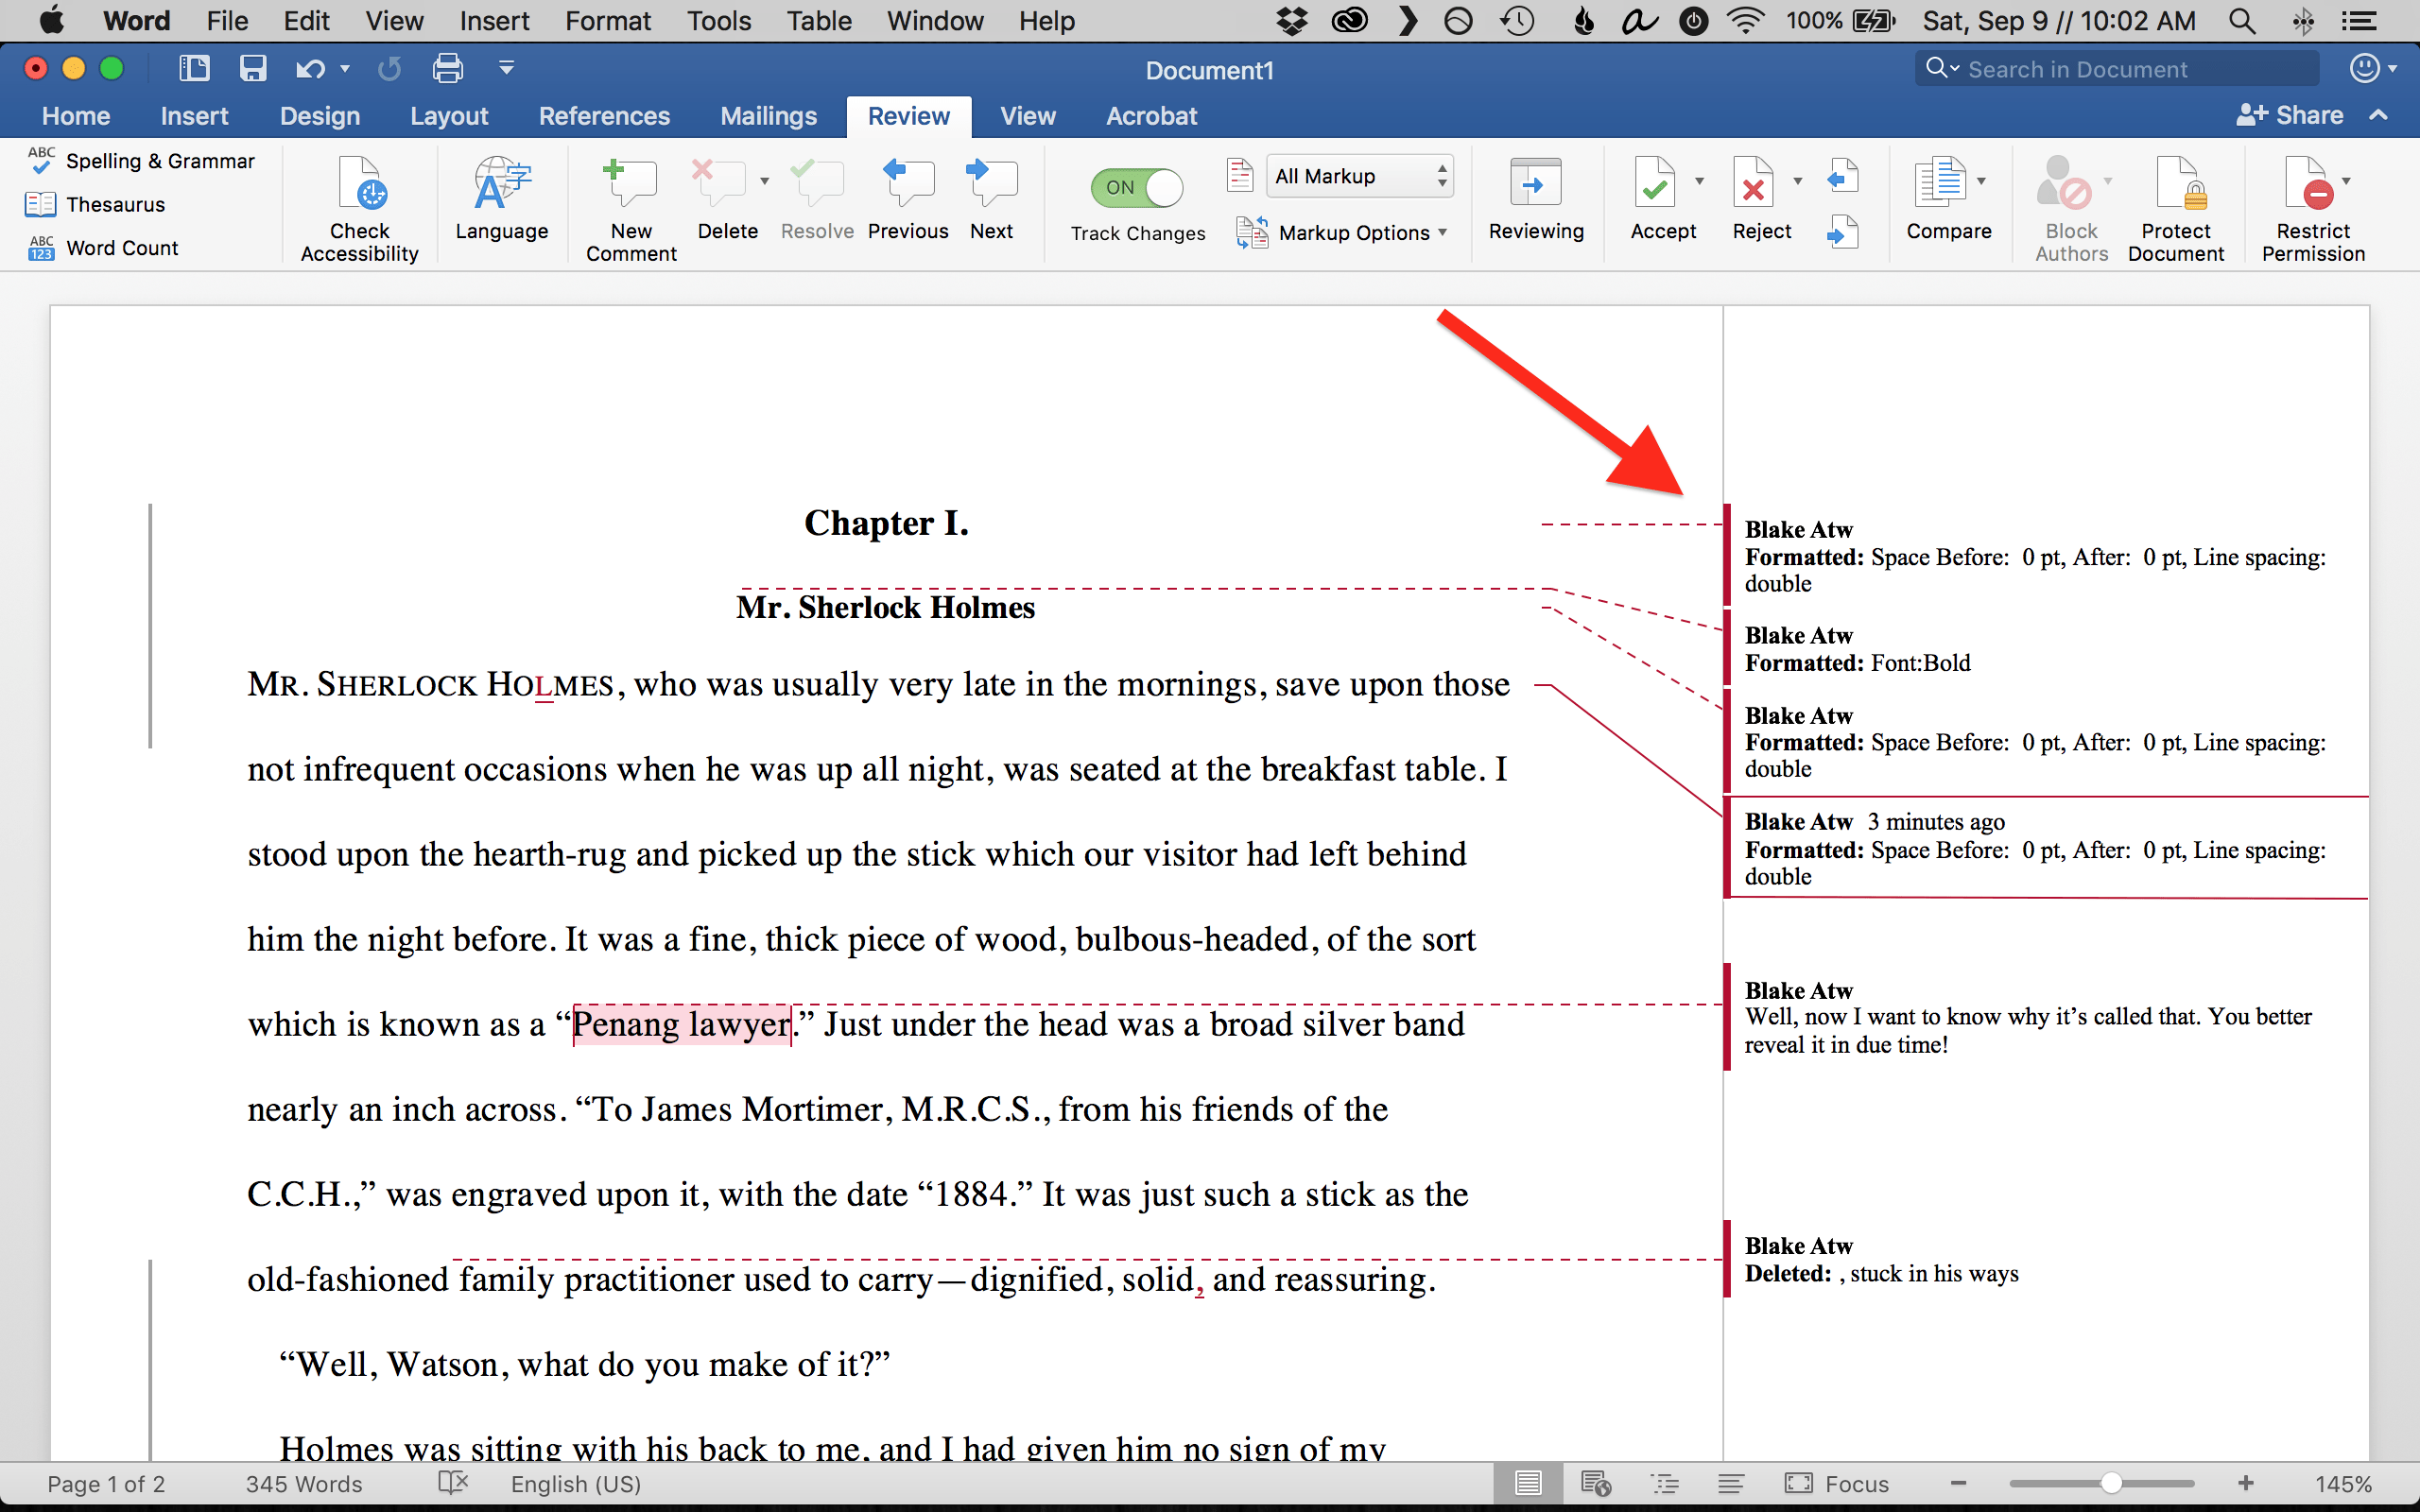
Once clicked, you should immediately see a sidebar appear to the right of your text containing your editor’s edits and comments.
How to use All Markup and Markup Options
If the Track Changes sidebar fails to appear, try three more actions before contacting your editor to see if they may have sent you the wrong document.
1. Near the Track Changes button, two drop-down menus show All Markup and Markup Options (or Show Markup on Windows). Clicking on the All Markup drop-down reveals its options:
- Simple Markup denotes edits with a line on the left-hand side and reveals editorial comments. However, because it’s so simple, it doesn’t show where the precise edit occurred.
- All Markup reveals every edit inline. This mode shows exactly what your editor did.
- No Markup presents the edited version to you but without sidebars and without revealing what edits were made. It’s a clean version of the final product after your editor’s edits.
- Original presents the file as it was before the editor attacked it. This mode may be useful to make comparisons between your version and your editor’s version.
If this drop-down menu was set to No Markup or Original when you turned on Track Changes, you won’t see any changes. If it’s set to Simple Markup, you may only see minimal changes.
When you’re first working with an edited document, be sure that All Markup is selected.

2. Next, click the Markup Options drop-down menu and ensure that all its items are checked: Comments, Ink, Insertions and Deletions, Formatting, and Track Moves From/To.
If you only want to remove seeing any of those types of edits, uncheck the selection. For example, to only see insertions and deletions, uncheck every other item.
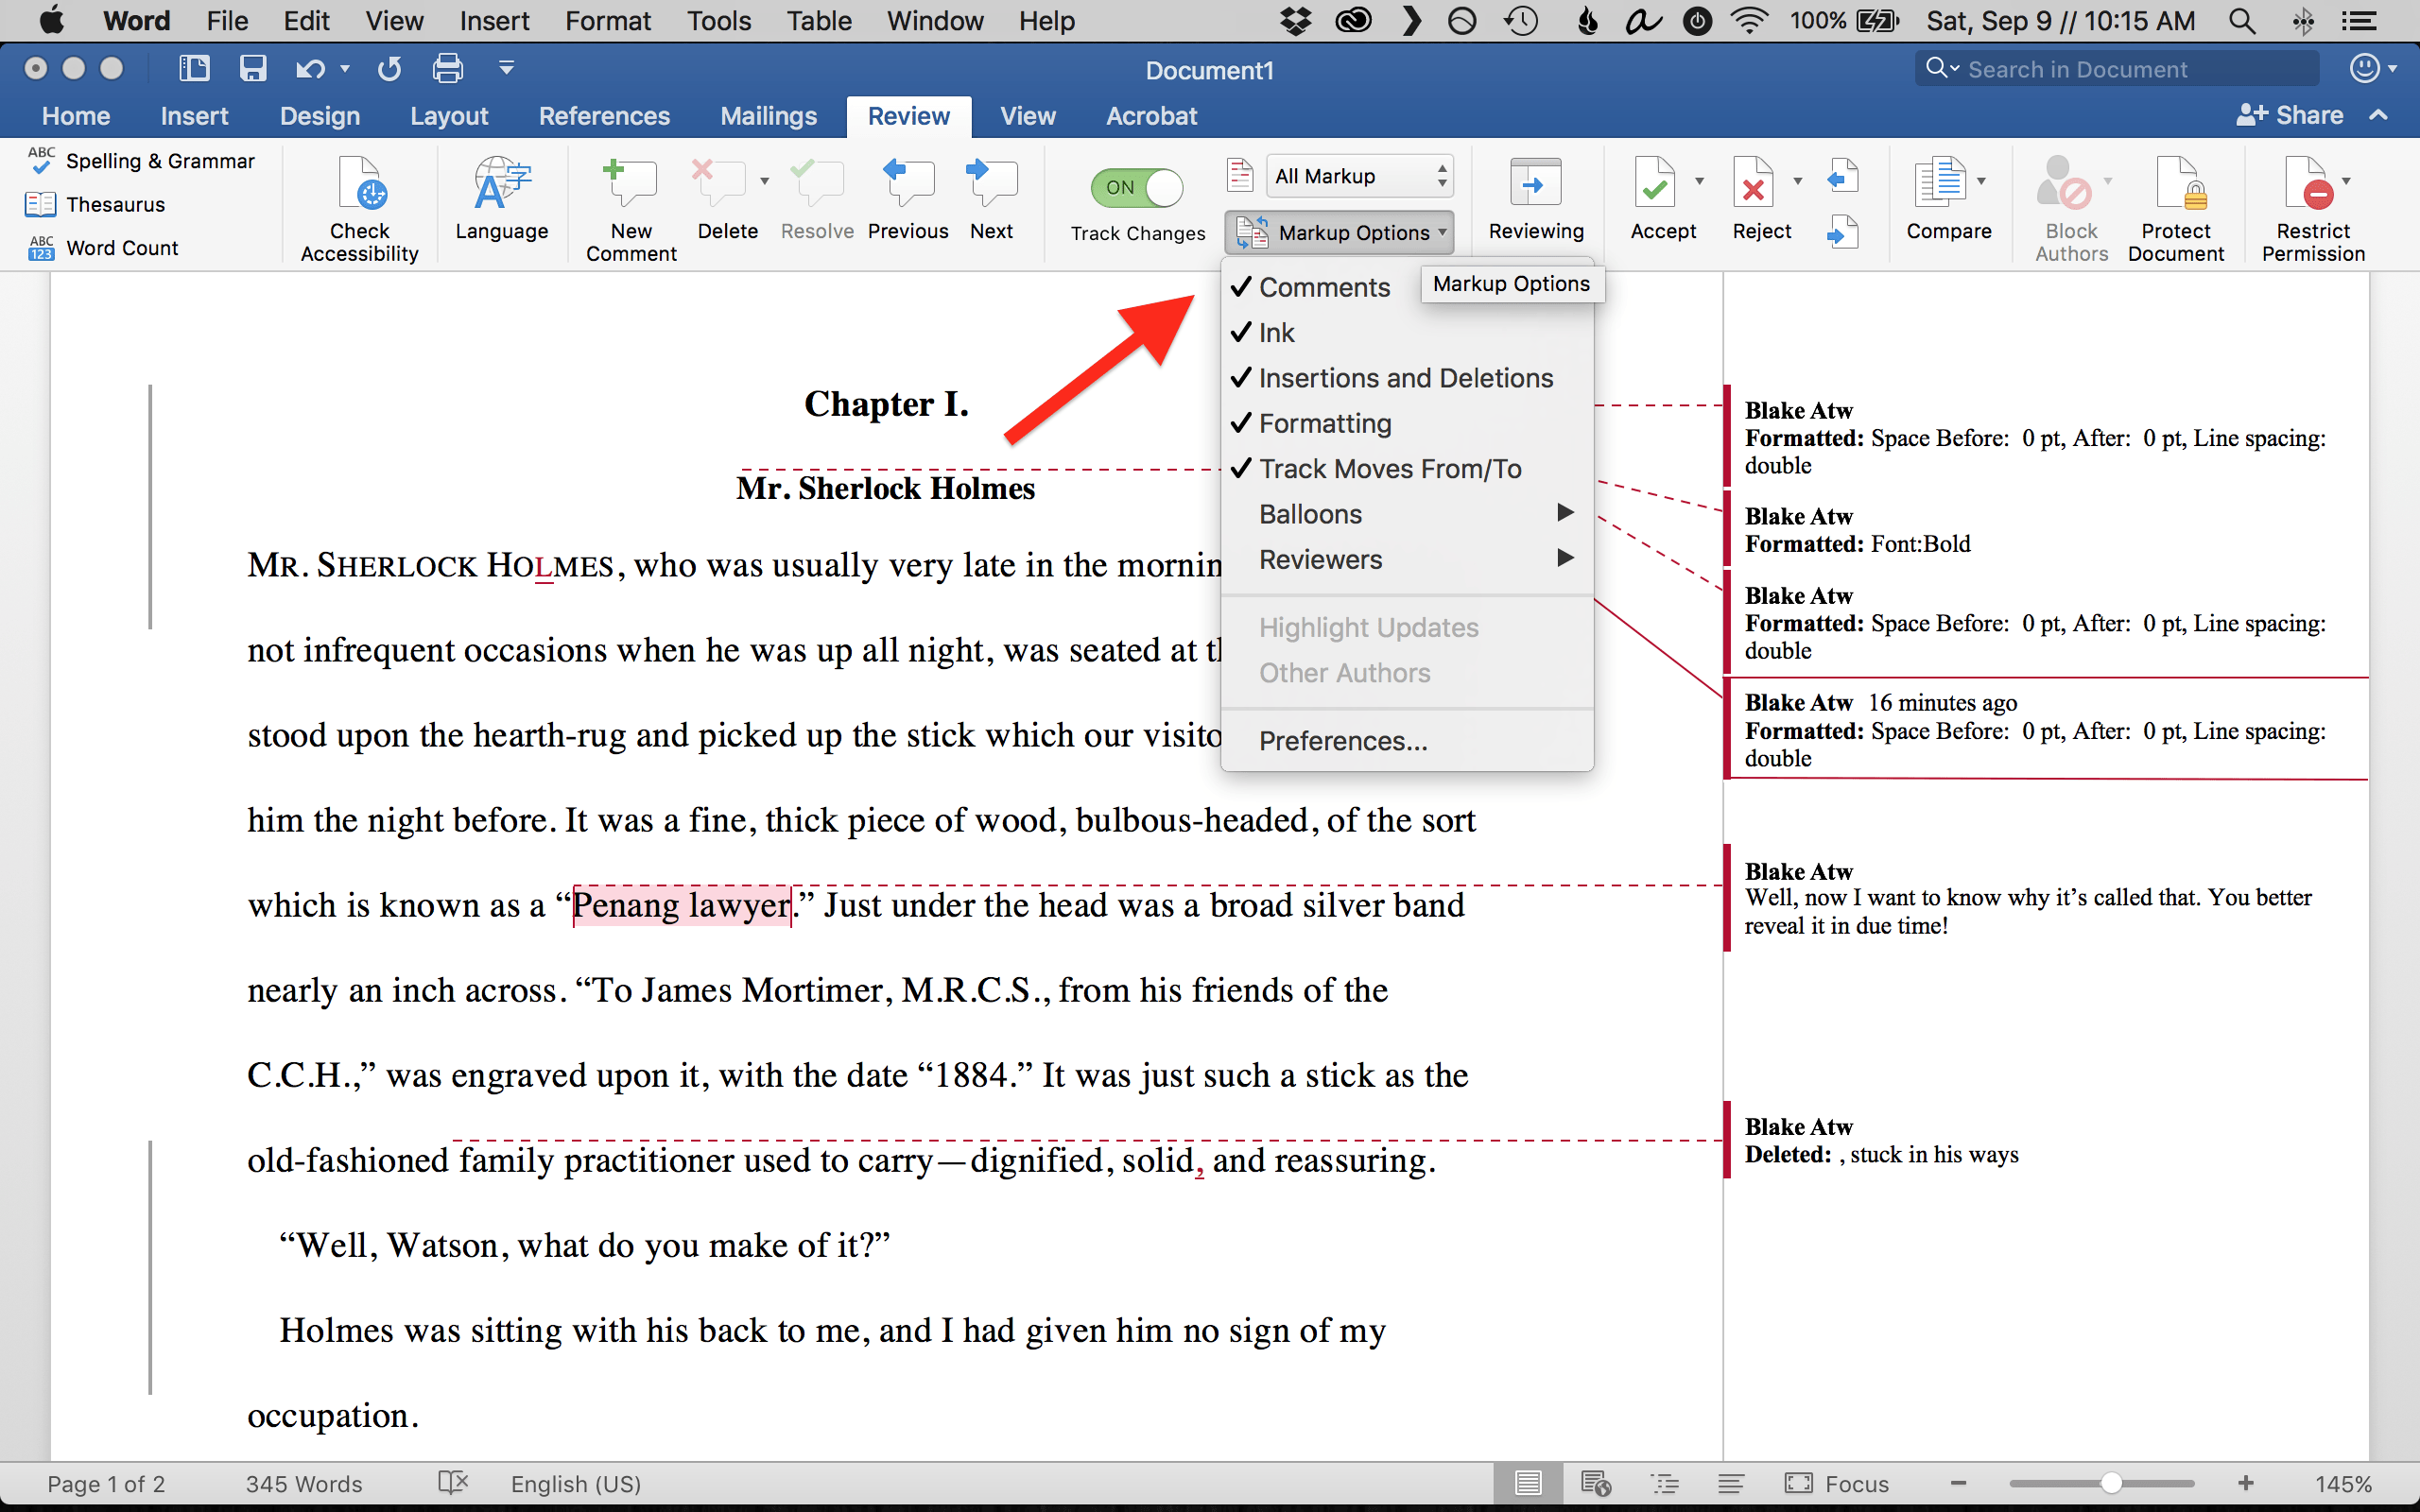
3. In that same drop-down menu, go to Reviewers and ensure that All is checked. If you had multiple editors work on the same document (which isn’t recommended) and only want to see one editor’s changes, ensure that they’re the only name checked in this menu.

If you’ve tried each of these steps and still don’t see your edits, contact your editor.
How to accept or reject changes in Track Changes
After ensuring your edits appear, now the real work begins: Accepting or rejecting edits.
Doing this either locks in the edit or prevents the edit from occurring.
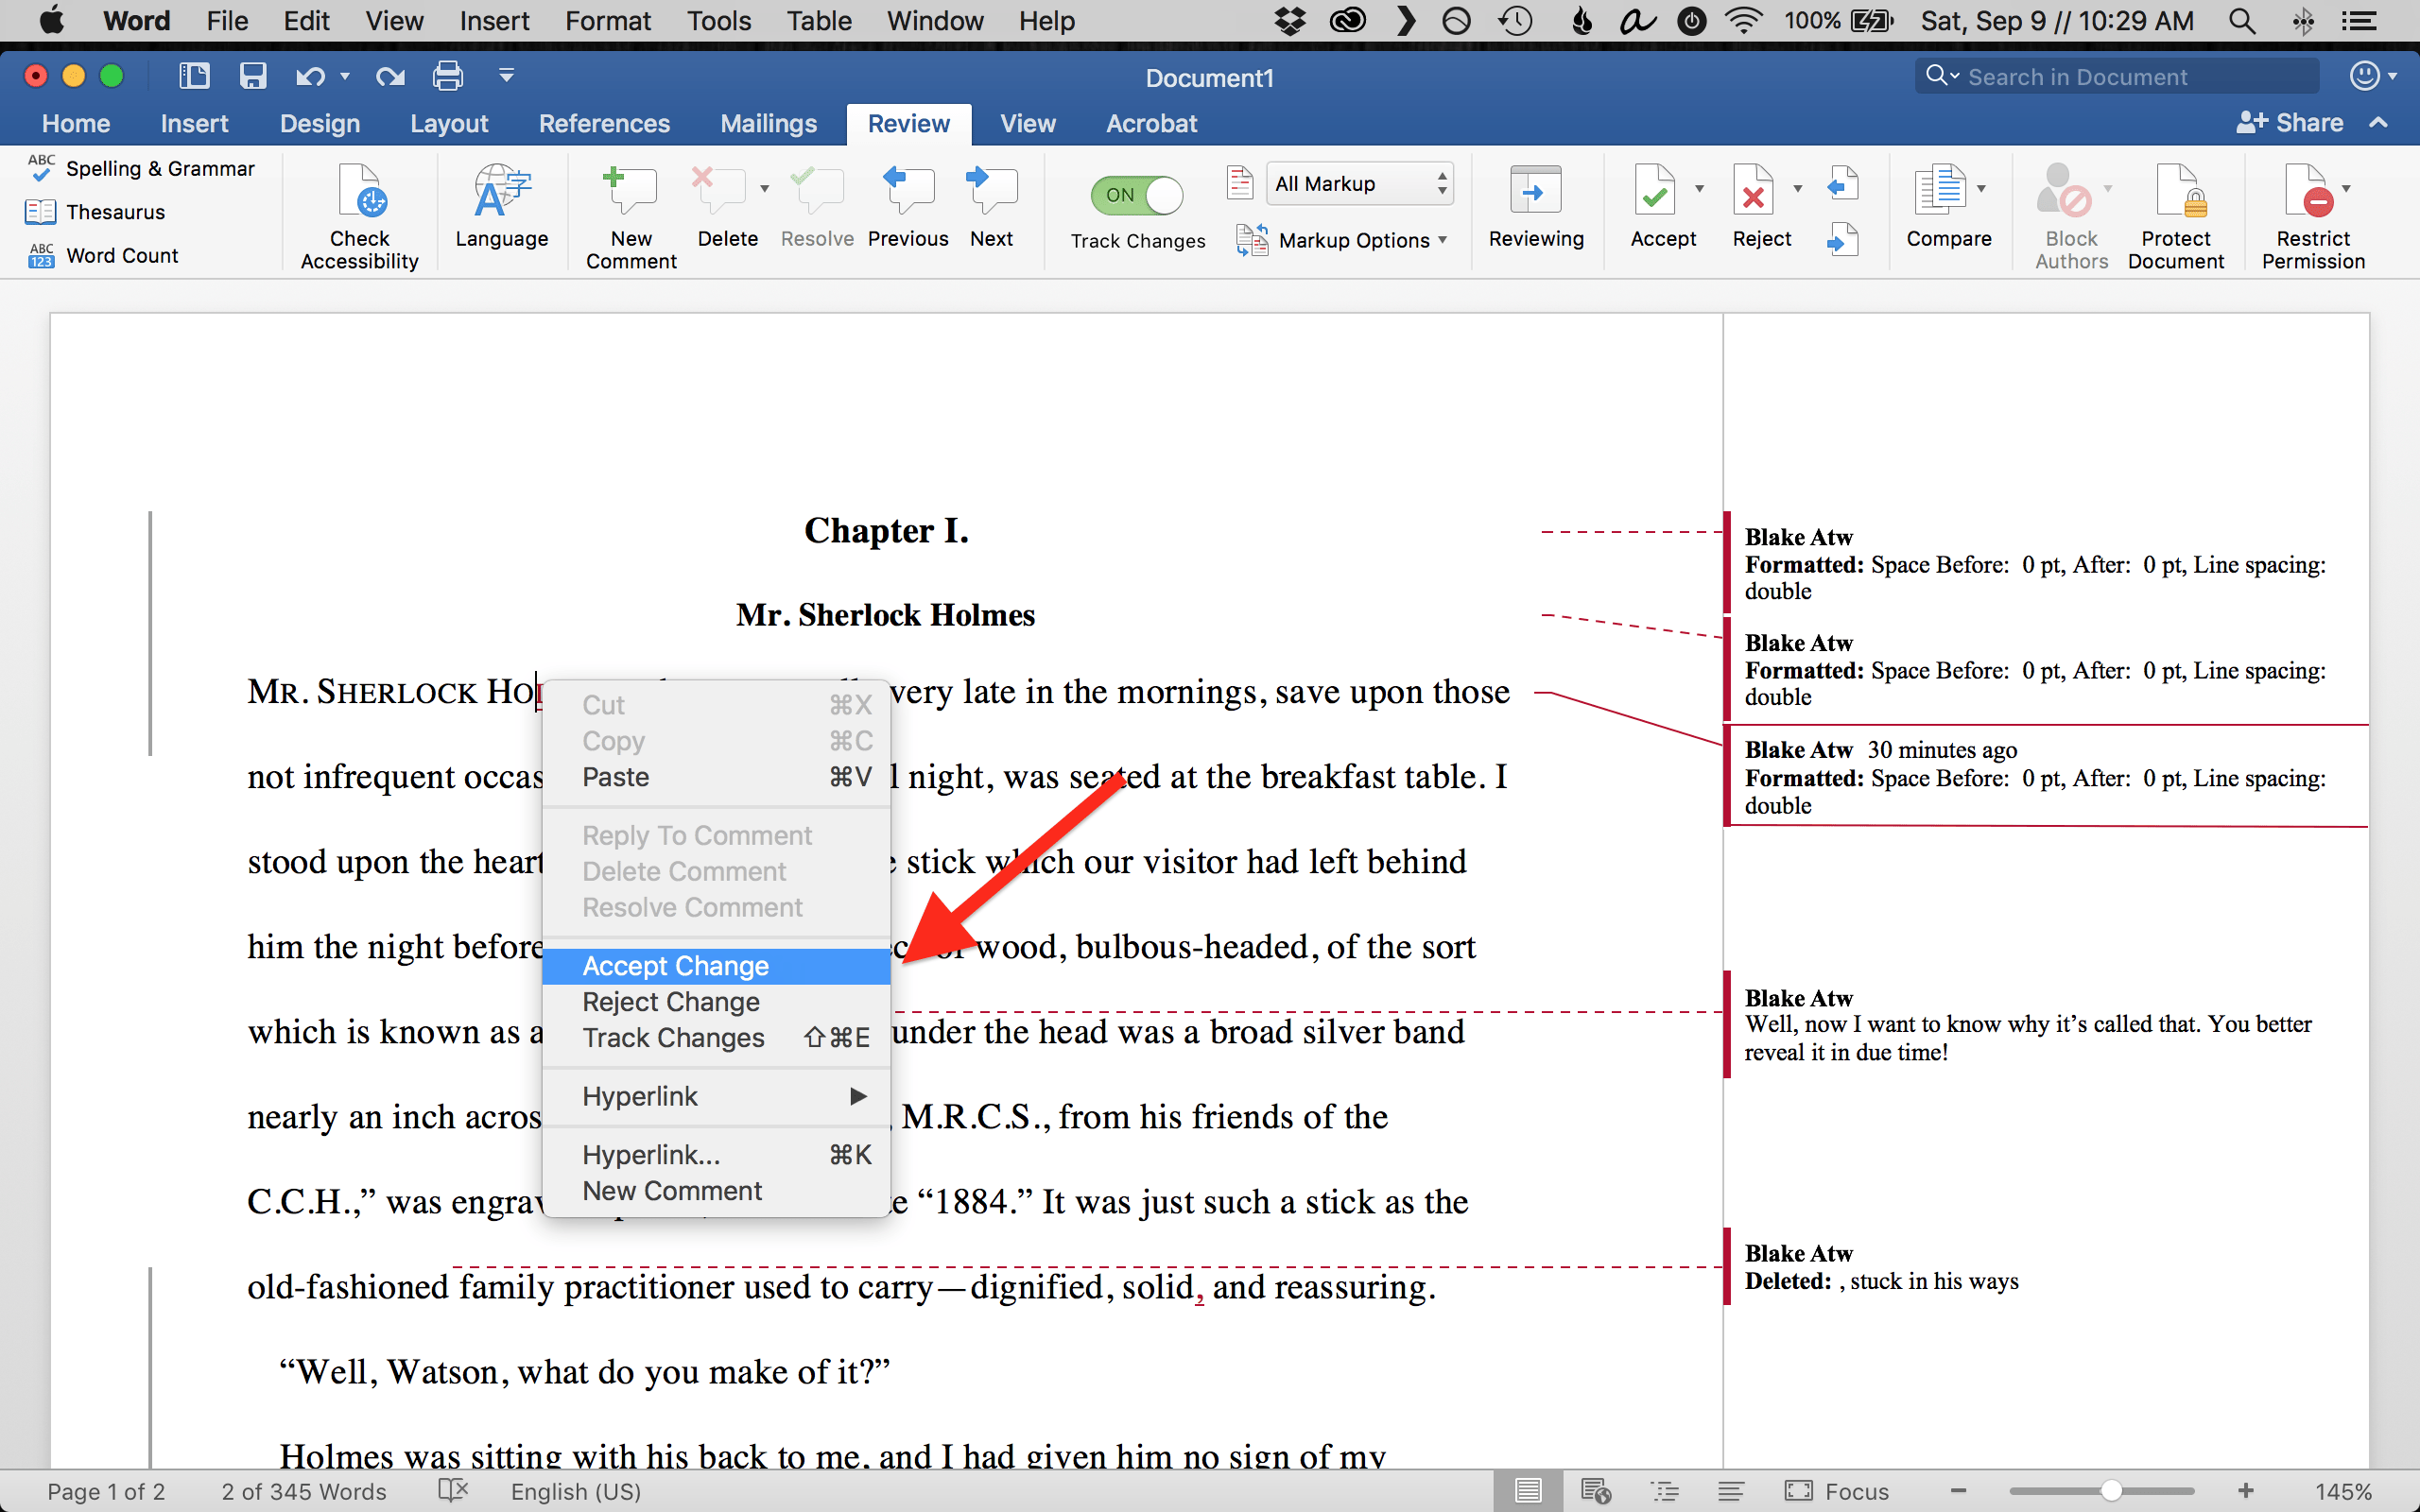
Within the review tab and to the right of the Markup drop-down menus live the Accept/Reject buttons. To start working through each edit, click within your main text where your first edit occurred or click the first edit in the sidebar. Then, go back to the menu and click Accept or Reject.
Word will automatically jump to the next edit, meaning that you can continue to click Accept or Reject without having to click back into the main text or the sidebar edits. You may also right-click any edit and select Accept Change or Reject Change.

How to reply to comments in Track Changes
Your editor may leave comments throughout your manuscript. Often, they will ask questions to seek clarification.
To reply, either click on the comment icon in the top right of their comment or right-click their comment and select Reply To Comment.
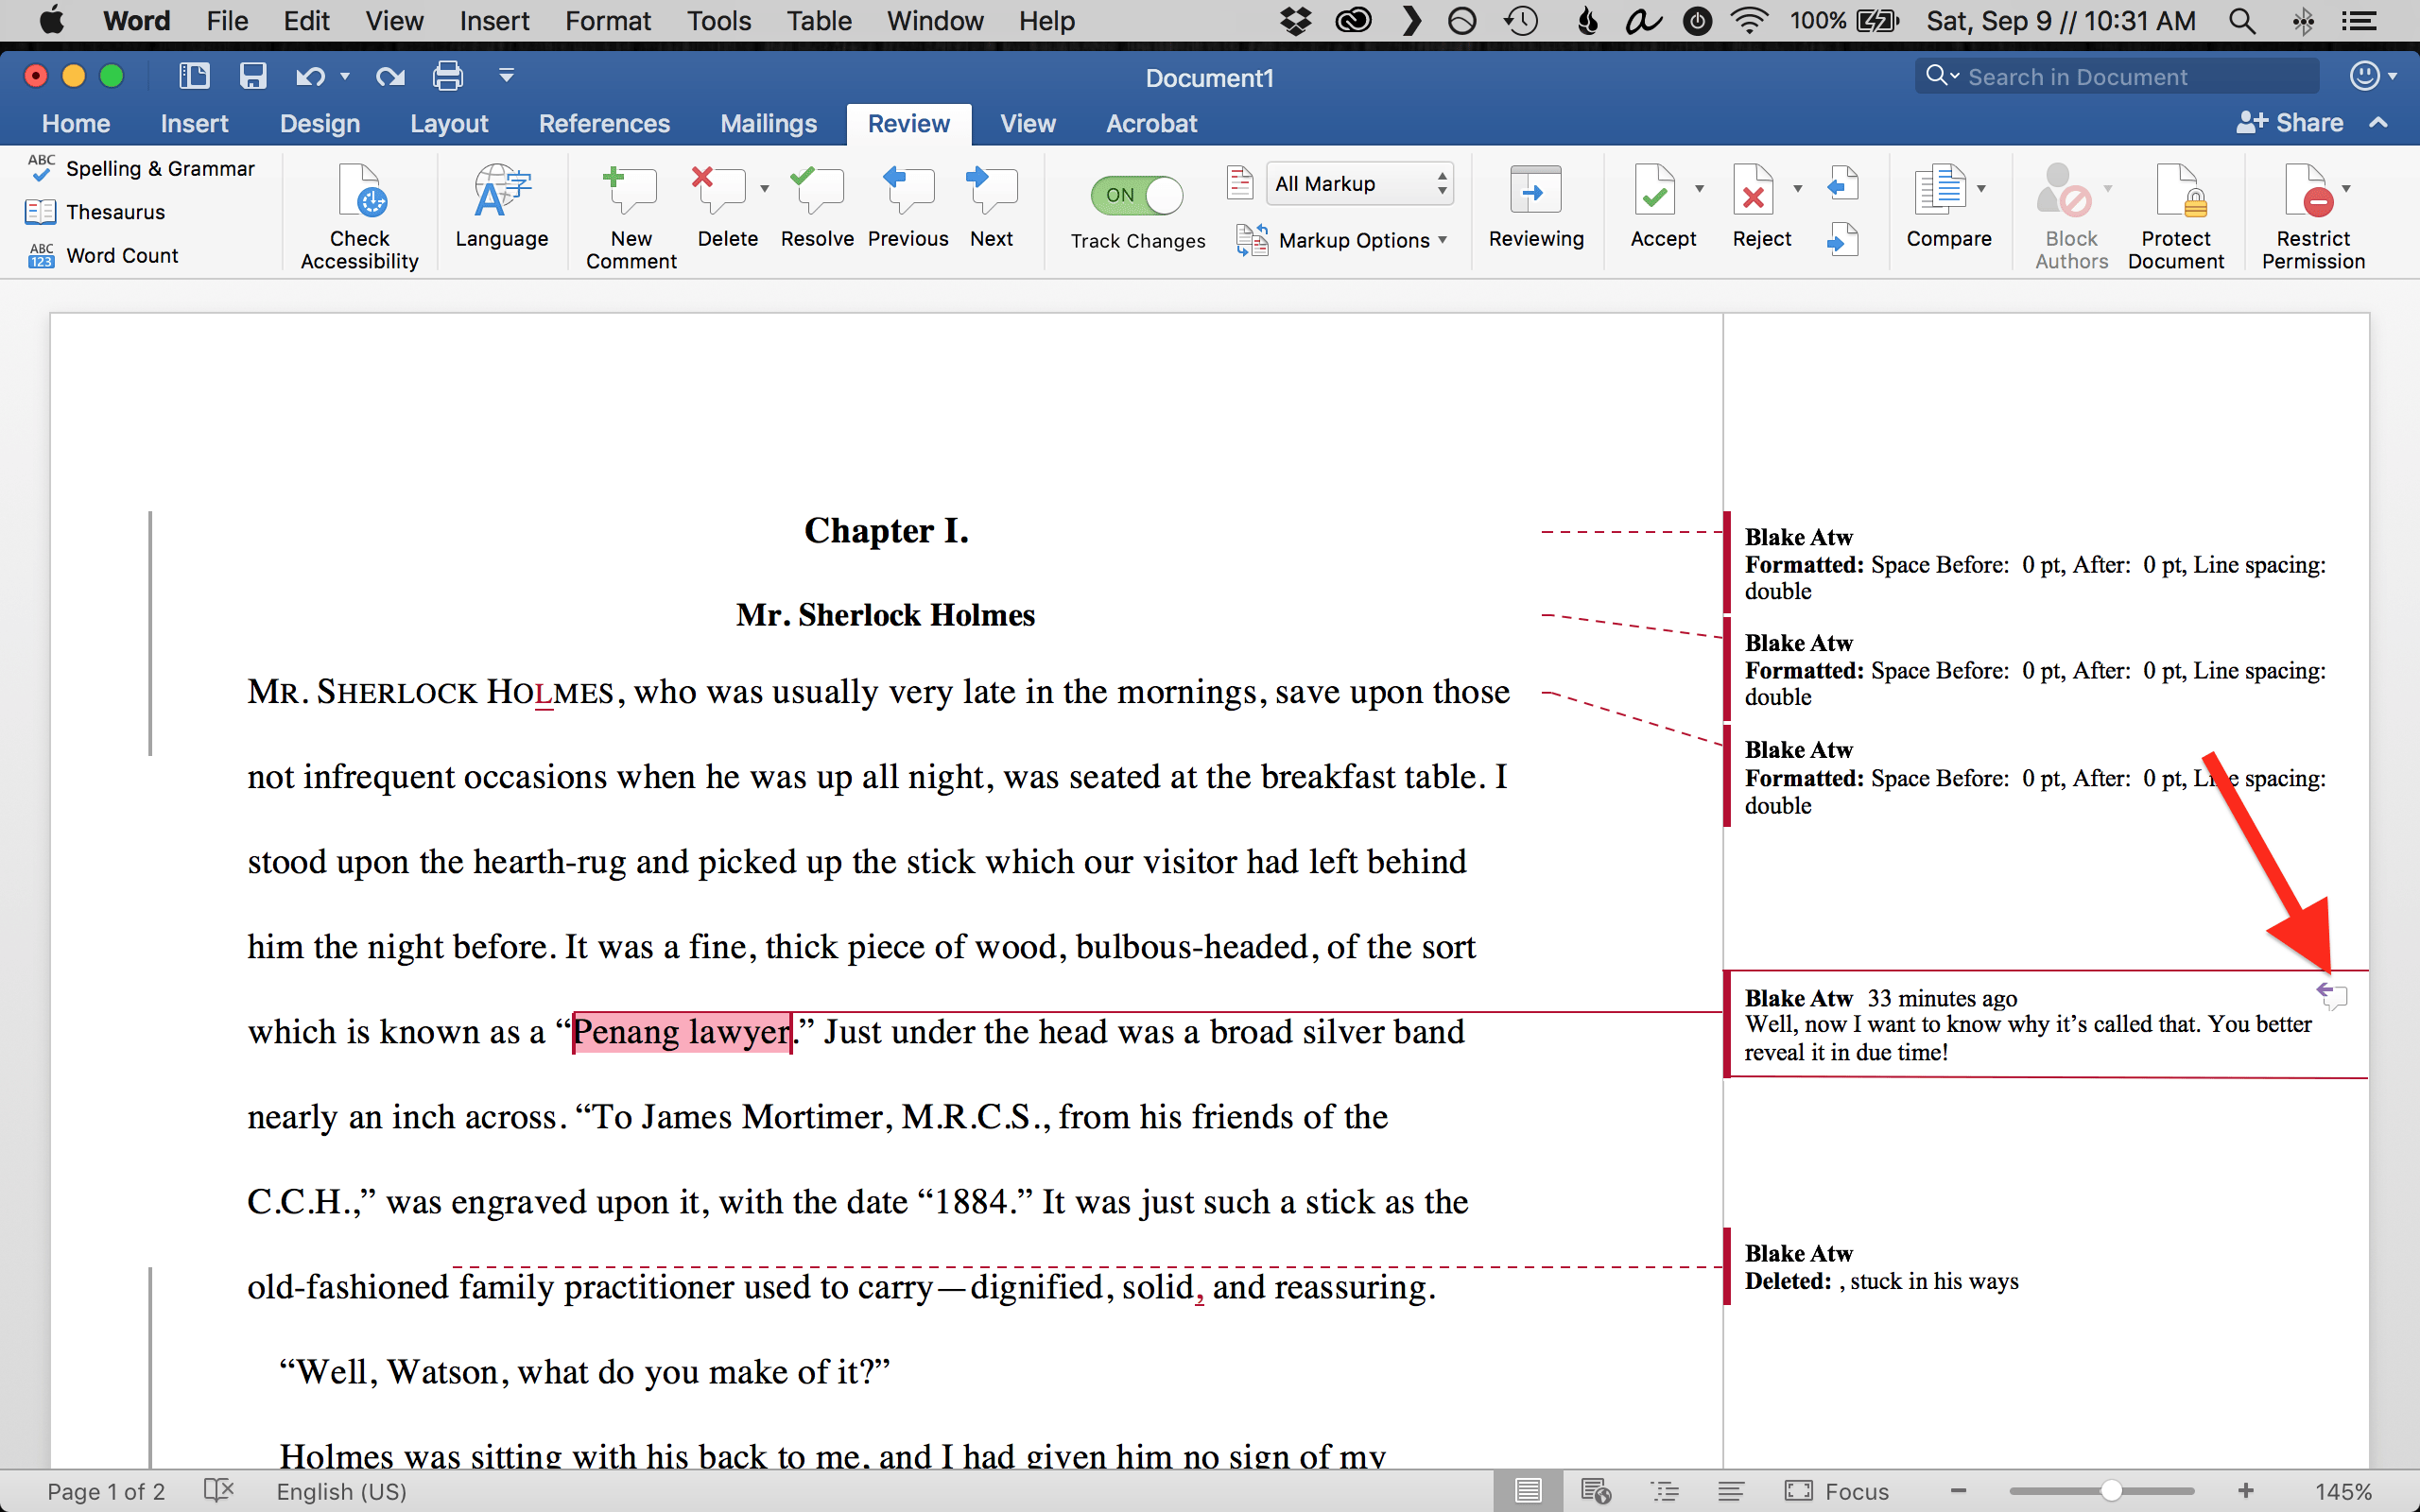
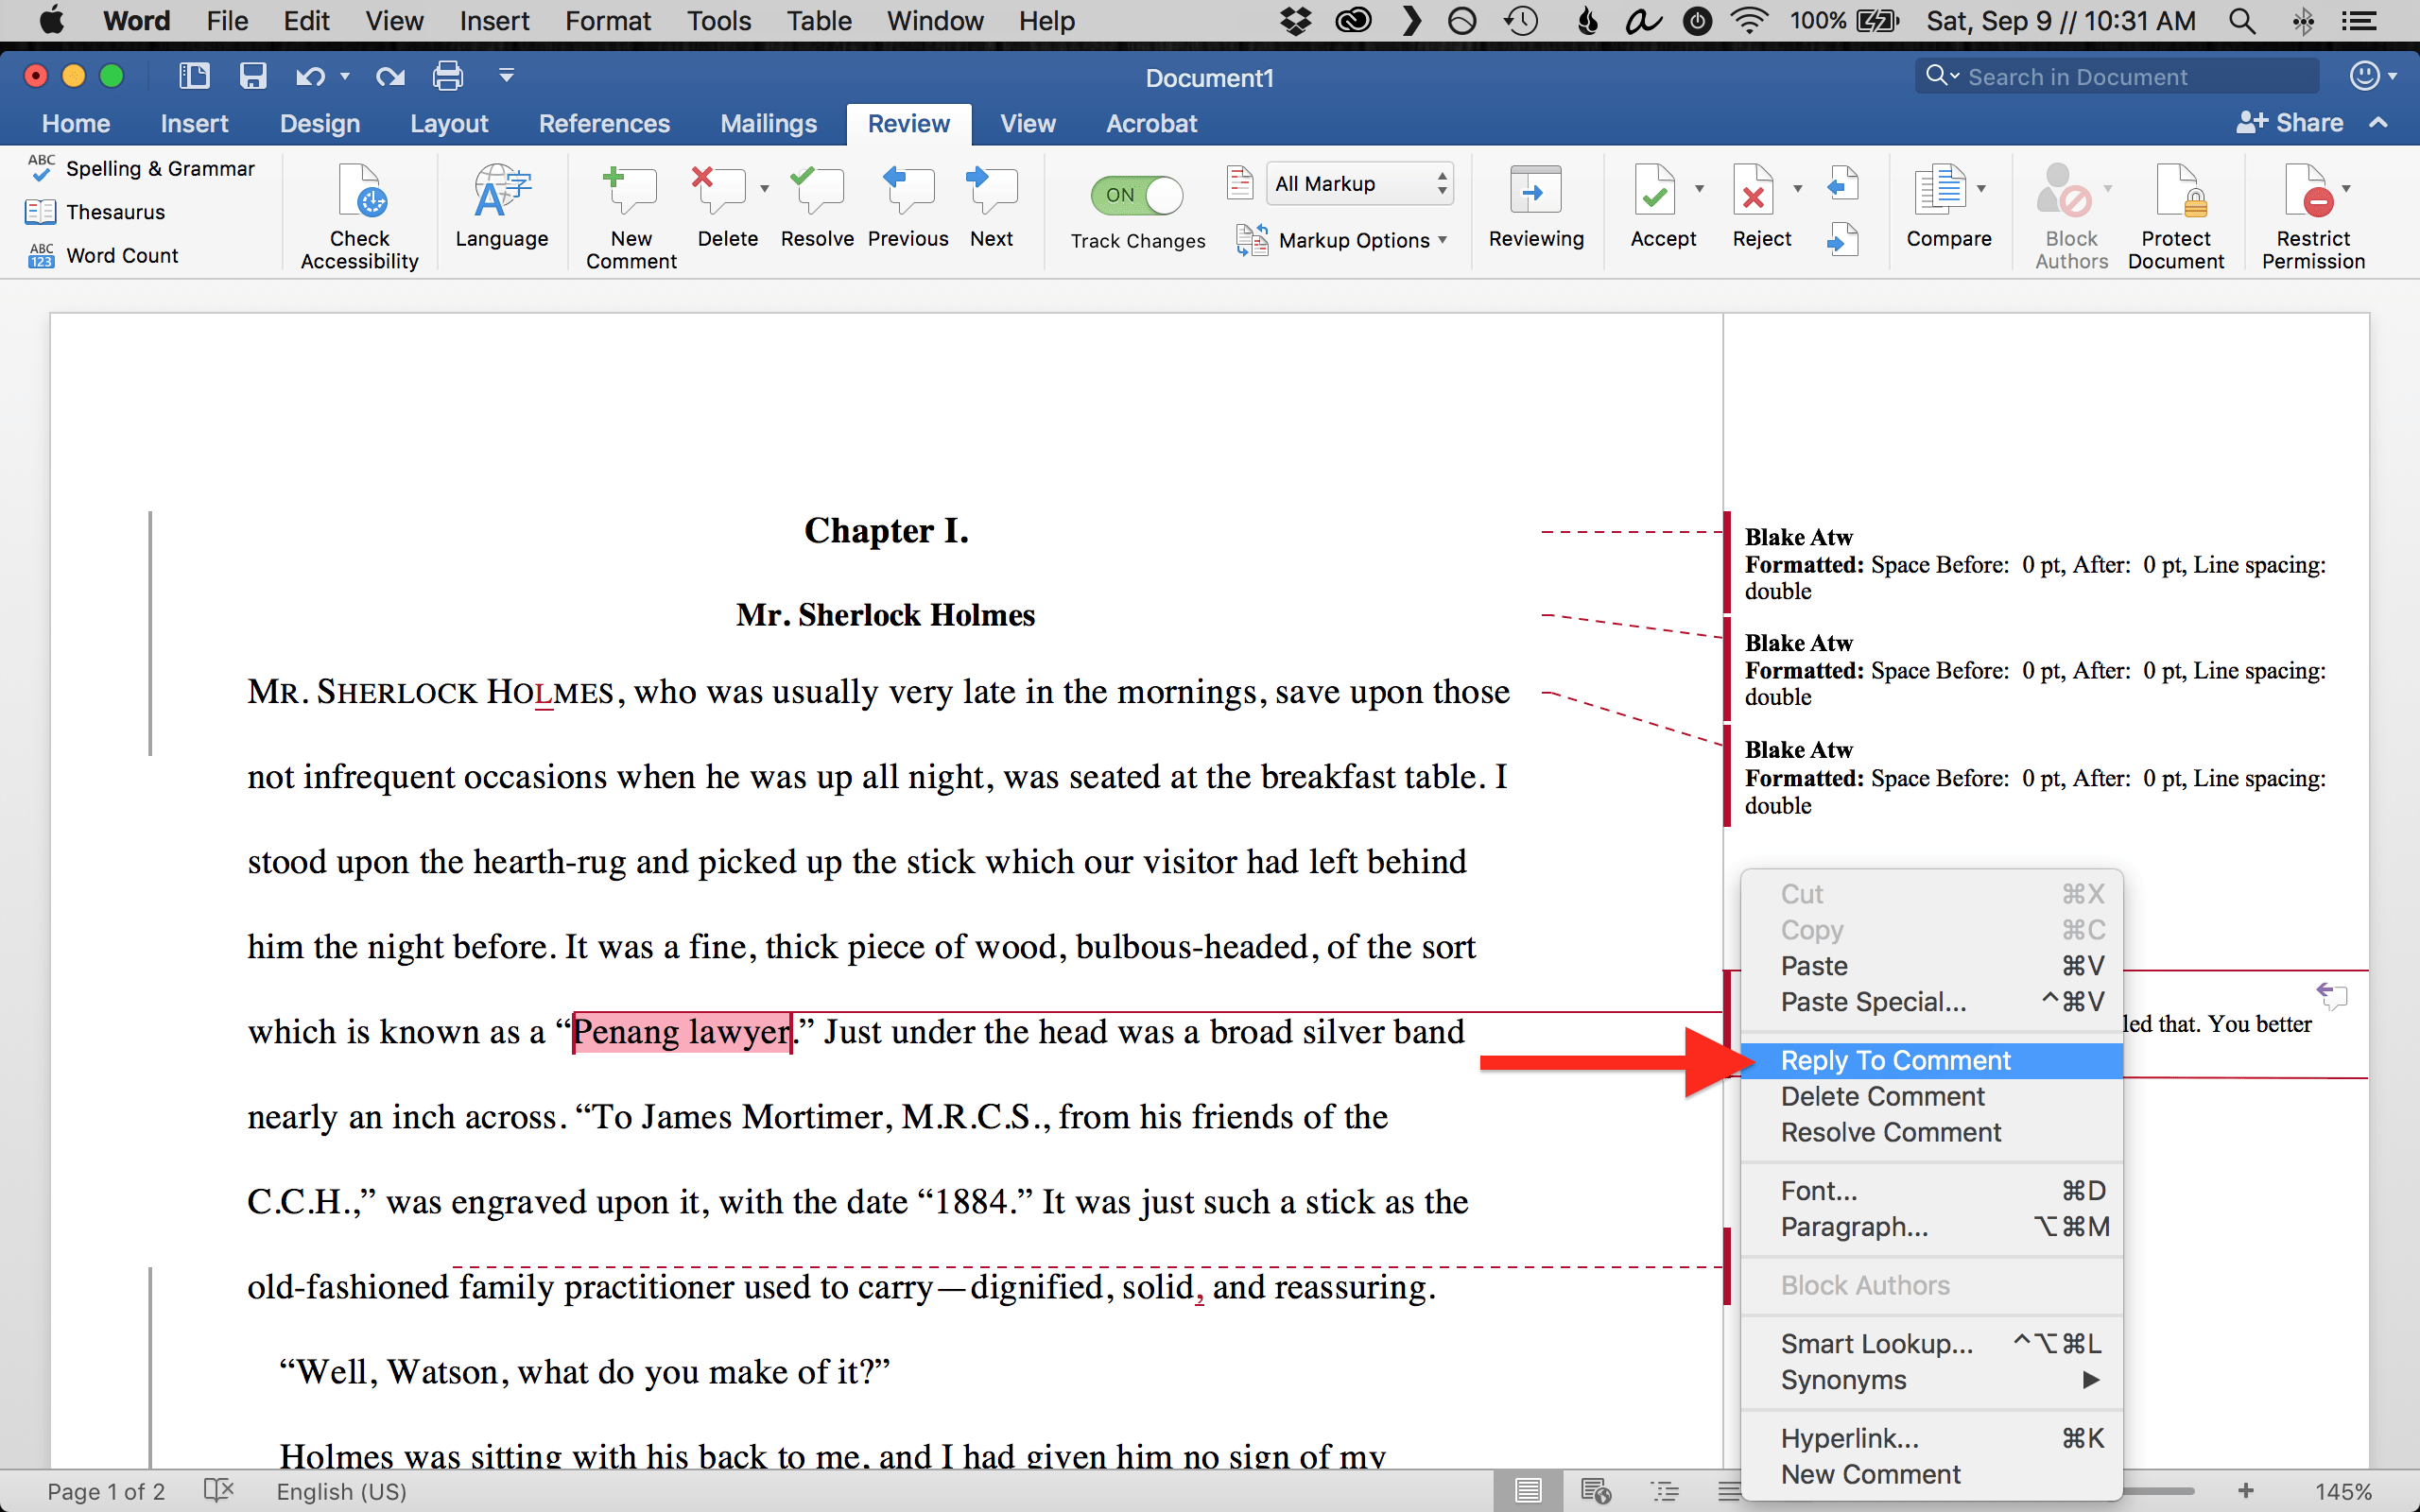
If a comment needs no reply and you’d like to remove it or archive it, select Delete or Resolve in the Review tab.
To create your own comments, highlight the part of your main text on which you’d like to comment, then select New Comment in the Review tab.

This brief, introductory tutorial should give you a firm foundation for tackling edits in Track Changes.
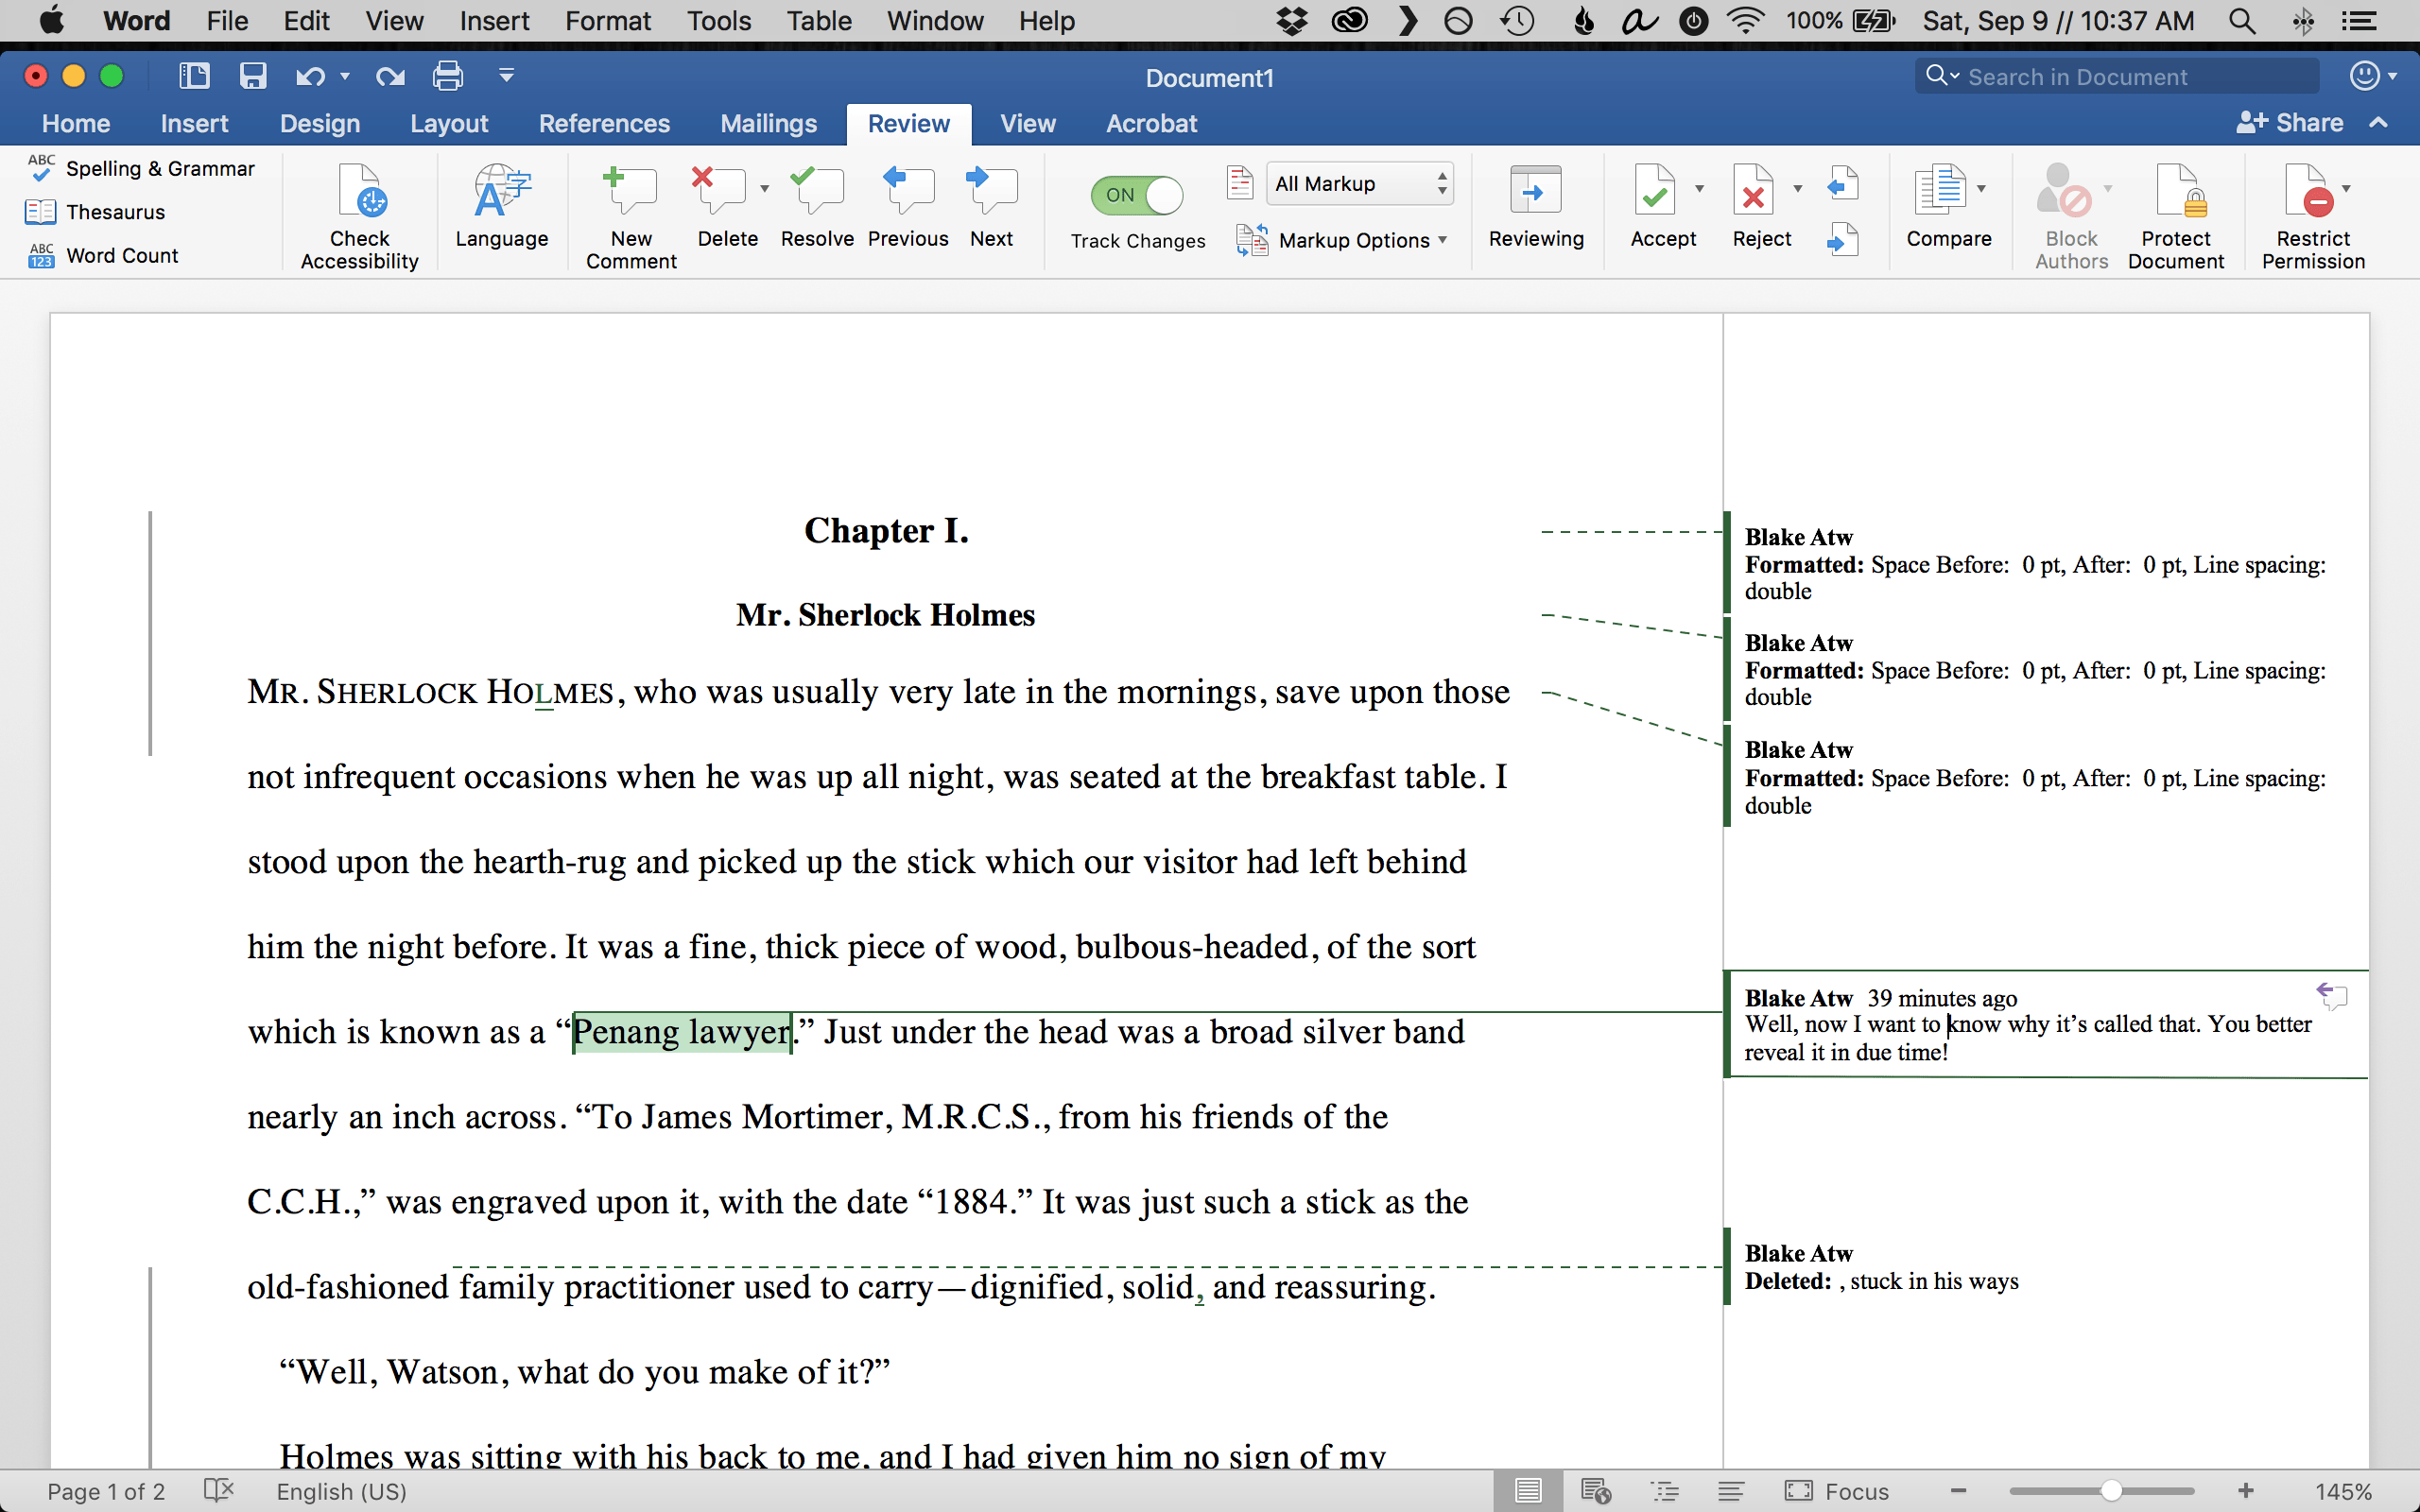
And if your editor is particularly nice and tech-savvy, they may even use some color other than red to mark up your manuscript.
If you’ve used Track Changes, what problems have you had? Or, what’s the best comment you’ve received on your writing?


