Welcome to a brand new monthly feature in which I highlight this month’s best new book releases that are especially beneficial for writers. Some fiction, some non-fiction, some craft-focused — all will be of interest to the writer who needs some more reading material. (Okay, I know all of our TBRs are way too long as it is, but new and shiny books always capture my attention!)
September is fiction-heavy, but that won’t be the case every month. I already know that October is heavy on author bios. Anyways, here we go!
Books about book are my favorite kinds of books. Publisher description:
A brilliant scholar imparts the lessons bequeathed by the Black community and its remarkable artists and thinkers.
Farah Jasmine Griffin has taken to her heart the phrase “read until you understand,” a line her father, who died when she was nine, wrote in a note to her. She has made it central to this book about love of the majestic power of words and love of the magnificence of Black life. . . .
Here, she shares a lifetime of discoveries: the ideas that inspired the stunning oratory of Frederick Douglass and Malcolm X, the soulful music of Marvin Gaye and Stevie Wonder, the daring literature of Phillis Wheatley and Toni Morrison, the inventive artistry of Romare Bearden, and many more. Exploring these works through such themes as justice, rage, self-determination, beauty, joy, and mercy allows her to move from her aunt’s love of yellow roses to Gil Scott-Heron’s “Winter in America.”
Griffin entwines memoir, history, and art while she keeps her finger on the pulse of the present, asking us to grapple with the continuing struggle for Black freedom and the ongoing project that is American democracy. She challenges us to reckon with our commitment to all the nation’s inhabitants and our responsibilities to all humanity.
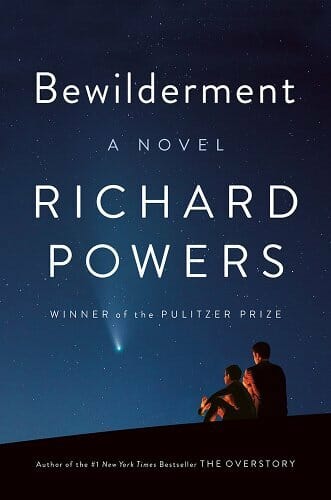
New works by brilliant Pulitzer winners are always of interest to writers (or at least they are to me!). Enjoy the story; learn from the craft. Publisher description:
The astrobiologist Theo Byrne searches for life throughout the cosmos while single-handedly raising his unusual nine-year-old, Robin, following the death of his wife. Robin is a warm, kind boy who spends hours painting elaborate pictures of endangered animals. He’s also about to be expelled from third grade for smashing his friend in the face. As his son grows more troubled, Theo hopes to keep him off psychoactive drugs. He learns of an experimental neurofeedback treatment to bolster Robin’s emotional control, one that involves training the boy on the recorded patterns of his mother’s brain…
With its soaring descriptions of the natural world, its tantalizing vision of life beyond, and its account of a father and son’s ferocious love, Bewilderment marks Richard Powers’s most intimate and moving novel. At its heart lies the question: How can we tell our children the truth about this beautiful, imperiled planet?
Writerly memoirs are always a joy; this blend of genres promises to deliver big-time. Publisher description:
Joy Harjo, the first Native American to serve as U.S. poet laureate, invites us to travel along the heartaches, losses, and humble realizations of her poet-warrior road. A musical, kaleidoscopic, and wise follow-up to Crazy Brave, Poet Warrior reveals how Harjo came to write poetry of compassion and healing, poetry with the power to unearth the truth and demand justice.
Harjo listens to stories of ancestors and family, the poetry and music that she first encountered as a child, and the messengers of a changing earth—owls heralding grief, resilient desert plants, and a smooth green snake curled up in surprise. She celebrates the influences that shaped her poetry, among them Audre Lorde, N. Scott Momaday, Walt Whitman, Muscogee stomp dance call-and-response, Navajo horse songs, rain, and sunrise. In absorbing, incantatory prose, Harjo grieves at the loss of her mother, reckons with the theft of her ancestral homeland, and sheds light on the rituals that nourish her as an artist, mother, wife, and community member.
See my note re: Bewilderment. Publisher description:
From the two-time Pulitzer Prize-winning author of The Underground Railroad and The Nickel Boys, a gloriously entertaining novel of heists, shakedowns, and rip-offs set in Harlem in the 1960s.
Ray Carney was only slightly bent when it came to being crooked. To his customers and neighbors on 125th street, Carney is an upstanding salesman of reasonably priced furniture, making a decent life for himself and his family. . . . Few people know he descends from a line of uptown hoods and crooks, and that his façade of normalcy has more than a few cracks in it. Cracks that are getting bigger all the time. . . . Harlem Shuffle’s ingenious story plays out in a beautifully recreated New York City of the early 1960s. It’s a family saga masquerading as a crime novel, a hilarious morality play, a social novel about race and power, and ultimately a love letter to Harlem. But mostly, it’s a joy to read, another dazzling novel from the Pulitzer Prize and National Book Award-winning Colson Whitehead.
Simone de Beauvoir wrote across nearly all genres. Writers like that are especially interesting to me; how do they manage to write well in fiction, philosophy, memoir, etc.? This new novel from the late feminist is well worth studying, for the craft as much as for the story. Publisher description:
A never-before-published novel by the iconic Simone de Beauvoir of an intense and vivid girlhood friendship
From the moment Sylvie and Andrée meet in their Parisian day school, they see in each other an accomplice with whom to confront the mysteries of girlhood. For the next ten years, the two are the closest of friends and confidantes as they explore life in a post-World War One France, and as Andrée becomes increasingly reckless and rebellious, edging closer to peril. . . .
Deemed too intimate to publish during Simone de Beauvoir’s life, Inseparable offers fresh insight into the groundbreaking feminist’s own coming-of-age; her transformative, tragic friendship with her childhood friend Zaza Lacoin; and how her youthful relationships shaped her philosophy. Sandra Smith’s vibrant translation of the novel will be long cherished by de Beauvoir devotees and first-time readers alike.
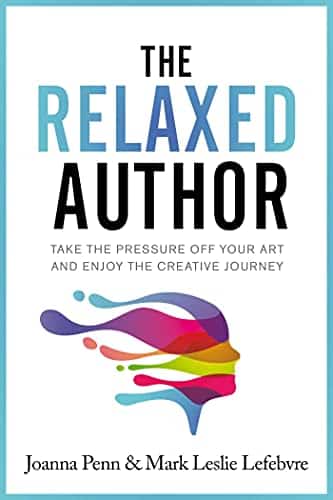
The title alone makes me want to read this one. Any writer can relate, yeah (even if you aren’t an “author”). Publisher description:
There are plenty of books and tips on writing faster, learning more marketing tactics and strategies, trying to maximize your ranking, hitting the top of the charts, juicing the algorithms, and hacking different ad platforms. While these are all important things — which the authors themselves regularly write and talk about — it’s also important to recognize that your author journey is a marathon, and not a sprint.
Joanna Penn and Mark Leslie Lefebvre have been in the business long enough to see authors burning out and leaving the writing life because they turned what they love into a hamster wheel of ever more production and marketing tasks they hate. It doesn’t have to be this way.
This book is a collection of tips on how to be a more relaxed author — and return to the love that brought you to writing in the first place.
About a month ago I promised that we were working on some new resources for you. We’ve been chugging along behind the scenes and I’m happy to say that today we’re launching our book outline template.
If you’re writing a book, the importance of an outline can’t be denied. The benefits are just too numerous to ignore: you’ll improve your book’s continuity, you won’t have to fight writer’s block as much (because your next chapter is mapped out!), the writing will almost inevitably be faster, and it frees you up to actually spend time on the craft versus the what of the book.
Not all outlines are created equally, though. Today, we’re releasing our non-fiction template. We also have a fiction template available.
It’s all set up in Google Docs for you. Click the button above, fill out the short form, and you’ll be emailed a link to a view-only Google Doc. (We ask for your phone number only for our internal records; we will not sell it to a junk call/text company.)
You’ll copy/paste the template into your own Docs and get working. What I love about this outline is that it includes the front and end matter that’s often so annoying to put together — introduction, acknowledgements, notes, etc.
This book outline template also helps you map out nearly every paragraph of the important stuff — your content! Use as much or as little outlining as you like, but you should definitely, at the very least, have an idea of the main thrust of each chapter and how to get there.
Give it a shot. Even if you’ve only been noodling with the idea of writing a book, this tool can help crystallize your idea and catalyze your motivation. If you’ve been writing for ages and don’t seem to be making headway, an outline can give you the push you need to finally finish.
Either way, I hope it’s a great help for your writing process.
I studied public relations and journalism back in college (shoutout to Drake U!). As you can imagine, there was a lot of writing involved: press releases, newspaper articles, client pitches, etc., etc. We were writing nearly every day. And yet, I never really thought of writing as a career. Sure, the skill would come in handy, but it would certainly never be a primary job function.
At the time, journalism seemed like a dying industry. Public relations seemed more about marketing and business than writing. Writing and publishing books seemed so far out of the realm of possibility that I never even considered it.
But here I am, a dozen years later, doing what I love to do. The possibilities when it comes to writing are so much greater than we tend to think. Whether you want a career in wordsmithing or simply want to gain mastery over your favorite hobby, this field has so much to offer.
Here at The Write Life, as we enter a new season, the team wants to know what this site means to you. What sort of content are you looking for when you venture to thewritelife.com or open one of our emails? What does your ideal writing life look like?
We are here to serve our readers, so the more we know about your writing goals, hopes, challenges, hobbies, and career aspirations, the better we can do that.
Whether it’s one of these, all of these, or a dream not listed, let us know in the comments! Next week, we’ll feature your responses in order to provide motivation, inspiration, and hope for all of us writers out there—myself included.
You might have noticed that The Write Life has been on a content break for the last couple months. In mid-June, The Write Life joined the Selfpublishing.com platform of sites and resources dedicated to writing, publishing, freelance, marketing, and more.
The vision for the Selfpublishing.com platform began back in 2015 when Chandler Bolt founded Self-Publishing School, an organization dedicated exclusively to changing the world through the power of books. The company provides education and coaching services to folks who are on the verge of writing or self-publishing a book, but need a little extra help getting across the finish line. Over the years, the vision has only grown (with a goal of helping self-publish over 100,000 books and impacting 120 million lives!), as have the number of resources available to help you do it.
Here at The Write Life, we’ve been ironing out some new content, among other backend systems/process changes, in order to bring you the best possible experience as a reader.
As the new Managing Editor, I want to let you know that I’m fully committed to providing top-notch content centered around helping you become a better writer so that you can achieve your writing goals. I’ll be working with world-class contributors to bring you a steady stream of articles that are guaranteed to both inspire and provide practical tips that can be implemented into your writing routine ASAP.
In the coming months we’ll also be revamping some of our free resources and ebooks, rolling out new trainings, and generally doing everything we can to bring value to The Write Life readers.
If you haven’t already, get signed up for our newsletter in order to get new content, valuable articles from the archives, and those jazzed up resources right to your inbox:
I’m honored to be guiding this ship and I can’t wait to see what lies ahead for The Write Life!
Soooo… you’ve been writing for a while. Maybe you seriously got into writing fiction a year ago; maybe you’ve been a freelance writer for three or four years now. Maybe you started writing a book and it didn’t go anywhere.
You know you want to improve your writing, but you don’t know HOW. What do you need to do to take your writing to the next level? Are there practical, actionable steps you can take to get your writing from GOOD to GREAT?
YES. Writing, like everything else, can benefit from what is called deliberate practice — a focused, disciplined attempt at identifying areas of improvement (and then, of course, improving them).
Here’s how to improve your writing skills — in three (or maybe four) easy steps.
Step 1: Evaluate your work.
Before you can start improving your writing skills, you need to evaluate your work — which means taking an honest assessment of what you’re doing well, what you could do better and which aspects of your writing have stalled at “good enough.”
(Remember, you’ll never get to GREAT if you’re satisfied with GOOD ENOUGH.)
This is the hardest part of the process, because writers aren’t always good at self-evaluation. Sometimes we don’t know where our work can improve, but there are two good ways to find out:
Ask a writer/editor/teacher you trust
Read writing by people you admire, in the genre/beat you’re currently writing in, and do an honest comparison of your work against theirs
If you want to go the first route, there are plenty of ways to connect with other writers and make the kinds of friends who can help you make your work better.
Joining a community like the Freelance Writers Den, for example, can put you in touch with other freelancers and industry professionals — and that’s before you factor in the job boards, writer website reviews, and online bootcamps you’ll be able to access as a Den member.
If you’re more into fiction than freelancing, you could team up with a critique partner or work with a beta reader to learn where your writing is currently working — and where it isn’t.
And don’t forget to read, read, READ. The more you read other writers’ work — especially writers who are doing the same kind of work you’d like to do — the more you’ll understand what it takes to make a piece of writing truly excellent.
Then, you can use what you’ve learned to improve your writing.
Step 2: Identify one area in which to improve your writing.
Going from good to great is an incremental process. Don’t try to change everything you’re doing at once, especially if what you’re doing is already getting you some writing success. If editors are saying yes to your freelance writing pitches, for example, keep pitching. If you just got a short story published, start writing another one.
While you’re continuing the work that’s currently helping you move forward, pick ONE AREA in which to improve your writing skills. Otherwise, your next piece is going to be just as good as your first one — and while that might qualify as “good enough,” it won’t help you take your writing from GOOD to GREAT.
If you don’t know where to begin, go back to that first step and do an honest self-assessment of your writing — or find someone who can help you assess your work and identify one aspect of your writing that could benefit from a little skill-building.
Let’s say, for example, that you have trouble writing an opening sentence. If you want to improve your writing skills, you could set yourself the goal of understanding the difference between GOOD ENOUGH OPENING SENTENCES and GREAT OPENING SENTENCES. Then, you can use that information to get your opening sentences to GREAT.
If you want to improve your writing, this kind of incremental improvement is one of the best ways to get started — but how do you do it?
That’s where Step 3 comes in.
[twl_reusable_block post_id=41455]
Step 3: Begin practicing. Deliberately.
Much has been said about the writing practice, but not enough has been said about the deliberate writing practice.
Deliberate practice is a term created by Anders Ericsson and popularized by Ericsson and Robert Pool in their book Peak: Secrets from the New Science of Expertise. Here’s how they define it:
Deliberate practice involves well-defined, specific goals and often involves improving some aspect of the target performance; it is not aimed at some vague overall improvement. […] Deliberate practice nearly always involves building or modifying previously acquired skills by focusing on particular aspects of those skills and working to improve them specifically; over time this step-by-step improvement will eventually lead to expert performance.
Using step-by-step improvement to build skills and gain expertise sounds like a worthy goal for any writer, but what does deliberate practice look like in practice?
Well — if you were a writer who wanted to focus on improving your opening sentences, you’d use part of your writing practice time to break down the differences between your opening sentences and excellent opening sentences.
What, exactly, is going on with Jane Austen’s famous opening sentence, “It is a truth universally acknowledged, that a single man in possession of a good fortune, must be in want of a wife”? What kind of information is being communicated to the reader, and what does the reader know about what to expect from the rest of Pride and Prejudice?
What about a classic essay like Joan Didion’s Goodbye to All That, which begins “It is easy to see the beginnings of things, and harder to see the ends”? What’s Didion specifically doing with her word choice, with her rhythms, with her parallel structure and use of the repeated “S”?
Then you’ll write opening sentences that do the same things. In your own words, of course. This isn’t about copying Didion or Austen. This is about understanding why those sentences resonate with readers, and learning how to create equally resonant sentences that serve your own purposes and your own voice.
Until you’re no longer guessing at what a good opening sentence should be, because you already know how to write an excellent one.
Step 4: Repeat steps 1–3.
The process of writing well takes a lifetime, but the process of improving one incremental aspect of your craft can go a lot more quickly than you realize. You may only need to devote a week — or even a few days — to opening sentences, and then you might want to move on to dialogue tags.
Or whatever it is you’re hoping to improve in your own writing.
Remember, this kind of work requires you to successfully identify not only what you aren’t currently doing well, but what you’re currently doing JUST WELL ENOUGH — so make sure you’re ready to evaluate and re-evaluate your writing as you continue to improve your writing skills.
This is where a writing accountability team can help, both in terms of ensuring that you’re focusing on areas of improvement and that you’re actually improving your work.
You could also use a tool like ProWritingAid to get an in-depth report of what you do well and what you could do better — and then work your way down the list of suggested improvements, tackling one issue at a time.
Because that kind of deliberate, focused practice is how you take your work from GOOD to GREAT.
Soooo… what tiny, incremental aspect of your craft do you want to address first, and how are you going to use these steps to improve your writing?
Even if you don’t know the first thing about SEO writing, you’ve likely heard the buzz.
SEO is a great (and free!) way to get traffic to your website or blog. It’s also a great skill to have as a freelance writer working for other clients, as it can help you provide additional expertise which means additional dollars in your pocket.
But from the outside looking in, it all can feel absolutely intimidating.
Don’t worry — this guide will break it all down for you in an easy-to-understand way.
So what is SEO writing, and why is it time to get on board? And how do you even write an SEO post? I’ll start with the basics.
What is SEO Writing?
SEO stands for search engine optimization. SEO writing is the practice of creating content that ranks on Google. (Of course, there are other search engines, but Google is the biggest player these days.)
Here’s the easiest way to think about it: Take a second to Google a term or phrase. Let’s go with “how to write an ebook.” The first few results that pop up are probably paid ads. Skip those, and you’ll start seeing various websites that cover the topic. (You might even spot The Write Life!)
The sites you’re seeing have mastered SEO writing. They’ve made it to the first page of Google. That’s your goal.
So why is page one of Google such a coveted spot? When your content ranks high, it gets more traffic.
The readers visiting your content are also coming in with high intent. They’ve just searched the specific topic of your article, so you’ve got a better chance of influencing them — whether you want them to click a specific link, download an ebook or subscribe to a newsletter or online course.
Ranking on Google is also a great way to boost your brand awareness and establish yourself as an authoritative figure in your niche. Basically, it’s free advertising.
An SEO writing mini-dictionary: The terms you need to know
Want to give this whole SEO thing a shot?
I won’t sugarcoat it: The world of SEO is pretty technical, and there’s a whole dictionary worth of terms and acronyms out there. I’ve been doing SEO writing for about four years now, and I think these are the three most important terms to keep in your back pocket when starting out (no need to overwhelm yourself).
Keyword
The keyword is the word or phrase you’re trying to rank for. This is what people are typing into the Google search bar. “How to start an ebook” is an example of a keyword.
Volume
Search volume refers to the number of searches a keyword gets per month. For instance, at the time of writing this, the keyword “how to write an ebook” had a volume of 2,400, according to Ubersuggest. (More on how to find this info in a minute!)
That means approximately 2,400 people have searched this term in the past month. The higher the volume, the more potential there is for traffic; however, you’ll want to keep the keyword difficulty in mind…
Keyword difficulty
The keyword difficulty (KD) is a number between zero and 100 that indicates how difficult it’ll be to rank on Google. If a keyword has a high KD, that means there’s a flood of content around the term, so you’ve got a lot of competition. It’ll be more difficult to climb the ranks.
As a general rule of thumb, you have a better chance of ranking with a lower KD.
Going back to our “how to write an ebook” example, its KD is currently 21, which means your content should have a decent chance of ranking if you’ve optimized it. If the KD were 50 or higher, it’d be more difficult.
How to choose your keyword (let Google help!)
Now that you’ve got the lingo down, it’s time to start researching keywords for your SEO article. You’ll want to choose this keyword before you write your content. Everyone’s process looks a little different, but I’ll show you how I do it.
Let’s say I want to write an article about growing lavender. I’ll brainstorm a list of terms and phrases around the topic. I think about what I would search as someone who’s looking to grow lavender. Here’s an example of what this list might look like:
Growing lavender
How to grow lavender
Lavender plant
Lavender garden
To add to your list, let Google help you out. Open a new browser window and start typing your keyword. When I type “growing lavender,” several suggested searches pop up, including “growing lavender from seed” and “growing lavender indoors.” These might be good article ideas.
You can also take a look at the “People also ask,” “People also search for” and related searches sections on the first page.
Once I’ve got my list, I’ll collect the volume and keyword difficulty of each term. If you’re just starting out, Ubersuggest is a great tool for this.
Choose one or two of your keywords, and check out the volume and keyword difficulty. (Ubersuggest calls this the SEO difficulty, or SD.)
The sweet spot is finding a keyword that has a high search volume and low difficulty.
That means a lot of people are searching the term, but there won’t be a ton of competition, so you have a better chance of getting up to page one.
I also love the “keyword ideas” section on Ubersuggest. These are just aggregated related terms you might not have thought about.
With my “growing lavender” example, I decided to write for the keyword “growing lavender indoors.” Although there’s a lot of search volume around “lavender plant” and “growing lavender,” I choose the indoors angle because it still has a robust search volume of 2,000, but its keyword difficulty is super low — at an eight. It’s also specific enough that it really caters to that reader searching with a high intent.
A brief note on SEO tools
There are so many SEO tools out there, but as you continue to explore the world of SEO, you’ll find your favorite.
Ubersuggest is great for beginners, but the free version limits you to the number of keywords you can search in a 24-hour period, so choose the keywords wisely! If you want to subscribe, individual accounts start at $29 a month.
If you want to test out a few other tools before you make a commitment, Wordstream is also a great resource, and it comes with a free trial. My personal favorite is Ahrefs, which has a seven-day trial for $7 if you want to take a look. (Editor’s note: We use Ahrefs here at The Write Life.)
5 SEO writing tips for strong content that ranks
Once you’ve got your high-volume, low-difficulty keyword, it’s time to start creating your content.
Full disclosure here: There’s never any guarantee what you create will rank. There are complicated Google algorithms working behind the scenes that ultimately make this call, and lots of other factors go into rankings that we don’t cover here, for example, website speed.
However, there are some best practices for you can implement so you can create the best piece of SEO content possible. These are called on-page SEO optimizations, because they’re changes you can make in the content right on the page.
Here’s what makes for strong SEO writing.
1. Study Google
Outside of your keyword research tools, Google is going to be your No. 1 resource for SEO writing.
With your keyword in hand, open an incognito window (so your previous search history doesn’t taint your results) and search your keyword. Take a look at the results. You’ll want to focus on five key features on this page:
The featured snippet: This is the box that appears at the top of your search. Typically, it includes a headline and a numbered list. With our “how to grow lavender indoors” example, the snippet features a list of tips.
People also ask: Right below the snippet you’ll find this section. These are related questions people have searched. It looks like folks are curious about “How long does it take to grow lavender indoors?” and “How do you care for an indoor lavender plant?” These are questions you’ll want to answer in your article.
The top three to five results: Because we know Google likes these articles (they’re on the mystical page one, after all), take some time to read the articles and consider their contents and organization. This will help you better understand readers’ search intent.
People also search and related searches: You’ll find both of these sections at the bottom of the page. These can also help inform what goes into your article. For instance, I might want to include information about “how to grow lavender from seeds” and “benefits of growing lavender indoors.”
I like to take notes on all this information and throw it in a document.
2. Make an outline
Armed with your intel, it’s time to make an outline. Typically, I despise outlining articles, but this is an essential step in SEO land.
In your outline, you’ll want to include the recurring themes, elements and keywords you collected from studying page one. I like to take pieces from each Google element and each top-ranking article and create my own rendition.
While you’re doing this, keep the reader in mind. If you were searching for “how to grow lavender indoors,” what would you want to read about? I leave little notes to myself where I want to address commonly asked questions, related search terms or specific keywords.
To really create the best content, go above and beyond. See if you can pinpoint a missing theme, section or element the other top-ranking articles didn’t cover. For instance, I notice none of the top-ranking articles for growing lavender indoors include ways to harvest and use your lavender (for oil, baking, tea, etc.), so I could include an ideas section at the bottom of my article.
3. Ask the experts
One of the reasons I love working with SEO content is because Google values page quality. It’s looking for content with legitimate information from legitimate sources.
In fact, there’s a popular acronym in the SEO community: EAT. It stands for expertise, authoritativeness and trustworthiness. Keep this in mind as you write.
To beef up your SEO article, reach out to an industry expert for an interview. You might also cite credible sources or databases. Adding external links (these are the hyperlinks to other websites) can also help.
4. Use your keywords wisely
There’s a popular phrase out there called “keyword stuffing.” It basically means a piece of content is unnaturally stuffed with keywords; the sentence structure is awkward, and all grammatical rules have gone out the window. Yikes.
You want to avoid keyword stuffing at all costs. Even if “growing lavender in apartment” is a related search, I wouldn’t add it to my content as such — that’s robot speak. It’d be OK to write about “growing lavender in an apartment.”
Write as naturally as possible, and don’t stretch to fit specific keywords or phrases into your content just because Google seems to like them. Keep to your craft, and write in a way that’s clear and concise.
On that note, there are some important places you’ll want to incorporate your primary keyword. (But avoid using it too much, see: keyword stuffing.) Places you’ll want to use it include:
The headline: Like always, you’ll want your headline to be enticing, but you’ll also want to incorporate the keyword you chose. For example, “Your Guide to Growing Lavender Indoors (Even If You Don’t Get a Ton of Natural Light)” could be a catchy headline.
The excerpt/description: When you upload your article to your website, write a strong excerpt that features your keyword. It never hurts to spark a little curiosity.
The URL: It’s important to include your keyword in your URL.
The article: You want to let Google know you’re actually writing about the topic at hand, so try to incorporate the keyword into your introduction and in a subhead, if you can.
The featured image description: Google doesn’t just focus on the text — it also looks at the images. Write an image caption and description that includes your keyword, so Google knows it’s relevant.
Above all, always keep the reader in mind. Generally, if you can make them happy, Google will take notice.
5. Don’t overthink it
My biggest piece of advice is don’t overthink this! Don’t worry about hitting a specific word count or implementing any SEO “hacks.” As long as you create a strong outline and write with the reader in mind — meeting their expectation and serving their needs — then you’re doing exactly what you need.
What’s next? Mastering the art of SEO writing
Remember: SEO writing is more of an art than a science. There’s no specific tried-and-true formula, so this will take some tinkering and experimenting on your end.
As you continue to dive into the world of SEO, here are my suggestions:
Keep studying: Like I said, the SEO world is ever-changing; Google is constantly updating and putting out new releases. Stay tuned by following some of the top experts and publications. The Freelance Writers Den actually has a great bootcamp that goes super in-depth into SEO writing. It’s definitely worth checking out in their course library. Additionally, check out Neil Patel, SEMrush, and Yoast for more great info. There are also plenty of podcasts, ebooks, Facebook groups, and online courses on SEO if you want to take a deeper dive.
Track your SEO performance: Once you’ve published your content, you don’t have to continuously search the keyword to see if you’re ranking. Instead, tap into your SEO toolbox. Head over to Ubersuggest (again, one of many options), and enter your website’s URL. There, you can track your search traffic, your top SEO posts and your top-ranking keywords. Keep tabs on this as you experiment.
Optimize: If after a few weeks your article just isn’t doing much, it might be time to optimize it. Conduct an “audit” for your target keyword, and see what else you can do to beef up your content. If some of the top posts include a comparison table, for example, consider creating your own.
Honestly, many people struggle with SEO writing because, well, they don’t know how to write. You’ve already got that down, so now it’s time to show Google what you can do.
Want to give SEO writing a try? What’s the first topic you want to cover? Let us know in the comments below!
This is an updated version of a story that was previously published. We update our posts as often as possible to ensure they’re useful for our readers.
You’re a writer and your words are important — but are they enough?
Online, it’s tough to keep readers’ interest. They have lots of distractions at their fingertips, plus reading on their device is tiring. An attention-grabbing image can draw them in.
If you’re writing for your own blog, finding, modifying and using images appropriately is completely up to you.
If you’re a freelance writer producing blog content for your clients, then they may want you to suggest images. Some clients will even ask you to upload your completed post, including images, into WordPress for them.
Best practices for using images in your blog posts
Here are nine best practices for using images in your blog posts, whether for your blog or for your clients’ blog.
1. Always make sure you can legally use an image
When you’re looking for images, it’s very tempting to go straight to Google’s image search, type in what you want and pick an option.
Don’t do this. The images you find are very likely protected by copyright. Using them can land you — or your client — with a whole range of problems. At best, you might get a polite email asking you to remove the image. At worst, you might end up facing a hefty fine: in a few cases, images have been deliberately used to lure unwitting victims.
The best places to find images that you can legally use on your blog, or a client’s blog, are:
Sites that explicitly offer free images. Pixabay and Pexels are great sources of these: there are some other recommendations in this list of places to find free stock images for your blog.
Stock photography sites like iStock and Shutterstock, where you pay for images.
2. Come up with several different image options
When you’re searching for an image to use in a blog post, it’s tempting to simply pick the first one that you think will complement your work well.
Sometimes, looking a little longer can give you a much better range of images to choose from. Plus, if you’re using popular stock photography sites, digging a bit deeper than the first handful of images is likely to give you something more unique.
If you’re finding images for a client to approve, they may well appreciate you suggesting several options to choose from.
3. Use images that represent your audience and brand
Some stock photos can seem a little “cheesy” or overused and it’s important to keep searching to find an image that’s a good fit for your audience and personal brand.
For instance, perhaps you’ve written a blog post about how setbacks can help you grow and go further. You could illustrate this with a photo of a seedling growing… but that might not resonate with your audience of sporty college students. Maybe a picture of a race track would work better instead.
You may also want to keep in mind the color palette of your blog (or your clients’ blog) when you’re choosing images. Perhaps you want to use images with lots of bright primary colors, or maybe soft, pastel shades would suit your site better.
4. Crop and edit images to suit your piece
Sometimes, you might find a great image that needs a few adjustments to work. If the image is landscape and you need it to be portrait, you might be able to crop it at the top and bottom to make it work. If the image is too dark or light, you could adjust the brightness and contrast.
You don’t need to have expensive graphics editing software to perform basic image editing tasks. Free tools like Paint.NET can work just fine for simple edits.
Note: Depending on where you sourced your image, you might be able to use it freely but not edit or modify it in any way. Check the site’s terms and conditions if you’re unsure.
5. Resize images to the correct width for your blog
Whether you’re adding images to posts for your own blog or posts for a client’s blog, you want those images to be the right width before you upload them. Otherwise, they’ll need to be resized by the blogging software, potentially making them look fuzzy or take longer to load.
It’s a good practice to have a standard width for all images on your blog. This should be no more than the width of the post content area. For many blogs, somewhere from 500px-800px works well.
If you have a lot of images to resize, you can do them all at once using an online tool such as Bulk Resize Photos.
6. Compress images before uploading them
Each image in your blog post takes time to load. If you have several images that have a large file size, your website will be noticeably slower.
Readers will be impatient with slow websites and may leave before your content loads up on their device. Plus, search engines like Google are increasingly favoring fast websites, ranking them more highly in search results.
This is why it’s so important to compress your images before uploading them. Your image will stay the same size and should look the same after compression, but its file size will be smaller.
The easiest way to compress images is to use online tools like TinyPNG and Compress JPEG.
Tip: Use the .jpg format for photos. Use .png for images with only a few colors, text or a transparent background: this includes most screenshots and logos.
7. Name your image files using keywords
Let’s say you’re writing a blog post about libraries and their importance in local communities, titled “Why Libraries Matter And How You Can Protect Your Local Library.”
When you download a typical image, it might be named something like this:
books-1617327_640.jpg
That file name doesn’t include much useful information. Before uploading the image to your blog, you should rename it using useful keywords:
All images on your website should ideally have alt text (“alternative text”). This can be read by search engines, but more importantly, it can be read by screen readers. These are used by people who are blind or partially sighted.
Alt text makes your post more accessible, particularly if the images are important to the meaning and you write good, descriptive alt text.
For instance, here’s an image of library books from Pixabay:
Using the alt text “books” wouldn’t be very helpful. Instead, something like “Library books displayed on shelves” would work better.
Note: Alt text isn’t the same as title text. The title text for an image will be displayed when the user runs their cursor over the image. The alt text won’t be seen by regular users, only by search engines and users with a screen reader. It usually makes sense to use the same phrase or sentence for both the alt text and the title text. For help adding these, check out this post on image alt text vs image title.
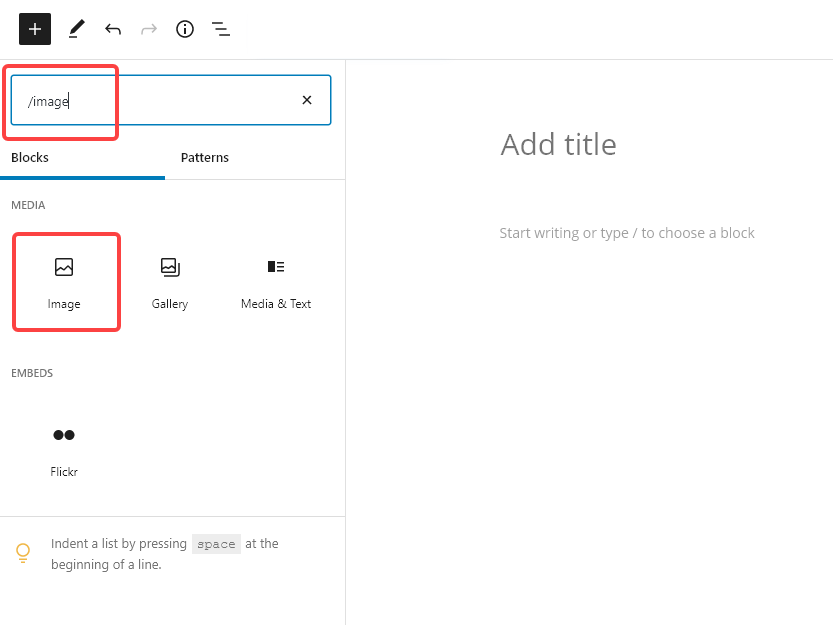
9. Consider using arrows or other elements on screenshots
If you’re demonstrating a technique using screenshots, it’s helpful to add arrows or boxes to point out particular parts of the image. These are sometimes called “callouts” or “markup.”
For instance, here’s a screenshot that shows you how to add an ‘Image’ block in WordPress’s block editor. The red boxes show you where to type in the search box and what to click on:
If you’ve got a screenshot with multiple different elements, using arrows or boxes can help readers quickly take in the relevant parts.
You may well feel, as a writer, that words are your thing. But using images in your content isn’t hard — and the right images could make a real difference to how engaging and useful your posts are.
If you’re a writer, it makes perfect sense: You can use a blog to serve as your author platform, market your work or find new freelance writing clients. Blogging is also a great way to experiment with your writing style.
This is the age of content — people are always looking for more to absorb, and your unique voice has a place on the vast, limitless interwebs, too.
How to start a blog
Starting a blog can feel overwhelming. But the truth is, it’s doable for anyone with the right guidance.
We’re here to help you navigate every step so you can start a blog stress-free — from choosing your domain name to publishing your first post.
This is a long post, so here’s a quick summary of what we’ll cover:
First things first when you start a blog: choosing a domain name. Where are people going to find you online?
This can be one of the most enjoyable parts of getting started with a blog; it’s such a rush when the URL you want is available and you can buy it right away.
But if your first choice isn’t available, if someone else is already using that URL, it can be stressful to come up with another domain that feels right. After all, this is a permanent home on the Internet you’re creating!
The truth though, is that you can always change this down the line if you decide to go in a different direction with your URL. The most important part isn’t choosing the perfect domain, it’s choosing one and getting started.
One of the best places to start is using a variation of your name. Especially as a writer, because you are your brand. Your name will never go out of style no matter how your interests change over time.
To check availability, search this handy domain-name checker:
If you’re feeling good about your choice, you can also visit Bluehost directly and purchase your domain there. The company offers a $2.95/month plan for The Write Life readers.
Even if yourname.com isn’t available, you might find it with a different ending, such as yourname.co or yourname.io. If you’re super committed to this whole writing thing, you can also try tacking a “writer” onto the end of your name, as in susanshainwriter.com.
Alternatively, you could opt for a creative blog name — but remember your interests and target audience may change as the years go by. When I started blogging in 2012, I focused solely on adventure travel and named my blog Travel Junkette. After expanding my niche and services, I switched to susanshain.com because my name won’t change, no matter what I’m blogging about.
Although it wasn’t a huge deal, I wish I’d started out using my name as the domain, and would advise you not to make the same mistake I did.
Once you’ve settled on your domain (or domains, if you’re like many of us writerpreneurs!), don’t wait to buy it. Even if you’re not ready to start a blog right now, domains are cheap — and you don’t want to risk losing the one you want.
If you’re really having a hard time picking a URL, review our more detailed post on how to choose a domain name.
Before you actually click “purchase,” though, you might want to read the next step; we’re going to tell you how to get a domain name for free.
2. Purchase a hosting package
Now it’s time to choose a web host.
What’s a web host? Your hosting company does all the technical magic to make sure your site actually appears when people type your domain name into their browser. In other words, it’s pretty important.
While we use MediaTemple to host The Write Life, it’s typically better for blogs with lots of traffic. You probably don’t need that if you’re just starting out, so go with a cheaper option instead.
For a new blog, try Bluehost. It’s used by top bloggers around the world and is known for its customer service and reliability.
The Write Life has a partnership with Bluehost whereby they allow our readers to purchase hosting for $2.95/month. The cool part is that INCLUDES your domain.
Oh, and pro freelancer money tip: Put your purchase (and all the purchases listed in this post) on a business credit card and keep the receipts; as investments in your business, they’re tax-deductible.
3. Install WordPress
We’re almost through with the techy stuff, we promise!
You have several different choices for blogging platforms, but we like WordPress best. Not only is it totally free, but it’s easy to learn, offers a wide variety of themes, and has an online community and abundance of plugins that make blogging accessible to everybody.
You can read comprehensive instructions for installing WordPress on your new blog here. Once you’ve completed that, you can officially log into your blog and start making it look pretty.
4. Put your site in “maintenance mode”
While working on your blog’s appearance, you might want to put up an “under construction” sign to greet visitors.
You don’t want any potential clients or readers to Google your name and find a half-finished site. (You may think you’re going to finish setting up your blog tomorrow, but we all know how writers procrastinate when there are no looming deadlines!)
To set up maintenance mode, just download this plugin. On your maintenance page, you could even include a link to your email newsletter or social media profiles so visitors have an alternate way of getting in touch with you. When you’re ready to share your blog with the world, simply deactivate and delete the plugin.
5. Choose a blog theme
Now we’re getting to the fun stuff! Your theme determines what your blog looks like, and you’ve got a lot of options to choose from. Yes, there’s a wide range of free themes, but if you’re serious about blogging, the customization and support offered by paid themes can’t be beaten.
Here at The Write Life, we use Genesis, which is one of the most popular premium themes available. Another popular and flexible theme is Thesis. On my first blog, I used Elegant Themes, which has a wide selection of beautiful themes at a reasonable price. All of these themes come with unlimited support — essential when you’re starting a blog.
If you want your blog to be a marketing tool for your writing services, you might look for a theme with a static home page (like mine). That way, your site will look professional and appealing to everyone — whether they’re there to read your latest post or hire you for a project.
Whatever you do, make sure your theme is “responsive,” which means it automatically adjusts to look good on any device. Since more than half of website visits are made on mobile phones, this is crucial for your blog’s aesthetic.
6. Create a blog header
I think it’s always worth getting a custom header for a new blog.
You can ask your favorite graphic designer, create one with Canva, or order one on Fiverr. I’ve had great luck getting headers and other graphics designed in this online marketplace, where thousands of people offer their services for $5 per gig.
7. Write your blog pages
Though you’re starting a blog and not a static website, you’ll still want a few pages that don’t change. (“Pages” are different from “posts,” which are the daily/weekly/monthly entries you publish on your blog.)
Here are some pages you may want to create:
About
The about page is frequently touted as one of the most-viewed pages on blogs, so don’t overlook it. Include a professional headshot and brief bio, and explain why you’re blogging and why the reader should care. What makes you an expert? How can you help them?
Don’t be afraid to let your personality shine through; blogging is a personal affair!
Contact
You want your readers to be able to get in touch with you, right? Then you’ll need a contact page.
It doesn’t have to be anything fancy; just tell your readers how best to reach you. Avoid putting your full email address on here, as spambots could get ahold of it. To work around that, you can use a contact form plugin, which we’ll link to below, or simply write something like “yourname AT yoursite DOT com.”
Portfolio
It’s your blog, so flaunt what you’ve got! Show your prospective clients and readers that you deserve their time and attention with examples of your past and present work.
Do you have a list of favorite writing tools? Or maybe books that have inspired you? Readers love resources pages, and for bloggers, they can also be a clever way to earn income from affiliate sales.
You probably won’t need this at first, but a “start here” page is smart once you have a decent amount of content. It’s a great opportunity to express your mission and highlight your best work, so your readers can see the value of your blog without wading through months or years worth of posts.
Joanna Penn does a good job with hers, encouraging readers to download her ebook and then choose a topic that interests them.
Work with me
If you’re using your new blog to sell your writing services, this page is essential. Be clear about how you can help people and how they can get in touch with you. You could even list packages of different services, like Lisa Rowan does on her site.
Once you’ve set up all your pages, make sure they’re easily accessible from the home page. If they’re not showing up, you may have to adjust your menus.
8. Install plugins
Plugins are great for everybody, especially those of us who are less comfortable with the technical side of things. Think of them as apps for your blog; they’re free tools you can install to do a variety of things.
Though having lots of plugins can undermine the functionality and security of your blog, there are several we recommend everyone look into:
Contact Form 7: If you want to avoid putting your email address on your contact page, use this plugin, which is frequently updated and receives good reviews.
Hello Bar: Want to get readers to sign up for your free newsletter? Or want to announce the release of your latest book? This plugin allows you to create a banner for the top of your blog.
Mashshare: These share buttons are similar to the ones you see here on The Write Life. Another minimalist option is Simple Share Buttons Adder. It doesn’t matter which plugin you choose; it’s just important to make social sharing easy for your readers.
Google Analytics Dashboard: This plugin tracks the visitors to your site so you can see what people are interested in and how they’re finding you.
Akismet: One of the headaches of blogging is the plethora of spam comments. This plugin will help you reduce the number of spammers that sneak through.
WP Super Cache: Another plugin that’s not sexy, but is important. Caching allows your blog to load faster, pleasing both your readers and Google.
Yoast SEO: This all-in-one SEO plugin helps you optimize your posts so you can get organic traffic from search engines.
9. Install widgets
If your blog has a sidebar, you might want to spruce it up with a few widgets, aka small boxes with different functions. That said, the minimalist look is in — so skip this step if you want to keep your sidebar simple.
Here are some ideas:
About box
You’ve probably seen this on a lot of blogs; it’s a box in the upper right-hand corner welcoming you to the site. Check out The Write Life managing editor Jessica Lawlor’s blog for a good example.
Social media icons
Make it easy for your readers to follow you on social media by including links to your profiles in the sidebar. Your theme will probably include this feature, but if not, here’s a basic tutorial.
Popular posts
Once you’ve been blogging for a while, you might want to highlight your most popular posts in the sidebar, which you can do with a basic text widget. We do this here on The Write Life so you can find our most popular content quickly and easily.
10. Purchase backup software
Don’t overlook this important step just because you don’t have content yet! It’s better to install this software early than to start blogging and forget until it’s too late.
Free options exist, but I’ve never had good luck with them — and for something as important as my entire blog, I don’t mind paying a little extra. (It’s a business write-off, remember?!) Popular backup options include VaultPress, BackupBuddy, and blogVault.
11. Start your email list
I know, I know, you haven’t even started blogging and I already want you to build an email list. Trust me; you’ll be so glad you did.
Alexis Grant, founder of The Write Life, agrees with me. “If I could go back and do one thing differently for my business, it would be starting a newsletter earlier,” she writes. “My email list is THAT important for my business, bringing traffic to my website, buys of my products and opportunities I never could’ve expected.”
Even if you don’t have anything to send, just start collecting email addresses. The best way to entice people to sign up is by offering a free ebook or resource. For a great example, check out The Write Life’s Freelance Writer Pitch Checklist.
My favorite email newsletter platform is Mailchimp. It’s intuitive, fun, and free for up to 2,000 subscribers.
A lot of creatives also use ConvertKit. It also offers a free plan, and some people say it’s easier to use than MailChimp. If you want more options, browse our list of news of tools for building your email list.
Once you’ve created your list, encourage your readers to sign up by adding a subscription box to your sidebar, and maybe even install a plugin like PopupAlly. Or, if you use ConvertKit, they have pop-up options built-in.
We recommend creating an editorial calendar, even if you are coordinating with no one other than yourself. It doesn’t have to be fancy; it can even be scribbled out in a notebook.
What’s important is that you plan your posts in advance, so you can keep track of your ideas and stick to a schedule. It’s also a chance to assess and tweak your content strategy. What do you want to write about? How will you draw readers in?
Don’t forget you’re writing for the web, so your style should be different than if you were writing for print. Keep your tone conversational, use “you” phrases to speak to the reader, and break up text with bullet points and sub-headers.
Images are important for grabbing attention and breaking up the text, so find a feature photo on Unsplash or Pexels to make each post shine.
13. Promote, promote, promote
You’re almost there! Now that you’ve started writing, it’s time to get readers. And I hate to be the bearer of bad news, but for many writers, this is the most surprisingly time-consuming aspect of blogging. Though it’d be nice if we could just write (that’s what we love to do, right?), it’s nicer to have people actually read your work.
You can try guest posting on other blogs, reposting on sites like Medium and LinkedIn, or including links when writing responses in forums, Facebook groups, or on Quora. Just make sure you’re adding value — and not spamming people with your URL.
Social media is another great way to get more traffic and grow your author following. Instead of merely tooting your own horn, be sure to interact with editors, writers and bloggers, too.Share their content with your community, comment on their posts and support them when and where you can. Hopefully, they’ll return the favor!
[sps_reusable_block post_id=43047]
In the end, creating a successful blog is about hard work and consistency. Keep posting helpful and engaging content, optimizing it for SEO, and sharing it with your networks — and you’ll soon see your new blog start to blossom.
Congratulations, you’ve now officially started a blog as a writer. Maybe one day it can become a full book? Time to get writing!
This post contains affiliate links. That means if you purchase through our links, you’re supporting The Write Life — and we thank you for that!
This is an updated version of a story that was previously published. We update our posts as often as possible to ensure they’re useful for our readers.
One-off assignments are a good starting point, but what you really need to form a reliable income stream is writing projects that continue over time: a company that wants you to write a blog post each week or a white paper each month, for example. Work (and pay) you can count on.
So how do you impress an editor with your first few assignments, with the goal of getting more assignments or even become a regular contributor?
I have spent much of my career building writing teams, including hiring freelance writers who contribute regularly to the websites my teams have managed. But most of those teams haven’t advertised openings for regular freelance contributors.
Why? Because we pulled from writers we already worked with, contributors who wrote a great first assignment for us, then another great assignment, then another.
How to convince someone to hire you for another writing job
When I hire a regular contributor, I want to know I can count on that writer to submit high-quality content on a regular basis. I might take a risk when assigning just one post to a writer I’ve never worked with before, but to bring on a regular contributor, I have to be absolutely certain the writer will pan out.
So how do you impress an editor to the point that they want to hire you for a recurring blogging job?
Here’s how to convince someone to hire you:
1. High-quality writing
This sound obvious, but it’s surprisingly difficult to find awesome writers. With so many writers looking for freelance writing jobs or blogging jobs, you’d think editors would be up to our eyebrows in quality contenders. But in reality, every editor I know is on the hunt for people who write well.
And here’s the thing: You don’t just have to write well, you have to write in a style that suits that particular publication. An increasing number of online publications and company blogs want to share ideas in an informal, friendly voice, not one that sounds stiff and stuffy. I’ve made the mistake before of hiring writers with excellent reputations and experience… only to find out they can’t nail that informal voice.
High-quality writing for the web also means eye-catching headlines, an engaging introduction that will hook the reader and easy-to-read paragraphs with lots of white space.
If you’re able to deliver high-quality work consistently, editors will clamor to get you on their roster.
2. Meet deadlines — every time
For an editor to rely on a writer on a regular basis, she has to be absolutely certain that person will meet deadlines, every time. Simply put, deliver what you promise. This quality is far more rare than it should be, so when you do deliver what you promise (or over-deliver), you will stick out, in a good way.
When writers don’t file posts when they say they will, editors end up scrambling for content to fill that spot, and that makes the job stressful.
Editors don’t like stress. They like writers who make their job easier.
This deadline aspect is so important that I’ve declined to work with writers simply because they missed their first deadline. Sure, emergencies happen and things come up, but if you’re working with an editor for the first time, get your work done ahead of your deadline, so you deliver what you promised even if something unexpected happens.
As a bonus, if you complete a piece and file early, that will most certainly put you on that editor’s list of writers he wants to work with again.
3. Turn in work that’s ready to publish
Take time to do little things before you file that make the editor’s job easier. Your assignment should be pretty much ready to publish when it lands in her inbox.
For example, look to see how the blog is formatted. Does it use H2s for subheads? Use those to format your post. Does each story include links to other posts on that blog? Find relevant places to add those links. Is each author bio just two sentences long? Shorten your four-sentence bio before you file, so the editor doesn’t have to ask you to do it later.
Go out of your way to adhere to those little details, because it means less work for the editor. You might not know all the rules the first time you write for a blog, but if you carefully watch all changes the editor makes, you’ll be able to make those same tweaks next time before you file the post. Your editor will notice! (More on this in the next bullet.)
On several of the blogs my team has managed, for example, posts need a two-sentence excerpt that shows on the homepage. First-time contributors don’t typically add this to the top of their posts, but sometimes, when we ask a contributor to write for us again, that writer adds the excerpt without us asking for it. The writer notices a preference and delivers it. That’s always a sign of a mutually beneficial relationship.
Learn how to edit your own copy, and deliver the post so it’s completely ready for publishing, and you’ll make your editor over-the-moon happy.
4. Be open to edits, and note the editor’s preferences
Writing is only half the job — you also have to be ready to make edits per the editor’s request. Too many writers assume their first draft is the final copy. Instead, assume you’ll need to make yourself available to answer questions, clarify points and maybe even reorganize your work to the editor’s liking.
And by all means, don’t take edits personally. Don’t get too attached to your darlings. Yes, sometimes an editor will suggest a change that does not improve your work. But most of the time, editors will make your work shine, so it’s worth your time to make changes they ask for.
While an editor doesn’t expect writers to know the publication’s preferences perfectly the first time they contribute, most will watch closely to see whether the writer makes an effort to incorporate changes on subsequent posts before they file.
For example, if I use track changes to add subheads to a writer’s post, I watch the next post he files to see if he added them himself. If I ask a writer to trim a post to 500 words, I hope she’ll know to do that with the next post, without me pointing it out.
In other words, editors like to work with writers who learn quickly and are smart and thoughtful enough to incorporate feedback. This not only shows your ability, it also demonstrates that you respect my time, just like I respect yours.
Time to ask for a regular writing gig?
Once you’ve proven just how great of a writer you are and how easy you are to work with, don’t be afraid to ask your editor whether she could use your work on a regular basis. But make sure you’ve strutted your stuff first!
Don’t be that writer who asks for a regular column before they’ve even written one post. I typically expect a writer to file at least three or four times before committing… and 90 percent of the time, that writer does not turn out to be the type of contributor we’re willing to invest in. This post-by-post trial period saves me from spending money on writers who don’t turn in the quality we need, and it also helps me spend less time editing blog posts that aren’t up to par.
Once you’ve proven yourself, let the editor know you’d love to contribute more often. Some blogs want regular writers to contribute once a month, while others might look for posts from regulars twice a month or even once or twice a week. This varies according to the company, so don’t be disappointed if a once-a-month column is all the editor can offer you.
If you’ve written for the editor several times and they still don’t bite when you ask for a regular gig, it’s probably due to one of these factors:
Your writing isn’t good enough. Keep practicing, and follow the advice above.
The editor doesn’t have space for another regular contributor.
The editor doesn’t have the budget to pay you regularly.
Even if you don’t score recurring work, it isn’t a waste of time to ask. Budgets and writing teams are always in flux, and if the editor truly likes your work, he’ll keep you in mind the next time an opening comes up.
Good editors have high standards. But if you check all of these boxes, you’ll put yourself in the position to land a writing gig — or two or three! — as a regular contributor.
Have any questions you’re dying to ask a blog editor? Go for it in the comments!
This is an updated version of a story that was previously published. We update our posts as often as possible to ensure they’re useful for our readers.
There’s no sugar-coating it: The world of SEO can be tricky to navigate — but it’s absolutely doable, even for the newest of newbies.
It’s so worth it, too. SEO is a powerful long-term approach writers can utilize to boost (free!) traffic to their websites or blogs.
Sure, you can build an SEO article from the ground up. (Might I suggest this writer’s guide to SEO writing?) But it doesn’t have to be that complicated just yet. You can start by optimizing your existing content.
I’ll walk you through my approach — as a writer myself — to on-page SEO optimizations.
On-page SEO optimizations: What does that mean anyway?
Let’s start with the basics. In the SEO world, there are a ton of technical terms, but don’t let that scare you.
When we talk about on-page SEO optimization, we’re talking about taking an existing article or page and updating it to increase its chances of ranking on Google — aka attracting more eyeballs.
On-page SEO optimizations can be a relatively easy way to step into the SEO world. After all, you already have the content out there. You just need to make some updates so Google will take notice.
How to identify content worth optimizing for SEO
First and foremost: It’s not worth attempting to optimize every single article on your website or blog. You have to remember different pieces of content serve different purposes. Some will work better on social. Others are perfect for your email newsletter audience. And some just might have the potential to rank on Google.
So how do you determine which of your existing articles are worth optimizing?
I suggest starting with the low-hanging fruit. Using a free SEO tool like Ubersuggest, search your website’s URL. You’ll see which pages get the most traffic through Google and with what keywords. You might identify a great opportunity to optimize what’s already working well and climb the (Google) ranks.
If you don’t yet have enough traffic to your site, or you’re not spotting any obvious keyword potential, you can always do a quick DIY survey of your content.
When doing this, I like to think about what folks Google. I look for articles that take the shape of ultimate how-to guides, “best of” lists, product comparisons, recommendations, questions answered… you name it. These posts tend to be more all-encompassing and lengthy in nature. Perfect for Google.
Let’s take a quick assessment of some articles on The Write Life and use them as examples.
I’m seeing articles about the best laptops for writers, how to self-publish a book, how to get paid to write and a guide to Upwork. I suspect people are searching these terms, so these all have the potential to make strong SEO articles. (And in many cases, they do!)
On the other hand, something like “ways writers can recreate the coffee shop experience” probably isn’t something that gets searched a ton, so you probably wouldn’t want to focus your efforts on optimizing it. However, it’s great content for other platforms like social pages, community groups or newsletters.
Once you pluck a few ideas from your site, it’s time to dive in with some keyword research.
A step-by-step guide to the on-page SEO optimization process
This is the fun part of SEO optimizations (at least in my humble opinion). I’ll walk you through each step I take when optimizing an article for SEO.
Step 1: Pinpoint your target keyword
If you don’t already have a selected keyword, you’ll need to do some research. Remember, your keyword is the word or phrase you want to rank for on Google.
Use a keyword research tool for this. We love Ahrefs around these parts, but again Ubersuggest is a great (and free!) alternative.
So let’s say you want to optimize an article about cold brew coffee. Type the core terms into Ubersuggest. In this case, it’d be “cold brew coffee.” Leave out any unnecessary adjectives, prepositions or articles. Here’s another example: If you were optimizing a post about how to self-publish a book, you might simply search “self-publish book.”
Going back to the cold brew coffee example, when you search that term in Ubersuggest, you’ll find there’s a high search volume (49,500 when we looked). That’s great! That means tens of thousands of people are searching the term each month.
However, you’ll see the SEO difficulty (SD) is pretty high. (At the time we checked, it was 58.) The SEO difficulty ranges from zero to 100, and the closer you can get to zero, the better.
If you scroll down, you’ll find more keyword ideas. View all keyword ideas to see what related terms people search. Consider the different angles.
Remember: Your goal is to find a relevant keyword with a high search volume and a low SD.
Also, keep your reader top of mind. The keyword “how to make cold brew coffee” has a lot of potential — 33,100 monthly searches with a 22 SD. But if you want to optimize a review you wrote of the Pumpkin Cream Cold Brew from Starbucks, readers are less likely to click because you’re not giving them what they’re looking for.
For the sake of this example, let’s optimize our hypothetical article with the keyword, “how to make cold brew coffee.” It has a high search volume and a relatively low SD.
Step 2: Read Google’s mind
You’re about to read Google’s mind. Think you’re ready? It’s not as difficult as you might think!
In this step, your goal is to better understand what Google considers top-ranking material for this keyword. Really, you’re just surveying your competition.
Here’s what you’ll need to do: Search your target keyword in Google, and take a good look at the first page of results. Start taking notes on:
The top-ranking articles: Read through the top three to five ranking articles. What content do they cover? What questions do they answer? Take inventory of headlines, formatting, tables and graphics.
The featured snippet: For some keywords, Google will populate what’s called a “featured snippet.” This is the box of text that populates at the top of your Google search. Note the content it’s highlighting. This is Google saying, “Hey, here’s the best answer!” If you can rank in this top spot, you’ll get more views, but fair warning: It’s pretty tough.
People also ask: This box contains questions related to your keyword. Consider: Are these relevant questions you could answer in your article? For instance, people also ask, “Can regular coffee be used for cold brew?” You could probably easily answer this somewhere in your article: “You can use regular coffee for cold brew. In fact, you can use any sort of coffee you’d like.”
Related searches: Finally, scroll down the related searches at the bottom of the first page. See if anything stands out. You might get some good ideas for topics you can add to your existing content like, “how to make cold brew in a mason jar” or “how to strain cold brew coffee.”
Again, the goal here is to simply take inventory and survey your competition. In a way, you’re getting inside Google’s brain to see what it “likes.”
Step 3: Beef up your article
It’s finally time to write!
With on-page optimizations, you’ll work with the existing content you have. There’s rarely a reason to delete everything and start over. You simply want to beef up your article with additional information, reporting, graphics or sections you noted in step two.
Of course, you never want to copy what exactly another top-ranking site is doing. Make this your own! But maybe one article included a neat graphic, and that sparked an idea. Or maybe another article listed several cold brew coffee recipes at the end of their guide. Perhaps you add one or two of your own. Again, use your research as inspiration and guidance — not your rulebook.
As you work, keep your reader in mind. This is one reason I love SEO writing — your goal is to serve the reader and give them all the information they’re seeking. Now, this doesn’t mean you want to jam-pack your article with every single element you noted from the top-ranking articles.
Instead, ask yourself: If I wanted to learn how to make cold brew coffee, what would I want or need to know?
Additionally, maintain your natural writing style and voice. Although SEO writing may feel a bit more prescriptive, you’re not writing for a robot. Avoid keyword-stuffing at all costs. (That means awkwardly wedging keywords into your post.) Again, SEO is all about the reader.
You’ll want to pay close attention to your headline (or title tag), excerpt (or meta description), you subheads (or H2) and your image descriptions. If you can do so naturally, include your keyword in these.
Links also help boost page rankings, so find opportunities to link out to credible sources. Or, once you republish your newly refreshed article, see if you can find other pages to link to it on your site (again, when relevant!).
Step 4: Give it a week and check in
The optimization process is ongoing, and it’ll likely take a good bit of experimenting.
Once you update your content, give it a week or so before checking in on it. Again, you can use Ubersuggest to peep your top pages and keywords.
After a few months, take another look at what’s ranking on Google for your intended keyword, and see if there’s anything else you can do to boost your rankings.
The ultimate key? Patience and persistence. The optimization process is ongoing. Google is constantly shifting its algorithms, and new articles are jumping in to compete for those rankings each day. Just keep your fingers to the pulse, and keep working. I have faith you’ll land on the magical Page One eventually!
Got an article in mind you’d like to optimize? Share your updates in the comments below!