Tag: online presence

  • 10 Great Portfolio Websites for Freelance Writers

    10 Great Portfolio Websites for Freelance Writers

    In this age of online everything, your web presence can make or break your freelance career, especially if you’re just starting out as a freelance writer.

    If prospective clients don’t know you by reputation, they need a quick, easy way to suss out your work, your style and your level of professionalism. While social media accounts can do wonders (having a few thousand followers never hurt a freelancer’s credibility), you’ll need more than that as your online calling card.

    That’s where your online portfolio comes into play. Even if you’re not quite ready to start a blog, a simple portfolio website that promotes your freelance writing can do a lot to help you land clients.

    Regardless of which of these portfolio websites you decide to go with, you should aim for these two things:

    1.Easy-to-read clips: If someone is looking to hire you, their main goal in coming to your site is to read your work and see if they like it. Make it simple for them!

    2. Uncluttered design: If a prospective client can’t find what they need in less than 10 seconds, you’ve got too much going on. You’ve lost their attention… and a potential client.

    A photograph of a woman smiling and looking out the window. She is holding an open book in one hand and reading glasses in the other. The text overlay says Portfolio Websites for Freelance Writers

    Easy-to-use Portfolio Websites to Showcase Your Work

    An online portfolio that fulfills these two basic criteria doesn’t have to be complicated to create. You’ve got lots of good portfolio design tools to help you get there! And if you’re looking for free portfolio websites, we’ve got you covered there too.

    When you’re ready to land your next freelance writing job, here are some easy-to-use portfolio websites to choose from.

    1. Squarespace

    Squarespace is an effortless drag-and-drop website builder that offers a stellar visual experience. While this isn’t a traditional portfolio website (nor is it targeted solely at writers), it’s a really good choice if you incorporate design or graphics into your work.

    Their templates give off a clean, minimalist and sophisticated vibe. And their responsive design is rock solid—an important factor when prospective clients want to view your writing on their phones or tablets. While there are many website building tools—like Wix and Weebly—Squarespace comes out ahead for its sleek visual design.

    Cool Feature: Stuck on a design issue while building your portfolio at 3 a.m.? Squarespace’s 24/7 client support (via email or live chat from Monday to Friday) is top-notch. Being able to communicate with a real human being when you have a question or issue can make freelance life that much easier.  

    Free version: No but there is a free trial

    Upgrade option: It costs $12 per month for a personal website with a free custom domain. For business and commerce versions, which include SEO features, advanced analytics, fully-integrated e-commerce and unlimited storage, it costs $18 to $40 per month. 

    2. Clippings.me

    Clippings.me was created explicitly for freelance journalists. It gives you a quick and easy way to show off your favorite clips, and add just enough detail about yourself to make you seem human. Like Journo Portfolio, you can add links, upload PDFs or embed multimedia pieces, including podcasts. And if you get stuck finding the right words to sell yourself or if you need some design guidance, check out their Writing Portfolio Guide

    Clippings.me also offers an open journalism directory where you can browse journalists based on beats or by country to find potential interviewees for the stories you cover You could (hopefully) use it to gain access to more prospective clients.

    Cool Feature: Simplicity is the name of the game. have the bare minimum technical skills but still want a refreshing layout for your online portfolio, this is a great choice.

    Free version: Yes! It’s free for the basic version, which allows up to 10 articles.

    Upgrade option: The pro version costs $9.99 per month, which includes unlimited clippings, downloadable resume on profile, contact forms, search engine optimization (SEO) and portfolio privacy, password-protected portfolio and features like Google Analytics integration so you can measure views.

    3. Muck Rack

    Muck Rack is a media database that helps connect journalists and PR pros—and their platform gives writers a slick way to easily showcase their work. 

    It creates and maintains the portfolio for you by automatically compiling articles, outlets, and social media profiles, which is one of the easiest options in terms of both set-up and maintenance. You can customize your page by adding a bio, listing your beats and spotlighting your best pieces.

    Muck Rack boasts it’s the easiest, most unlimited way to build your portfolio, grow your following and quantify your impact. The best part? It’s all free.

    Cool Feature: Do you ever wonder how big your reach is? With Muck Rack’s Who Shared My Link tool, you can instantly see the total number of social shares for your article and which other journalists shared your stories.

    Free version: Yes! It’s free for all users. Additional features are unlocked for journalists Muck Rack verifies—check out the criteria to become a verified journalist.

    4. The Freelancer by Contently

    The Freelancer by Contently is a portfolio website specifically for freelance writers and journalists. In addition to serving as your online portfolio, it can serve as a place to find work and connect directly with clients. Here are its top three compelling features:

    1. It uses a simple and single-page portfolio interface where you can display an unlimited number of projects or blog posts
    2. Potential clients can filter projects based on the clients you’ve worked with, topics and skills, which are great for writers that work in multiple industries
    3. Freelancers with professional experience might even be contacted for freelance opportunities with clients like Marriott, Microsoft and Walmart 

    Cool Feature: Contently has a rates database so you can see what other freelancers earn, and a freelance rates calculator to help you determine the amount you should charge for each client. 

    Free version: Yes! It’s free for writers. (Clients pay to tap into that network.)

    Want more writing advice?

    Subscribe to get our latest content by email.

      We won’t send you spam. Unsubscribe at any time.

      5. Journo Portfolio

      On Journo Portfolio, you can create a modern, no-fuss online portfolio. The dashboard is easy to use: customize your site’s look with six distinct themes, and sort your clips into any number of pages or content blocks.

      Another handy feature is the range of ways you can share materials: link directly to clips (just type in the URL and Journo Portfolio will grab the title, publication, date, and content), or upload almost any kind of multimedia, including PDFs, videos and images.

      Cool Feature: To help you keep track of your metrics, Journo Portfolio’s built-in analytics show you how many visitors your site has had, how long they spent on the site and where they came from. Wanna go the extra mile? integrate your dashboard with your private Google Analytics account so you can access all the raw data available.

      Free version: Yes! It’s free for a name.journoportfolio.com URL, and you can host up to 10 articles.

      Upgrade option: For the pro version, pay $5 to $10 per month. That includes unlimited pages, article back-ups, and the ability to use your own domain, like www.yourname.com.

      6. WordPress.com

      WordPress is the grandfather of content management platforms. While not specifically geared towards online portfolios, the joy of WordPress is that you can do pretty much anything you want with it. It’s available as a totally free, no-frills blog; a paid version with more bells and whistles; or the “install-it-yourself-and-do-whatever-the-hell-you-like setup.”

      Your standard WordPress themes aren’t all ideal for portfolio work, but search Google for “WordPress portfolio themes” and you’ll have everything you could ask for—WordPress even offers this dedicated portfolio splash page! This is a great platform for people who want lots of options and total creative control (and who don’t mind fussing around with a little CSS).

      Cool Feature: Since WordPress is so adaptable, it can be a good place to start if you think you may want something beyond a portfolio site somewhere down the line. That way, when you realize that you want to be both a freelance writer and photographer, you’re not stuck on a platform where you can’t show off your other skills.

      Free version: Yes! For a basic blog.

      Upgrade option: For more control over how the site looks and functions, some freelancers choose to upgrade to the $8-per-month premium option. That gives you access to marketing and monetization tools, unlimited premium themes and advanced site design customization. 

      7. Writer’s Residence

      Run by Monica Shaw and Tim Harding, a writer and programmer duo in the UK, Writer’s Residence portfolios have two simple goals:

      1. To make it hassle-free for writers to showcase their best work with a beautiful website
      2. To give writers a valuable tool that they can use to market their careers

      Whether you’re an aspiring freelance writer or a published author, Writer’s Residence understands that a well designed website highlights your professionalism and makes it easy for editors to see your work. Bring your own domain or use one of theirs, get creative with their variety of templates and use their “brain-dead simple system” to have your website up and running in 30 minutes. 

      Cool Feature: No HTML experience? No biggie! When you create a portfolio with Writer’s Residence, they take care of the design so you can stick to your expertise—writing. Here, you’d build your site with plain text using their simple forms. And if you do want to get fancy, customization is an option, too. 

      Free version: Yes! All accounts come with a 30-day free trial.

      Upgrade option: After the trial, continue managing your website for $8.99 per month (or £5.49) on this easy platform that lets you upload an unlimited number of writing samples and provides prompt and personal customer support.

      8. Writerfolio

      The writing industry is highly competitive—make your writing stand out with an appealing and professional Writerfolio portfolio to leave a great first impression with clients and editors. That’s sure to land you your next writing job!

      On this platform that also requires no computer skills, you can build a portfolio with unlimited writing samples with attachment uploads, a variety of themes to choose from, an easy fill-in-the-blanks portfolio setup and more. 

      Cool Feature: They have a 100% satisfaction guarantee—if you’re not 100% happy, they’ll refund you with no questions asked.

      Free version: No, but you can try out a free demo without evening signing up! 

      Upgrade option: Memberships cost $4 per month and come with a complete online writing portfolio at yourname.writerfolio.com (but you can use yourname.com, if you already own it).

      9. Format

      Any kind of artist can find a home here, from photographers and designers to writers and illustrators. Format provides an impressive selection of curated themes to fit your unique brand, giving you a beautiful digital canvas to show off your best work.

      Your portfolio with Format will be automatically optimized for mobile—so clients can view your work from any device—and you can enjoy unlimited bandwidth and blog posts, copyright protection for any image you upload, plus social media integration. Format will also give you a free domain name for a year!

      Need some design inspo? Check out these writer portfolios using Format’s themes. 

      Cool Feature: For when you need to make a change on-the-fly, Format’s iOS apps make it easy for you to show off your portfolio, manage your menu items and create and write blog posts anywhere you go. 

      Free version: No, but you can try it free for two weeks to see if it’s a fit!

      Upgrade option: With the Pro, Pro Plus and Unlimited plans, creatives can tailor their website with dozens of themes, custom code editing, 24/7 support and SEO tools. A bit on the pricey side, monthly membership costs range from $12 to $25

      10. Carbonmade

      Carbonmade has been building portfolio tools for creatives since 2005. Fifteen years later, they offer hundreds of features specifically built for creatives:

      • They can personalize your starting point layouts specifically for your profession
      • Carbonmade is automatically responsive and optimized for all devices so your site always looks great
      •  You can link your own domain or choose from the ones included in all plans: name.carbonmade.com, name.portfolio.site or name.gfx.work options
      • Audio and PDF upload support

      Cool Feature: Instead of sticking to a certain theme or layout, Carbonmade lets you use dozens of flexible layout blocks to design your website—just drag and drop to create your dream portfolio. No limitations here. 

      Free version: No, but check out the free trial! 

      Upgrade option: Monthly membership costs range from $8 to $18. For the cost of two coffee cups per month, writers typically enjoy the $8 plan for access to eight projects and unlimited images and videos. 

      Examples of online portfolio websites

      Now that you’ve got lots of portfolio websites to choose from, want to see some of them in action?

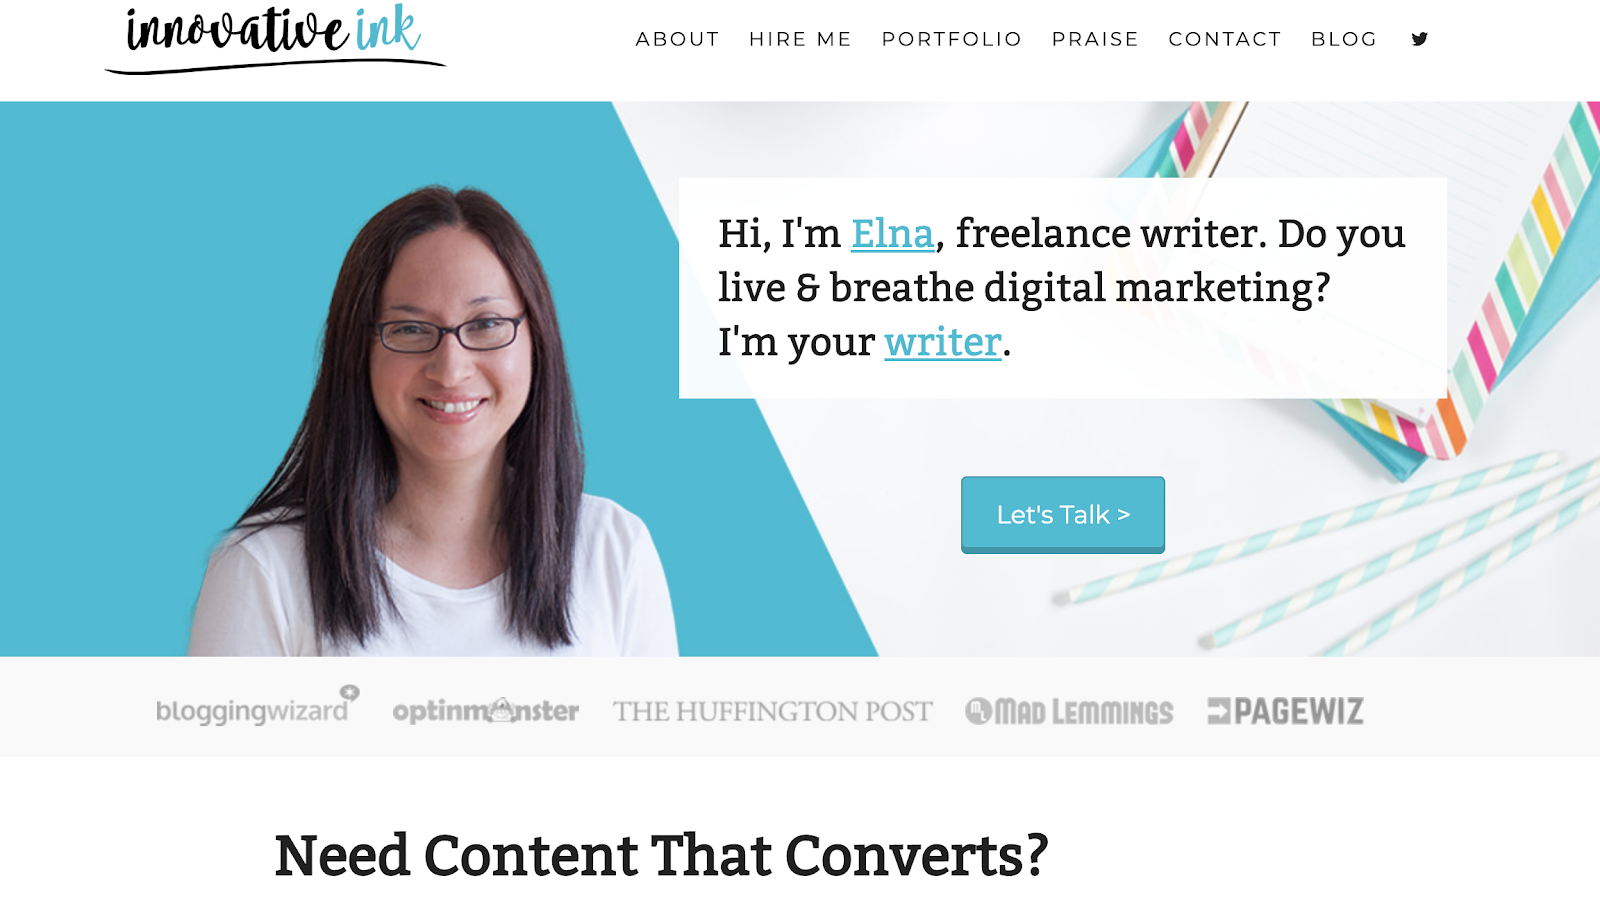
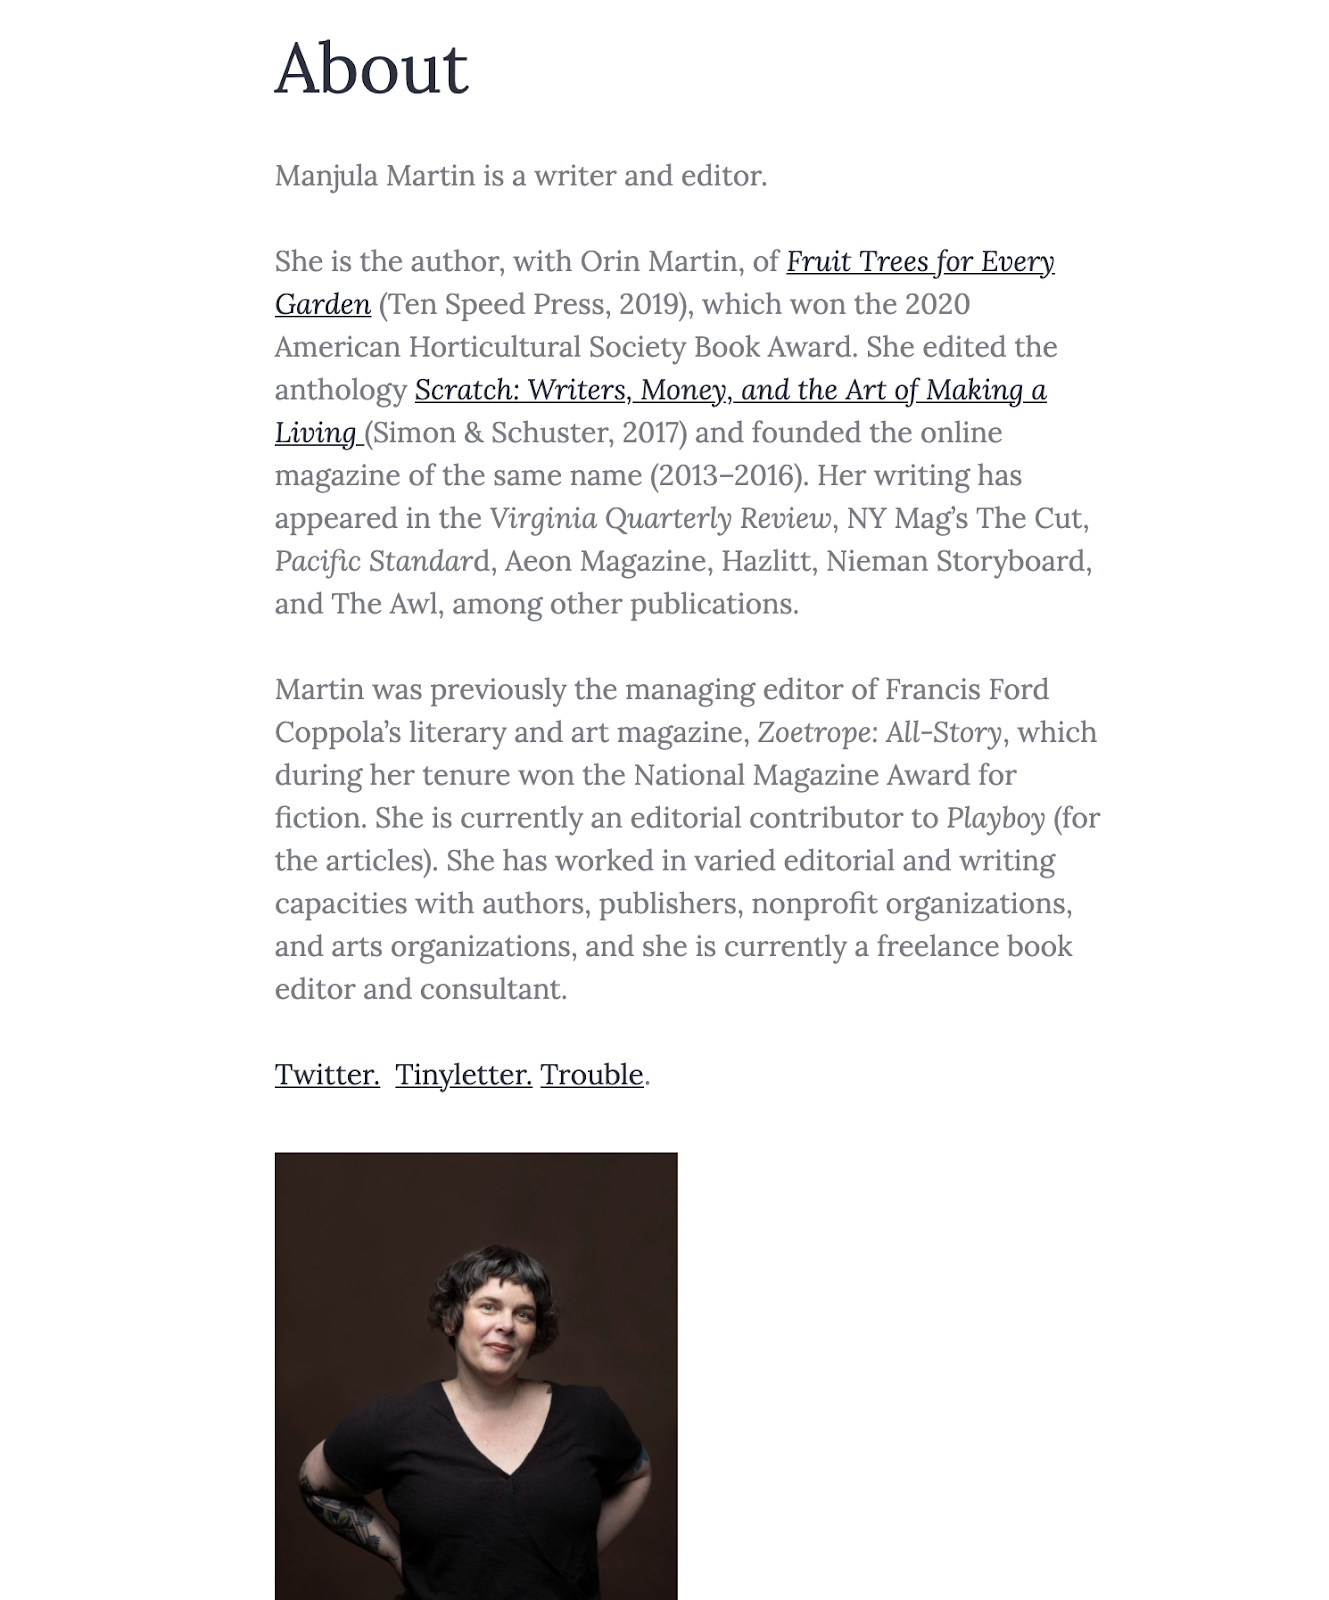
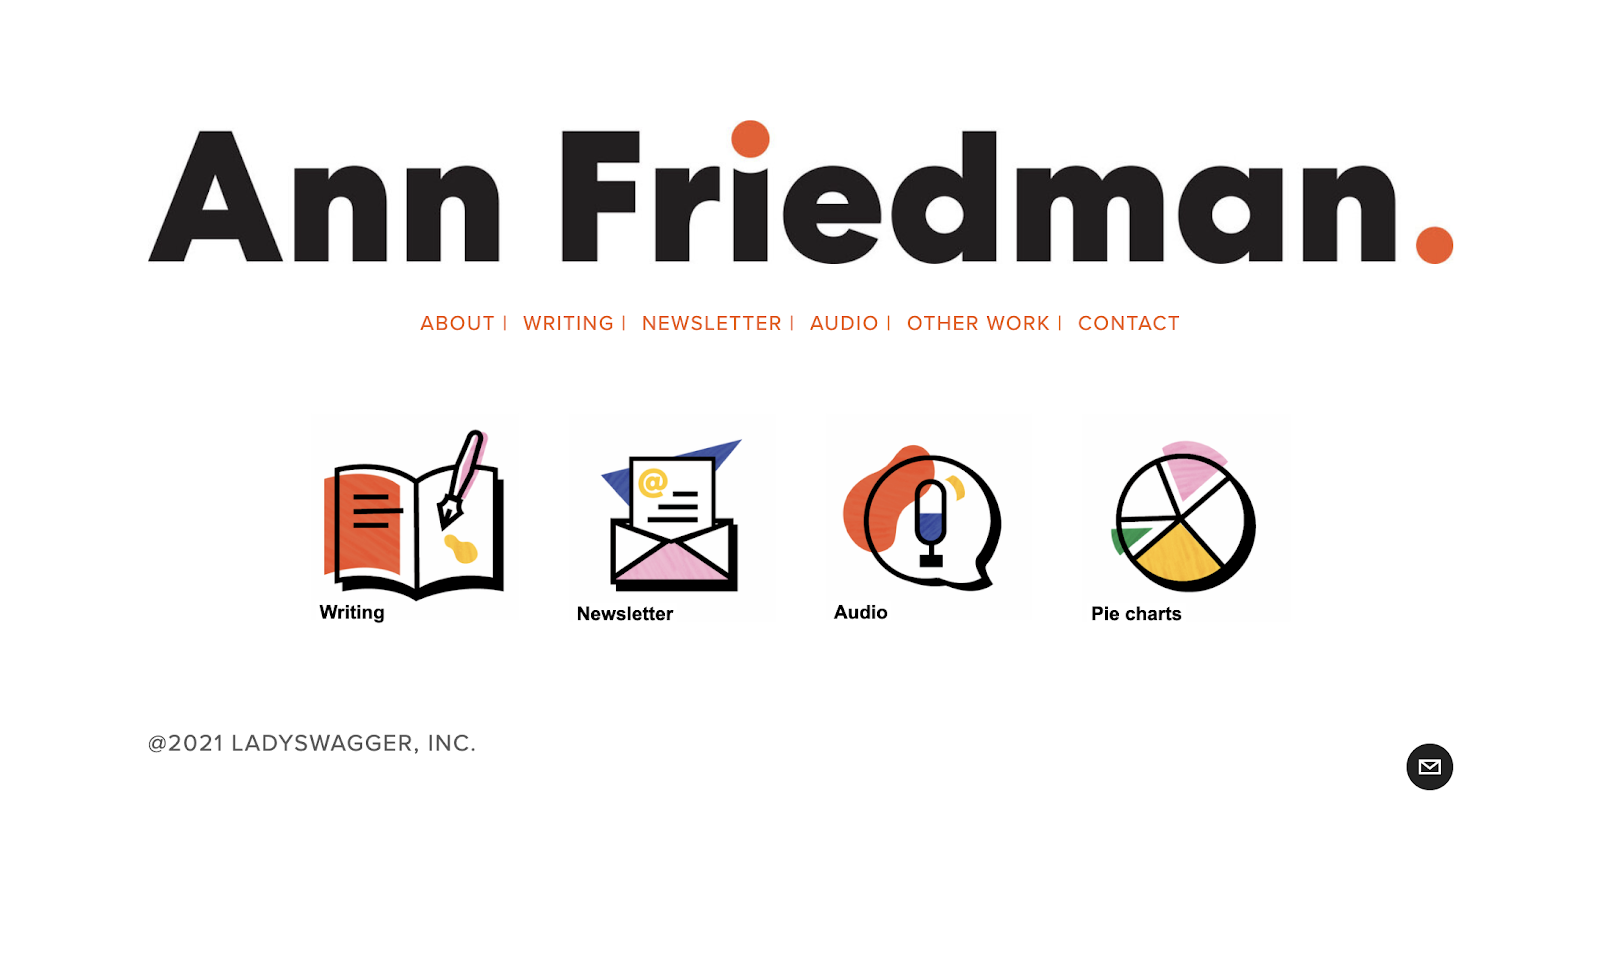
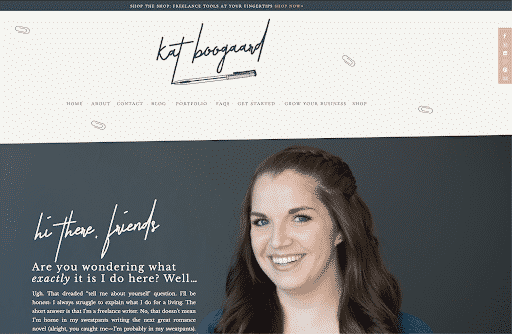
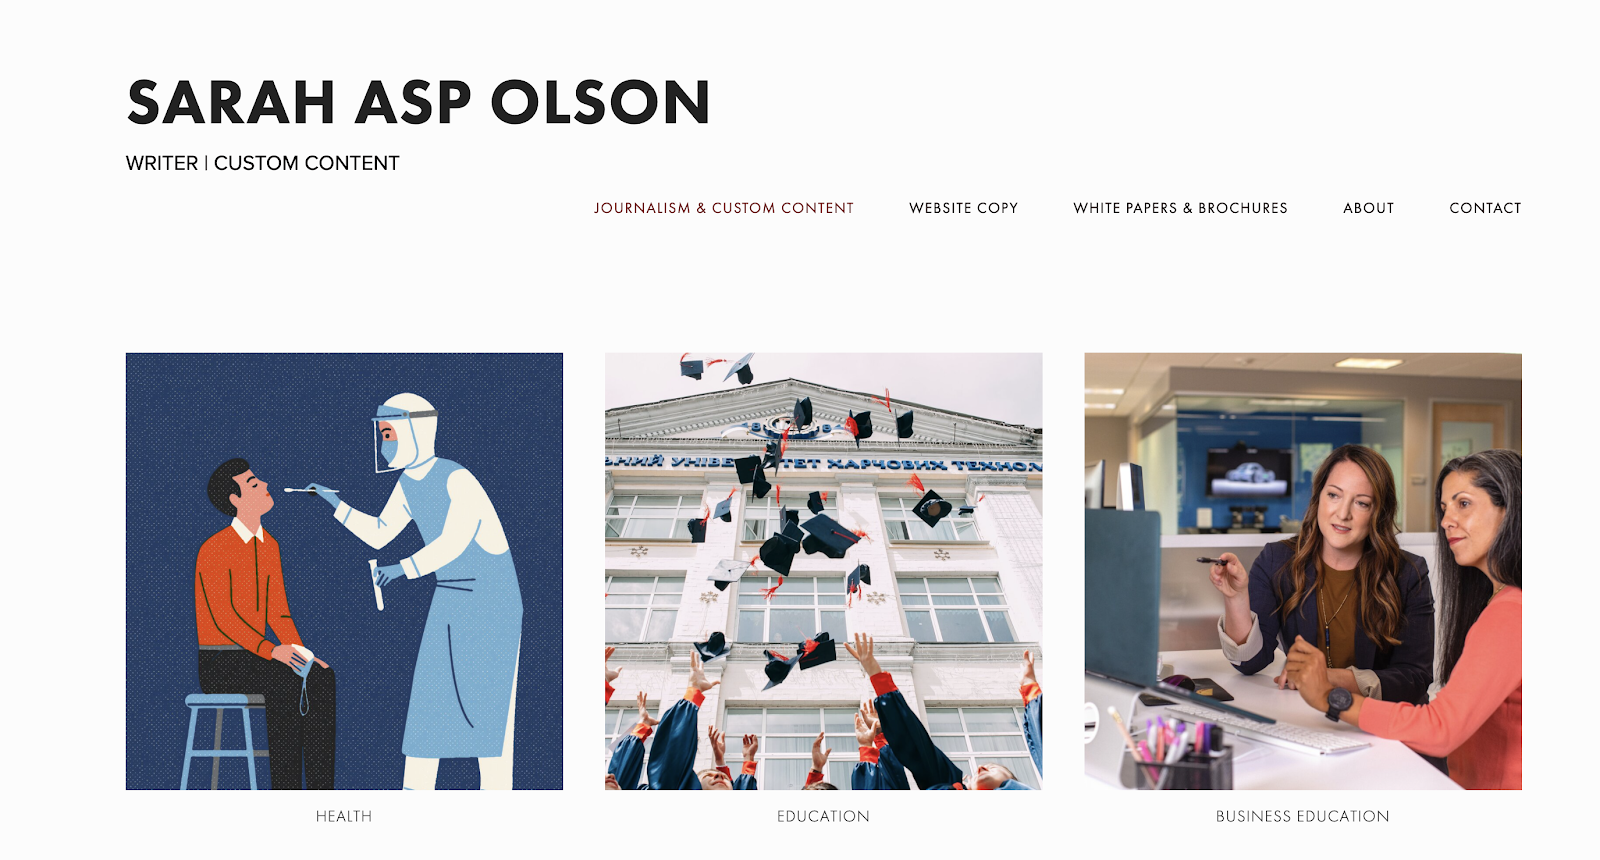
      We’ve compiled a list of online writing portfolios to inspire you. Here’s where to check out some online portfolio examples.

      Want more writing advice?

      Subscribe to get our latest content by email.

        We won’t send you spam. Unsubscribe at any time.

        The original version of this story was written by Annie Rose Favreau. We updated the post so it’s more useful for our readers.

      • How to Publish on Medium… and Make Money from It

        How to Publish on Medium… and Make Money from It

        When it comes to writing online, there are endless options for publishing your work.

        However, for the most part you have two main options: to create your own website to publish your content, or to use a site that will host your writing for you.

        If you don’t want to do the extra work of setting up your own website, you can use Medium to get publishing right away.

        If you have been writing online for any length of time, you have probably stumbled across Medium.com as a publishing platform.

        [sps_reusable_block post_id=43047]

        If you’re a writer, you might want to know how to publish on Medium and how to get set up with an account. We will go over what Medium is, how it works, how to publish on their site, and how to monetize your writing on Medium.

        how to publish on medium

        What is Medium

        According to their website, Medium is “A place to write, read, and connect.” If you haven’t used it before, it is essentially a publishing platform with a social networking aspect built-in.

        As you publish, Medium helps send your articles out to people who are interested in the topics you write about. It also has a clean interface so you can publish easily without all of the complications of publishing on your own site.

        Just to note, Medium is not the first website to offer an easy-to-use blog. Before Medium there were sites like WordPress.com, Blogger, and Tumblr. However, Medium has a different overall look and different monetization features.

        Why publish on Medium

        A lot of people choose to start writing on Medium because it’s free and already has a lot of built-in traffic. With a traditional website, you often have to work hard to send people to your website. On Medium, when you publish with certain keywords or categories, people who are already on the site will naturally find your writing. 

        That can save you a lot of time from worrying about growth, SEO, or any of the other stresses that come with owning your own website.

        There is a built-in algorithm, similar to what you would find on social media sites, that tailors content to you so you can find interesting writers and posts to read. As you can imagine, when you publish on this site, it gives the same benefits to your content as well by showing it to people who would be interested in your work.

        It’s not easy to do, but there is also a chance for your articles to go viral across Medium. If they hit a certain number of readers, likes, and comments, there’s a chance for them to appear in front of more people or to be sent out in their newsletter.

        Medium also connects to your social media profiles, so you can automatically send out your articles through them. This also means you can connect with people who already follow you on social media. If you’ve done the hard work to build connections and get to know other people, they will have the chance to follow you on Medium as well.

        Keep in mind, you do not have to exclusively only post your content on Medium or on your own website, you can share it in both places if it makes sense for your publishing strategy. 

        How to get started with Medium

        To start writing on Medium, you will need to sign up for an account on their site. As mentioned before, it’s free to sign up but they do have a membership option. The membership allows you unlimited access to every story with a portion of your membership going to the writers you read the most. It starts at $5 per month or $50 for the year.

        Once you sign up, you’re ready to start writing. Signing up for an account also gives you the ability to comment on other people’s blogs, follow certain authors or publications, and generally network with other writers.

        The basics of publishing on Medium

        To publish on Medium, you simply need to add in a new post, write your text, and format it to look how you want it to – which is easy with their editing tools. It’s helpful to have a tool that is easy to edit and manage if you don’t have a lot of technology or coding skills.

        After you write your post, you can add in some tags or add it into certain publications. Then you simply need to publish the post and if you link your social media profiles, it will automatically send out to them as well.

        You can learn more about publishing on Medium and formatting your article in this article.

        Inside of Medium, you have the option to set up what they call a publication on top of writing your regular articles. Publications are often written by multiple authors around one particular topic. You can create your own publication or join one that already has readers (with permission from the publications’ editors).

        Publications allow writers to send out newsletters and they also receive their own stats page, so all the writers involved can keep track of how the publication is doing or where readers are coming from.

        Plan what to write about

        Ideally, before you start publishing on Medium, you should outline what you’re going to cover and make a basic content calendar.

        Once you decide what to write about, you’ll want to set up a publishing schedule. What can you fit inside your schedule and how often can you publish a post? Answering those questions will give you an idea of how often you should be publishing. You don’t want to set up a blog to only publish in it once every few months.

        Medium keeps track of your engagement and your overall metrics, so you can see which posts are gaining traction. That way, you can tailor your future content around what your audience already loves to read. Even with the best planning, it can be hard to figure out what readers will love to read from you, so analytics can help.

        How to make money on Medium

        Now let’s get to the real question that most people want to know: how can you make money on Medium? If you’re going to be putting in the hard work to come up with a niche, publish regularly, and stay on top of your content, you might as well make some cold hard cash while you do so.

        They have a whole page that breaks down the specifics, but we’ll give you a quick overview to get started.

        First, you’ll need to apply for the program and meet its eligibility requirements. As of the time of writing this article, to meet their criteria you need to publish a story, gain at least a hundred followers, and publish one every six months.

        One of the first ways you can get paid is by keeping and attracting readers to your work. The more people read and stay on your stories, the more you will get paid.

        From there, you can also make money based on how many people you can convince to join the Medium membership. As of the time of writing this, you earn half of their membership fee (after payment processing fees) for as long as they remain a member. That’s a good deal for a lot of creators out there to start making an income from their writing.

        Overall, Medium is a great site for writers to publish their content and reach a whole new audience.

        [sps_reusable_block post_id=43047]

      • 5 Marketing Strategies for Writers Who Hate Promoting Their Own Work

        5 Marketing Strategies for Writers Who Hate Promoting Their Own Work

        In a long-ago golden age, all a writer had to do was write; he churned out pages, presented them to an editor, and let others worry about promotion and advertising.

        Those days are long gone.

        Today, writers must be their own most ardent advocate, marketer and promoter. Self-promotion is as integral to writing success as any tool in the writing toolbox. In this post, we’ll look at five marketing strategies that will help you gain more exposure as a writer.

        We all know the importance of self-promotion, yet many of us are horrible at it. We’re conscientious in every other aspect of our craft. We outline, we carve out time to write, we edit and do everything else we can for our work to stand out. Except self-promote.

        For some fortunate writers, self-promotion is as natural as breathing. For others (especially introverts like me) it’s a daunting task, but one that must be done, and done well.

        The challenges of self-promotion

        Nature

        In her book Quiet: The Power of Introverts in a World That Can’t Stop Talking, Susan Cain writes,

        To advance our careers, we’re expected to promote ourselves unabashedly. The authors whose books get published – once accepted as a reclusive breed – are now vetted by publicists to make sure they’re talk-show ready.”

        If you’re a natural introvert, it’s probably not in your nature to draw attention to yourself. Sure, you’re able to take the spotlight when you absolutely have to, and you’re probably good at it when you do, but you’re much more comfortable working behind the scenes.

        Nurture

        Some of us are raised not to stand out, so we struggle to post that Facebook update about the great review we just got or tweet about our book being on sale.

        I’m Jamaican, and contrary to what our reputation might be, Jamaicans are actually a fairly conservative people. Usain Bolt notwithstanding, we’re not raised to toot our own horns — it’s one of the byproducts of the Quaker influence on the island. Those of us who’ve grown up trying to fit a reserved ideal often have a hard time sharing and promoting our work.

        Plain old fear of rejection

        No one wants to put themselves out there and hear only crickets. We all, in some way, want the approval of others, so when we share our work and get a negative response — or worse, no response — it’s painful. So, we think, why do it all?

        Worry about competition

        Indie publishing has opened the door for many writers, and the competition to make yourself heard is intense. It’s hard and often discouraging work to differentiate yourself from all the other voices clamoring for attention. When you try, sometimes it leads to…

        Burnout

        Marketing and self-promotion is hard work even if you enjoy doing it. For those of us who don’t, just the thought of it can raise our stress levels, so we put it off. Then, when the time we’ve grudgingly carved out comes around, the task is so utterly unenjoyable that we burn out quickly and do the bare minimum.

        So how can we make self-promotion easier?

        1. Create realistic self-promotion goals

        If you’re a serious writer, you’re no stranger to creating goals. From finishing a chapter to hitting a specific word count, setting realistic goals is second nature. So what makes our marketing goals different? I’ve spoken with writers just beginning their promotion efforts whose goals included:

        • Add 100 Twitter followers in a week
        • Increase sales 4 percent in a month
        • Build and promote a Facebook fan page and get 50 likes per day

        Strictly speaking, none of these goals are impossible, but for first steps, they’re pretty lofty. Instead, set more attainable goals, such as:

        • Tweet your book/article/reviews twice per day
        • Submit your book to three review sites per week

        Once you achieve these goals, set the bar higher for the next round. Achieving modest goals gives us the confidence to attempt harder ones while avoiding the burnout we feel when our goals are overwhelming. (Click to tweet this idea.)

        2. Keep what’s working, drop what’s not

        Most social media platforms allow you to measure your engagement with your audience. Marketing and social media expert Gary Vaynerchuk writes in his book Jab, Jab, Jab, Right Hook,

        Ignoring the deep analytics available for your Facebook fan page (and other platforms soon) is the equivalent of stepping into the ring without even having watched a video of your opponent during a fight.”

        Even if you’re just beginning your promotion efforts, getting familiar with those tools will give you a huge leg up, allowing you to fine-tune your efforts. Is Instagram not working for you? Drop it. Is Twitter driving sales? Tweet more often.

        Whatever the case, concentrating on the platforms that work for you is not only smart, but will keep you motivated as you reach more and more readers.

        3. Don’t reinvent the wheel

        Chances are your social media feeds are full of people giving great advice about self-promotion, so you don’t have to come up with a plan from scratch. Research how the experts are doing it, then use their tried and true techniques to jump-start your own marketing efforts.

        4. Use available tools to your advantage

        It’s strange, but sending a tweet or posting a Facebook update about my work in real time is intimidating. It’s much simpler to write my promotional tweets and set them to go out in advance.

        To do this, I use Tweetdeck and Buffer. In addition to being solutions for my real-time phobia, they save time, as I can set my tweets and updates and forget them.

        5. Shift your focus

        In my 9-to-5 career, I’m a Director of a department for a NYC consulting firm, and I constantly present on behalf of my clients. I’ve spoken before senators, commissioners, council members and community groups (often hostile ones), and I’m never flustered. Why?

        Because I treat what I do like the business that it is. My career, as important as it is, isn’t held as close to my heart as my writing.

        Shifting your focus to seeing your books as commodities to be sold as opposed to the work you hold so near and dear to your heart may help to remove the personal aspect from the equation, thus making promotion easier.

        How do you feel about self-promotion? What marketing strategies work for you? Tell us below in the comments.

        Need to learn how to do social media better as a writer and author? Check out this free training that we’re offering with Self-Publishing School.

        This post contains affiliate links. That means if you purchase through our links, you’re supporting The Write Life and we thank you for that!

        This is an updated version of a story that was previously published. We update our posts as often as possible to ensure they’re useful for our readers.

      • 8 Lucrative Tips for Selling Articles to Magazines and Websites

        8 Lucrative Tips for Selling Articles to Magazines and Websites

        This column is excerpted from Create Your Writer Platform, from Writer’s Digest Books.

        Article writing can be great for your career as a writer: nothing bad can come from writers trying to sell content to magazines, newspapers and websites. Think about it. Selling articles ups your credentials and credibility; it gives you something awesome to talk about in the Bio section of your query letters; it generates nice paychecks; it puts you in touch with media members who can help you later; it builds your writer platform and visibility, and more.

        If you want to make more money writing and expand your writing horizons, think about penning short nonfiction pieces for outlets seeking good work. It’s a simple way to do some good for your writing career.

        [sps_reusable_block post_id=43047]

        Here are 8 tips for selling articles to magazines and websites

        1. Seek out the publication’s writers’ guidelines

        All publications have guidelines, which, simply put, are an explanation of how writers should contact the publication in consideration of writing for them. Writers’ guidelines usually address three key things:

        1. What kind of pieces the publication is looking for (including length, tone, and subject matter)
        2. How to submit your work for consideration (details on formatting and whether they accept email or snail mail submissions)
        3. When and how they will respond to your request

        2. You do not have to write full articles before you sell them

        Selling a nonfiction article is exactly like selling a nonfiction book—you sell the item based on the concept and a “business plan” for it. Here’s how it works: You compose a one-page query letter (typically submitted via email) that details what the article/column will be about, as well as your credentials as an article writer. From that point, the publication, if interested, will contract you to write the article—and only at that point will you write it.

        Writing an article when no one has agreed to buy it is called writing on speculation (“on spec”). You can do this if you feel you need to, but you risk losing time on a project that may never see a financial return.

        3. Consider what the gig has to offer

        Remember that in your case, the goal is platform. The goal is getting your name and work and bio in front of people who will buy your book and become followers. If an editor asks you to write a long piece for little money, that’s not good.

        But are there benefits? Will you get more assignments in the future—and therefore more platform? Are you doing the editor a favor he will remember? Will writing the article put you in touch with key people you’d like to know?

        4. Keep an eye out for new publications

        New publications are actively seeking content to fill pages and are willing to work with newer and untested writers. I would suggest signing up to the Writer Gazette and Writer’s Market newsletters (both free) to get notices of any new publications or paying websites that pop up.

        5. Write for local publications

        Besides the fact that you’re befriending local media pros who can help you later, you should know that local publications have a natural affinity for local writers. People always say “write what you know” — and you know your hometown and community better than anyone else. (Click to tweet this idea).

        6. Feel free to aim high, but expect to start small

        You’ll have an easier time getting things published if you pitch shorter pieces and aim for small to mid-sized outlets. The goal is to break in, and then use your success and accomplishments to get bigger, better assignments. That’s not to say you can’t at least aim for Real Simple or The Huffington Post—just don’t be surprised if they say no because you lack the experience. (But hey, it never hurts to ask.)

        7. You can recycle ideas and get multiple paying jobs

        One of the best parts about being a freelancer is your ability to recycle and reuse ideas. For example, I pitched Ohio Magazine a series that would profile historic theaters around the state that were still in operation today. After the magazine said no, I made a few changes to my query and sent it off to Pennsylvania Magazine. This time, I got a yes, and I received fourteen articles and paychecks out of it.

        8. Read the publications you’re pitching

        Get familiar with several target markets and read back content, either online, with a subscription, or through issues at your local library. Note the tone of the articles, the sections of the magazines, and the general feel of the magazine and its advertisers. From there, you will be better off pitching the best article ideas—and you will also find out if the idea you want to share has been used recently.

        You never know where a writing opportunity or assignment will lead you, so challenge yourself and stick your toe in different waters. In my case, writing that series for Pennsylvania Magazine was what drew a literary agent to sign me. From there, we’ve been able to sell six books together. If I hadn’t dived into article writing and kept querying until I found some success, who knows if my writing journey would resemble what it does today.

        Other TWL Guest Posts by Chuck Sambuchino:

        This is an updated version of a story that was previously published. We update our posts as often as possible to ensure they’re useful for our readers.

      • The 17 Best Writer Websites to Inspire Your Portfolio

        The 17 Best Writer Websites to Inspire Your Portfolio

        Your online portfolio is the portal through which both clients and readers learn about you and your work — and one of the best ways to land writing jobs.

        That means that, for many of us, creating a writer website is hugely intimidating. I put off creating a writer website for months simply because I didn’t know how I wanted to put it together.

        Luckily, you have options. There are as many types of writer websites as there are writers, and you don’t have to make your writer website fit any kind of preconceived template or mold.

        Instead, use your online portfolio to reflect what makes you unique as a writer, and what you have to share with clients, readers and fans.

        [sps_reusable_block post_id=43047]

        Need inspiration? Check out these online portfolio examples

        Don’t make the mistake of thinking that creating your online portfolio has to be a massive project. We’ve showcased lots of portfolio websites that make it easy for you.

        But before you build your own, we’ve got some inspiration to get you started! We found some solid writer websites to share, each with a unique focus and design.

        Here are 17 online portfolio examples.

        1. Elna Cain

        Elna Cain’s writer website is bold, partly because she blatantly tells you she’s the freelance writer your business or project needs. To further convince you, a row of prominent publications are listed right above her introduction — that’s where she confidently states the problem clients have and how her skills can it. Then, the page ends with glowing client remarks. 

        Elna’s online portfolio shares a variety of ways to get in touch with her for business opportunities and how to keep up with her work online. To assert her expertise in the field, Elna also links her popular blog that’s filled with tips on how to make money with writing. 

        2. Manjula Martin

        Manjula Martin’s site is a great example of a basic, straightforward online portfolio: a brief introduction with her resume highlights front-and-center, and lots of links to connect people who want to learn more. She built it on WordPress.

        Manjula’s website works because you learn everything you need to know about her credentials and writing style at a single glance. It’s easy to follow the links and read her clips, and she also gives you many ways to contact her with writing or consulting opportunities.

        3. Ann Friedman

        The first thing you notice on Ann Friedman’s website is how it brightly displays her logo, followed by a row of links to her completed work, newsletter and contact information. Talk about a simple and beautiful landing page! 

        The rest of this writer website contains plenty of unique touches: a general FAQ plus one for her newsletter; a page of various creators, content and organizations she recommends; a thorough contact page; and creatively-titled side work that highlights even more skills beyond her stellar portfolio of work for tons of household brands. There’s no question about who Anne is, the service she provides and how to reach her — this is the goal for all writer websites. 

        4. Nozlee Samadzadeh

        It’s possible to create an extremely compelling writer website without a single photo, logo, or image. Nozlee Samadzadeh’s site lists her contact information, concise explanations for her professional experience, and links to her publications, all on a single page.

        Nozlee’s site also includes a short statement of her “primary beats,” which is key info for anyone looking to hire her for a writing job.

        5. Seanan McGuire

        Seanan McGuire’s writer website instantly immerses you into her urban fantasy world. Her latest release is prominently featured, and the header image and colors help establish her genre to new visitors. The left-hand navigational column provides easy access to important information.

        If you write fiction, especially genre fiction, let your writer website reflect your fictional worlds. Open the door to your fiction by giving readers the chance to see what might be hidden within the pages.

        6. Francesca Nicasio

        Copywriter Francesca Nicasio’s writer website aptly showcases her expertise in writing B2B content around retail, eCommerce, technology, and more. The entire website is structured around one goal: informing readers about her capabilities the very moment they get to her site. 

        What’s the goal of your writer website? Are your skills and services clearly explained?  When users visit your site, do they know what to do if they want to work with you? With her email address displayed largely on the front page, Francesca makes it easy for clients to get in touch with her. Your writer website should do the same.

        [sps_reusable_block post_id=43047]

        7. Kayla Hollatz

        “Inviting” is the best way to describe Kayla Hollatz’s writer website. The big, bold words that immediately greet you are enticing enough to make you want to keep exploring her trendy online portfolio. And without needing to scroll too far, Kayla’s concise and effective introduction appears, placed evenly below a prompt to take her brand style quiz. 

        Wherever you go, Kayla’s writer website accomplishes one major thing: She pulls you in by subtly emphasizing her savviness. From spelling out the details of how you’ll work together to sharing impressive client success rates, it’s evident  this writer knows her stuff — and she wants you to learn it, too, hence her quiz and email course. 

        8. Brittany Berger

        How often are you intrigued by an unpopular opinion? Probably almost always, because, well, you just have to find out how you could possibly be on the wrong side of the truth. That’s what’s awesome about Brittany Berger’s approach to her writer website — she offers a solution most companies think is the problem. 

        Her conversational tone guides you into understanding her logic, and she offers a number of valuable resources to help you learn about being mindful about content creation, and how to be more productive as you do. 

        She created her website on WordPress.

        9. Sarah Turner

        Sarah Turner’s writer website is one of those slick, beautifully designed sites that intimidate the rest of us. It’s the type of site that looks like it requires the assistance of a web designer, which means it’s aspirational for a lot of us, especially those of us who are just getting started as freelancers. In actuality, Sarah’s website was created with the help of WordPress and Themely. 

        However, design isn’t the only aspect that makes Sarah’s writer website great. Her opening sentence clearly highlights her writing niche, how she can use her skills to improve your business in the health industry — the key goal of any resume or website — and includes a direct call to action. 

        You can include a similar paragraph and call to action on your own writer website; no design firm required.

        10. Kat Boogaard

        Freelance writer Kat Boogaard leads with an authentic and friendly voice on her writer website — one that makes you feel like you’ll hit it off with her right away. Amid a fresh and sleek design filled with calming neutral colors, she shares brief paragraphs about who she is, what she writes for clients and how she can help freelance writers grow their businesses.

        Kat’s conveniently-placed menu at the top and bottom of her website is easy to navigate, but one thing I love about her website is how you can find your way around her site without it. As you scroll through the homepage, you’ll find that she takes you from one valuable resource to the next, all without making you feel bombarded. 

        11. Helen Gebre

        This writer website gets one important thing down pat: You can feel how much Helen Gebre loves the art of writing. She also does this very simply, through an introduction and biography that gives you a glimpse into her personal life, her career and why she does this work. 

        Helen’s website design is simple, likely because she has a diverse portfolio featuring big and bold copywriting decks that span across print and digital writing, social media, video scripts and more. Besides a contact page, she also cleverly set up her phone number as the footer on each page — that way, clients viewing her page know how to reach her immediately. 

        12. Chidinma Nnamani

        Clients visiting B2B writer Chidinma Nnamani’s page learn right away what her expertise is. Throughout her writer website that she designed with WordPress and Elementor, she clearly articulates her skill and experience with B2B writing for the tech, food and digital marketing industries. 

        Besides a clean website design that reflects Chidinma’s design aptitude, her inclusion of a robust services page and a page that details her four-step process for working relationships provide a peek into her professionalism and organizational skills. One more thing to note from this writer website? The frequent “Ready to hire me?” prompts displayed throughout the site! 

        13. Sarah Asp Olson

        Before you learn about this writer, you first take a tour of her impressive writing clips, which progressively leads you to where you can learn more about and reach out to her. 

        One of the best parts of designing your writer website is all the creative ways you can display your work. Each website on our list brings their own flair to their portfolio, and Sarah Asp Olson is no exception in the way her site only features the content she’s created. Like she does, you can use bright, colorful images that capture the eye to separate the industries you write for. Then, display your samples in bulleted lists, or in rows of hyperlinked thumbnails.

        Remember there are no rules to how you organize your work — just ensure it’s clear, and easy to navigate.

        14. Samar Owais

        What should people learn about you as soon as they visit your writer website? For writer Samar Owais, potential clients find out immediately she can increase conversions and boost sales — and her speedy acknowledgement of these skills and her niche can make a difference in how quickly visitors leave her site. 

        Throughout her writer website, Samar features client testimonials and a valuable email marketing quiz. Additionally, she makes her expertise clear through brief, compelling descriptions that outline how she solves conversion issues as an email conversion strategist and SaaS copywriter. And if anyone wonders why they should work with her, she makes convincing arguments for that, too. 

        15. Muriel Vega

        Don’t you just want to click those icons? That’s the power of color and fun design animation! Atlanta-based writer and editor Muriel Vega’s writer website has a simple design layout, but that doesn’t stop the sense of her personality from seeping through as you learn about her through projects and writing samples. 

        This site is a great reminder that you don’t have to overwhelm your writer website to make an impact — consider who you want to attract, and incorporate engaging design elements that reflect your creativity.

        16. Tyler Koenig

        Copywriting expert Tyler Koenig has a writer website that feels extremely confident and laid-back. Within a well-designed website that tastefully centers the color orange (maybe for basketball?), Tyler provides heaps of value through his email list, webinars, courses and free tips through his blog. 

        “Become your own most trusted copywriter,” he writes on the landing page of his self-paced copywriting courses, which successfully expresses his earnest desire to share his passion to help others grow. Besides that, providing free and paid resources truly highlights your expertise to prospects.

        17. Nicole Dieker (yes, that’s me!)

        My writer website serves two purposes: It’s a place where people can learn more about my freelance and teaching work, and it’s also a blog that focuses on the art and finances of a creative career. I include “where I got published this week” roundups every Friday and finance roundups on the first of every month, along with daily insights on work-life balance, how to earn money for your creative work, the process of writing a novel and more. I also pay writers for guest posts, so pitch me!

        I set up my site through WordPress using a pre-designed template.

        Do you have a writer website you’re proud of, or are you working on one now? Share your experience with us in the comments!

        This is an updated version of a story that was previously published. We update our posts as often as possible to ensure they’re useful for our readers.

        Photo via Zofot/ Shutterstock 

        [sps_reusable_block post_id=43047]

      • How to Start a Blog in 2024: A Simple, Step-by-Step Guide

        How to Start a Blog in 2024: A Simple, Step-by-Step Guide

        Have you always wanted to start a blog?

        If you’re a writer, it makes perfect sense: You can use a blog to serve as your author platform, market your work or find new freelance writing clients. Blogging is also a great way to experiment with your writing style.

        This is the age of content — people are always looking for more to absorb, and your unique voice has a place on the vast, limitless interwebs, too. 

        How to start a blog

        Starting a blog can feel overwhelming. But the truth is, it’s doable for anyone with the right guidance.

        We’re here to help you navigate every step so you can start a blog stress-free — from choosing your domain name to publishing your first post.

        This is a long post, so here’s a quick summary of what we’ll cover:

        • Pick a domain name (URL) and see if it’s available (to cut to the chase, check URL availability here)
        • Purchase a hosting package and install WordPress
        • Choose a theme and blog header
        • Write your blog pages
        • Install plugins and widgets
        • Promotion, including building an email list

        Ready to dig in?

        Here’s how to start a blog.

        [sps_reusable_block post_id=43047]

        1. Pick a domain name (and get it for free)

        First things first when you start a blog: choosing a domain name. Where are people going to find you online?

        This can be one of the most enjoyable parts of getting started with a blog; it’s such a rush when the URL you want is available and you can buy it right away.

        But if your first choice isn’t available, if someone else is already using that URL, it can be stressful to come up with another domain that feels right. After all, this is a permanent home on the Internet you’re creating!

        The truth though, is that you can always change this down the line if you decide to go in a different direction with your URL. The most important part isn’t choosing the perfect domain, it’s choosing one and getting started.

        One of the best places to start is using a variation of your name. Especially as a writer, because you are your brand. Your name will never go out of style no matter how your interests change over time.

        To check availability, search this handy domain-name checker:

        If you’re feeling good about your choice, you can also visit Bluehost directly and purchase your domain there. The company offers a $2.95/month plan for The Write Life readers.

        Even if yourname.com isn’t available, you might find it with a different ending, such as yourname.co or yourname.io. If you’re super committed to this whole writing thing, you can also try tacking a “writer” onto the end of your name, as in susanshainwriter.com.

        Alternatively, you could opt for a creative blog name — but remember your interests and target audience may change as the years go by. When I started blogging in 2012, I focused solely on adventure travel and named my blog Travel Junkette. After expanding my niche and services, I switched to susanshain.com because my name won’t change, no matter what I’m blogging about.

        Although it wasn’t a huge deal, I wish I’d started out using my name as the domain, and would advise you not to make the same mistake I did.

        Once you’ve settled on your domain (or domains, if you’re like many of us writerpreneurs!), don’t wait to buy it. Even if you’re not ready to start a blog right now, domains are cheap — and you don’t want to risk losing the one you want.

        If you’re really having a hard time picking a URL, review our more detailed post on how to choose a domain name.

        Before you actually click “purchase,” though, you might want to read the next step; we’re going to tell you how to get a domain name for free.

        2. Purchase a hosting package

        Now it’s time to choose a web host.

        What’s a web host? Your hosting company does all the technical magic to make sure your site actually appears when people type your domain name into their browser. In other words, it’s pretty important.

        While we use MediaTemple to host The Write Life, it’s typically better for blogs with lots of traffic. You probably don’t need that if you’re just starting out, so go with a cheaper option instead.

        For a new blog, try Bluehost. It’s used by top bloggers around the world and is known for its customer service and reliability.

        The Write Life has a partnership with Bluehost whereby they allow our readers to purchase hosting for $2.95/month. The cool part is that INCLUDES your domain.

        Oh, and pro freelancer money tip: Put your purchase (and all the purchases listed in this post) on a business credit card and keep the receipts; as investments in your business, they’re tax-deductible.

        3. Install WordPress

        We’re almost through with the techy stuff, we promise!

        You have several different choices for blogging platforms, but we like WordPress best. Not only is it totally free, but it’s easy to learn, offers a wide variety of themes, and has an online community and abundance of plugins that make blogging accessible to everybody.

        You can read comprehensive instructions for installing WordPress on your new blog here. Once you’ve completed that, you can officially log into your blog and start making it look pretty.

        4. Put your site in “maintenance mode”

        While working on your blog’s appearance, you might want to put up an “under construction” sign to greet visitors.

        You don’t want any potential clients or readers to Google your name and find a half-finished site. (You may think you’re going to finish setting up your blog tomorrow, but we all know how writers procrastinate when there are no looming deadlines!)

        To set up maintenance mode, just download this plugin. On your maintenance page, you could even include a link to your email newsletter or social media profiles so visitors have an alternate way of getting in touch with you. When you’re ready to share your blog with the world, simply deactivate and delete the plugin.

        5. Choose a blog theme

        Now we’re getting to the fun stuff! Your theme determines what your blog looks like, and you’ve got a lot of options to choose from. Yes, there’s a wide range of free themes, but if you’re serious about blogging, the customization and support offered by paid themes can’t be beaten.

        Here at The Write Life, we use Genesis, which is one of the most popular premium themes available. Another popular and flexible theme is Thesis. On my first blog, I used Elegant Themes, which has a wide selection of beautiful themes at a reasonable price. All of these themes come with unlimited support — essential when you’re starting a blog.

        If you want your blog to be a marketing tool for your writing services, you might look for a theme with a static home page (like mine). That way, your site will look professional and appealing to everyone — whether they’re there to read your latest post or hire you for a project.

        Whatever you do, make sure your theme is “responsive,” which means it automatically adjusts to look good on any device. Since more than half of website visits are made on mobile phones, this is crucial for your blog’s aesthetic.

        6. Create a blog header

        I think it’s always worth getting a custom header for a new blog.

        You can ask your favorite graphic designer, create one with Canva, or order one on Fiverr. I’ve had great luck getting headers and other graphics designed in this online marketplace, where thousands of people offer their services for $5 per gig.

        Starting a blog can seem like a lot of work -- but we’ve made it easy with this step-by-step guide just for writers. Here’s how to start a blog from scratch.

        7. Write your blog pages

        Though you’re starting a blog and not a static website, you’ll still want a few pages that don’t change. (“Pages” are different from “posts,” which are the daily/weekly/monthly entries you publish on your blog.)

        Here are some pages you may want to create:

        About

        The about page is frequently touted as one of the most-viewed pages on blogs, so don’t overlook it. Include a professional headshot and brief bio, and explain why you’re blogging and why the reader should care. What makes you an expert? How can you help them?

        Don’t be afraid to let your personality shine through; blogging is a personal affair!

        Contact

        You want your readers to be able to get in touch with you, right? Then you’ll need a contact page.

        It doesn’t have to be anything fancy; just tell your readers how best to reach you. Avoid putting your full email address on here, as spambots could get ahold of it. To work around that, you can use a contact form plugin, which we’ll link to below, or simply write something like “yourname AT yoursite DOT com.”

        Portfolio

        It’s your blog, so flaunt what you’ve got! Show your prospective clients and readers that you deserve their time and attention with examples of your past and present work.

        You can see examples of great writer portfolios here; personally, I love Sara Frandina’s.

        Resources

        Do you have a list of favorite writing tools? Or maybe books that have inspired you? Readers love resources pages, and for bloggers, they can also be a clever way to earn income from affiliate sales.

        Check out The Write Life’s resources page for inspiration.

        Start here

        You probably won’t need this at first, but a “start here” page is smart once you have a decent amount of content. It’s a great opportunity to express your mission and highlight your best work, so your readers can see the value of your blog without wading through months or years worth of posts.

        Joanna Penn does a good job with hers, encouraging readers to download her ebook and then choose a topic that interests them.

        Work with me

        If you’re using your new blog to sell your writing services, this page is essential. Be clear about how you can help people and how they can get in touch with you. You could even list packages of different services, like Lisa Rowan does on her site.

        Once you’ve set up all your pages, make sure they’re easily accessible from the home page. If they’re not showing up, you may have to adjust your menus.

        8. Install plugins

        Plugins are great for everybody, especially those of us who are less comfortable with the technical side of things. Think of them as apps for your blog; they’re free tools you can install to do a variety of things.

        Though having lots of plugins can undermine the functionality and security of your blog, there are several we recommend everyone look into:

        Contact Form 7: If you want to avoid putting your email address on your contact page, use this plugin, which is frequently updated and receives good reviews.

        Hello Bar: Want to get readers to sign up for your free newsletter? Or want to announce the release of your latest book? This plugin allows you to create a banner for the top of your blog.

        Mashshare: These share buttons are similar to the ones you see here on The Write Life. Another minimalist option is Simple Share Buttons Adder. It doesn’t matter which plugin you choose; it’s just important to make social sharing easy for your readers.

        Google Analytics Dashboard: This plugin tracks the visitors to your site so you can see what people are interested in and how they’re finding you.

        Akismet: One of the headaches of blogging is the plethora of spam comments. This plugin will help you reduce the number of spammers that sneak through.

        WP Super Cache: Another plugin that’s not sexy, but is important. Caching allows your blog to load faster, pleasing both your readers and Google.

        Yoast SEO: This all-in-one SEO plugin helps you optimize your posts so you can get organic traffic from search engines.

        9. Install widgets

        If your blog has a sidebar, you might want to spruce it up with a few widgets, aka small boxes with different functions. That said, the minimalist look is in — so skip this step if you want to keep your sidebar simple.

        Here are some ideas:

        About box

        You’ve probably seen this on a lot of blogs; it’s a box in the upper right-hand corner welcoming you to the site. Check out The Write Life managing editor Jessica Lawlor’s blog for a good example.

        Social media icons

        Make it easy for your readers to follow you on social media by including links to your profiles in the sidebar. Your theme will probably include this feature, but if not, here’s a basic tutorial.

        Popular posts

        Once you’ve been blogging for a while, you might want to highlight your most popular posts in the sidebar, which you can do with a basic text widget. We do this here on The Write Life so you can find our most popular content quickly and easily.

        10. Purchase backup software

        Don’t overlook this important step just because you don’t have content yet! It’s better to install this software early than to start blogging and forget until it’s too late.

        Free options exist, but I’ve never had good luck with them — and for something as important as my entire blog, I don’t mind paying a little extra. (It’s a business write-off, remember?!) Popular backup options include VaultPress, BackupBuddy, and blogVault.

        11. Start your email list

        I know, I know, you haven’t even started blogging and I already want you to build an email list. Trust me; you’ll be so glad you did.

        Alexis Grant, founder of The Write Life, agrees with me. “If I could go back and do one thing differently for my business, it would be starting a newsletter earlier,” she writes. “My email list is THAT important for my business, bringing traffic to my website, buys of my products and opportunities I never could’ve expected.”

        Even if you don’t have anything to send, just start collecting email addresses. The best way to entice people to sign up is by offering a free ebook or resource. For a great example, check out The Write Life’s Freelance Writer Pitch Checklist.

        My favorite email newsletter platform is Mailchimp. It’s intuitive, fun, and free for up to 2,000 subscribers.

        A lot of creatives also use ConvertKit. It also offers a free plan, and some people say it’s easier to use than MailChimp. If you want more options, browse our list of news of tools for building your email list.

        Once you’ve created your list, encourage your readers to sign up by adding a subscription box to your sidebar, and maybe even install a plugin like PopupAlly. Or, if you use ConvertKit, they have pop-up options built-in.

        12. Write!

        If you really want to start a blog, you’re going to need to…start writing your posts.

        We recommend creating an editorial calendar, even if you are coordinating with no one other than yourself. It doesn’t have to be fancy; it can even be scribbled out in a notebook.

        What’s important is that you plan your posts in advance, so you can keep track of your ideas and stick to a schedule. It’s also a chance to assess and tweak your content strategy. What do you want to write about? How will you draw readers in?

        Don’t forget you’re writing for the web, so your style should be different than if you were writing for print. Keep your tone conversational, use “you” phrases to speak to the reader, and break up text with bullet points and sub-headers.

        Images are important for grabbing attention and breaking up the text, so find a feature photo on Unsplash or Pexels to make each post shine.

        13. Promote, promote, promote

        You’re almost there! Now that you’ve started writing, it’s time to get readers. And I hate to be the bearer of bad news, but for many writers, this is the most surprisingly time-consuming aspect of blogging. Though it’d be nice if we could just write (that’s what we love to do, right?), it’s nicer to have people actually read your work.

        You can try guest posting on other blogs, reposting on sites like Medium and LinkedIn, or including links when writing responses in forums, Facebook groups, or on Quora. Just make sure you’re adding value — and not spamming people with your URL.

        Social media is another great way to get more traffic and grow your author following. Instead of merely tooting your own horn, be sure to interact with editors, writers and bloggers, too.Share their content with your community, comment on their posts and support them when and where you can. Hopefully, they’ll return the favor!

        [sps_reusable_block post_id=43047]

        In the end, creating a successful blog is about hard work and consistency. Keep posting helpful and engaging content, optimizing it for SEO, and sharing it with your networks — and you’ll soon see your new blog start to blossom.

        Congratulations, you’ve now officially started a blog as a writer.  Maybe one day it can become a full book? Time to get writing!

        This post contains affiliate links. That means if you purchase through our links, you’re supporting The Write Life and we thank you for that!

        This is an updated version of a story that was previously published. We update our posts as often as possible to ensure they’re useful for our readers.

      • Build Your Author Platform: 7 Manageable Ways to Start From Scratch

        Build Your Author Platform: 7 Manageable Ways to Start From Scratch

        By now we’ve all heard about author platform, even if we’re not entirely sure how to build or maintain one.

        But in my everyday work with authors, I’ve noticed many writers aren’t sure how exactly to get started. What should you focus on when you’re being pointed in 20 different directions, and all roads are potentially huge time sucks?

        How to start building your author platform

        As I explain in this post, author platform includes these components: expertise, contacts, social media, previous media, previous books, personality, existing readership and ability to execute. That breakdown can function as a roadmap for anyone who’s trying to figure out how to get started, especially if you feel like you’re starting at zero.

        Ready to build your author platform? Here’s how to start from scratch.

        1. Expertise: Write an “I am fabulous” statement

        The goal with this step is to pump yourself up. In what specific and particular ways are you awesome? Why are you the person to write your book? Why is it the case that no one but you could write your book? What unique experience do you bring to the table?

        Even if your answer is simply that you lived the life you lived — and maybe it was a hard one —  you’re awesome for having survived it. If you write fiction, your book likely involves themes or situations you know a lot about, which makes you an expert.

        Let your statement be free-flowing, but work hard to pat yourself on the back. While many of us tend to undervalue our abilities, the first step toward being an expert is believing you can be an expert.

        You may have to fake it till you make it, and your “I am fabulous” statement can give you the motivation and validation you need to get there.

        2. Contacts: Put together a “big mouth list”

        Everyone you know is a contact. The more people you know, the more influence you have, especially if you know people in high places.

        So what if those influencers are a couple degrees of separation from you? People are surprising in how they choose to support fledgling authors. I’ve witnessed seriously established authors supporting new writers just because it feels good, and they remember what it’s like to be in your position.

        In addition to the list of people you’re connected to, create a list of people who might blurb you, from realistic to pie in the sky. Who would be your ideal reader? Who do you dream might one day recommend your book?

        3. Social media: Pick just two social channels

        That’s right: only two. Set up a profile on each and post once a day.

        For most writers, I recommend choosing Facebook and Twitter, but if you’re into other channels or options, give them a shot. If you’re writing something that lends itself to images, join Pinterest. If your work lends itself to video, do YouTube. Experiment to find a social media channel that works for you and your writing.

        The key to social media is posting regularly and engaging people. You want shares, because shares lead to more follows. Rather than spreading yourself thin across multiple platforms, focus consistently on the two platforms that provide the most value to you and your work.

        It takes forever (seriously) to build up a following on social media, so don’t be discouraged. Celebrate a few likes a week. Manage your expectations. Keep going. Building an author platform is a marathon, not a sprint.

        [twl_reusable_block post_id=41455]

        4. Previous media and books: Publish an ebook

        If you’re starting at zero, you may not have any previously published books or media, like guest posts or podcast interviews. That’s okay.

        If you’re working on a book project that you know is going to take some time to complete — a novel or a memoir that’s already been in progress for a few years, for instance — then write a shorter ebook!

        It’s surprisingly easy to self-publish an ebook. You want it to be high quality, with great content, a compelling cover and a well-designed interior. Using Amazon, Barnes & Noble, Kobo, iBooks, or e-junkie you can promote and sell your ebook from your website. While marketing your ebook is a topic for another post, figuring out how to write an ebook is a fairly simple process. And voila, you have a book to propel future books.

        Media opportunities will come, but any interview you do, blog post you write or opportunity to speak in front of people you come across qualifies as media. Don’t be afraid to showcase these successes on your website and social media channels.

        It takes a major shift in consciousness to start self-promoting, but I’ve found the key is in the balance. It’s cool to self-promote if you’re giving your readership fantastic, smart and interesting content — providing value. And it will get more comfortable with practice, I promise.

        5. Personality: Figure out your persona

        Jeff VanderMeer’s Booklife helped me understand the value of figuring out who you are online.

        Some people put it all out there and are wholly themselves online, while others choose to create a persona different from who they are in real life or only show a certain side of themselves. You get to decide, and you’re not wrong or weird or bad if you want to retain a little privacy.

        However, being private or an introvert does not mean you should not have a website, or that you can get away with pooh-poohing the importance of an author platform.

        It just means you get to set boundaries. Instead of holding technology in contempt, learn to work with what you might not like, and to figure out how to make it work for you.

        6. Existing readership: Create an email sign-up form on your website

        What? You don’t have a website yet? OK, the first step is to set up your new site. Here’s a guide on how to start a blog.

        While you’re at it, create a sign-up form that connects to an email management system; here are a few of our favorite email newsletter platforms to choose from. Put it on your homepage to capture email addresses — and take a deep breath.

        Authors often tell me that people they know already have too much email. Get over it. Seriously. Your job is to collect emails, and to send out worthwhile content. It may take a long time to build up your email list, and to figure out exactly what your message is, but you need to practice having a following.

        It doesn’t matter if you launch your email list with 20 people on it. That’s exactly what I did, and four years later I’m publishing for 5,000 subscribers who want to hear from me. After all, if they don’t, they can opt out.

        But don’t worry about the numbers for now. Just take the first step and set up the form.

        (Ready to take your email collection to the next level? Check out these 7 simple steps to build your author email list – fast!)

        7. Ability to execute: Stick to a schedule

        The ability to execute, like personality, is sort of a “soft” aspect of author platform, but it matters. It’s about follow-through and the ability to stick to a commitment to create content. It’s about consistency, and showing up even if it seems like no one is listening.

        Building an author platform is grueling work, but it’s truly rewarding when you see the occasional spikes in engagement or new followers, or the payoff in the form of positive feedback or sales.

        This payoff can only happen if you execute a plan and stick to it.

        I know it’s a long haul. I’m out there myself, working on my platform every day, sometimes wondering why I am putting so much effort toward all this personal branding. But if you want to publish, and if you want readers, you have to find a voice, write content, connect with your readers and put yourself out there.

        Your hard work will pay off; it just takes some time. Give it time and figure out a schedule that works for you. I recommend blogging once a month and posting on social media once a day, to start. You might increase from there, but again, you can take it little by little and adjust your plan as you figure it out.

        The best way to build an author platform is simple: start

        Just like you don’t run a marathon without training for weeks or months, you don’t start your author platform full force. Building your platform takes discipline and hard work, but if it weren’t worth it, no one would be doing it.

        The key is to find genuine value in your endeavors. Keep going, even when it feels like no one is listening. Eventually people will start to listen, and eventually you will get a comment to a post that makes you realize you’re making a difference, reach a milestone with your contacts that surprises you, or connect with a high-profile writer who supports you just because.

        Have faith. Work hard. Don’t dismiss these ideas just because they feel like too much effort, or because starting from zero seems daunting. Everyone started from zero, even your literary heroes. And it’s only with hindsight and effort that anyone has the wisdom to promise that it’s worth it.

        I promise, it is. Come on in and test the waters. Wade in slowly. You’ll find your way.

        What was the first thing you did to build your author platform? If you’re just starting out, what’s your biggest obstacle?

        This is an updated version of a story that was previously published. We update our posts as often as possible to ensure they’re useful for our readers.

        Photo via GuadiLab / Shutterstock 

      • 6 Ways to Knock Your Next Guest Post Out of the Park

        6 Ways to Knock Your Next Guest Post Out of the Park

        The holy grail of guest blogging is not writing for a popular blog. It’s writing a popular post for a popular blog.

        One that gets mentioned, shared, and retweeted.

        One that sends you traffic and earns you subscribers.

        The best part? It opens the door to a new relationship with the popular blogger, since hosting your viral post is also a win for them.

        But let’s back up for a moment. How do you take your guest blogging game from so-so to superstar?

        Here are six go-to strategies for writing a great guest post.

        1. Read the guidelines

        Sites that continually accept guest posts will have clear guidelines to follow. Read them. Ingest, digest and get to work.

        2. Do your research

        Read as many of the posts on the blog as you can. Learn which posts are popular and why. What are the readers saying in their comments? Can you find a different perspective on the same topic as a popular post?

        For example, the forum on Tiny Buddha is a gold mine for the kinds of things its readers fear, love, yearn for, and worry about. I noticed a theme of loneliness, thought about a time when I felt this way (this blog’s guidelines require personal experience) and started writing.

        The result? My post, “Loneliness is a Choice: Proactively Choose to Connect with People” is one of Tiny Buddha’s most popular.

        3. Write a concise email

        If the blogger has guest post guidelines on their site, they won’t need a 200-word intro on the post you send them.

        Simply state that you’ve been reading their blog for a while and think their audience would enjoy your post. Give the title of the post and some details of its content.

        And that’s it. No need to grovel, beg, or offer your pet poodle as a bribe. If they like it, they will get in touch with you. If they don’t reply after a week, follow up.

        4. Use your networks

        Your post was accepted? Awesome! Make a note of its go-live date and get ready to promote it to your own community.

        Once the post is live, be there for your baby. Share it using all of your social media prowess. Email your subscribers a link to the post.

        5. Be responsive

        Be active in the comments section: answer questions left by readers, and engage in discussions with the audience. Check back on the post often or sign up to be updated when new comments are posted.

        6. Build connections

        Guest posting gets easier with established relationships; I had already written several posts for Tiny Buddha before submitting this particular one, so I had a good idea of what the editor was looking for.

        What if you want to submit a post, but you don’t have a relationship with the blogger? Start by building a rapport through commenting on existing posts, communicating on Twitter/Facebook/their preferred social media platform, and replying to the emails they send (you are subscribed to their list, aren’t you?).

        Going from writing just another guest post to creating a destined-to-be-popular post takes time. Use yours wisely, and do everything you can to show you care about its future. (Click to tweet this idea).

        And now, ladies and gents, you know the secrets to writing popular guest posts. So what are you waiting for? Get writing!

        What other strategies have you used in order to write a popular guest post?

        This post contains affiliate links. That means if you purchase through our links, you’re supporting The Write Life — and we thank you for that!

        This post originally ran in 2013. We’re sharing it again because it’s such a great resource!

      • This Simple Website Tweak Will Lead to More Freelance Writing Jobs

        This Simple Website Tweak Will Lead to More Freelance Writing Jobs

        If you have a website for your writing business, you undoubtedly have a single goal: You want to land freelance writing jobs.

        That’s great! You should be using your website to reel in clients, but what if you’re not seeing results?

        You know what I mean. You spent weeks of sleepless nights fighting with your theme, researching plugins and arranging your widgets so that you’d have at least a half-decent writing website.

        Do you hear that? That’s nothing but the sound of crickets coming from your contact form. Either nobody cares about your services or you’ve gone the wrong direction with your site.

        Tons of people are looking for writers, so chances are it’s not the former. That leaves your writer website as the issue. Where are you going wrong?

        You don’t have a clear call-to-action

        One thing I see a lot of writers miss is a clear call-to-action (CTA), and it’s crippling your website’s effectiveness.

        What’s a call-to-action? It’s web-speak for asking visitors to do something on your website. That could be signing up for your newsletter, or getting in touch for a quote, or buying an ebook. Getting people to visit your website is only half the battle; you won’t make any progress if they don’t take the action you want them to take.

        In a case study, ContentVerve.com found that tweaking a single word increased click-through rates by 90 percent. Imagine what having a decent CTA could do for you!

        The two most common errors are:

        1. You don’t include a CTA at all

        You might make this first mistake because you’re under the impression your prospects know where to go next. It’s a no-brainer to head to the contact page to get a quote, right?

        However, it’s important to show website visitors what you want them to do next. That way, prospects won’t end up all over the place without any direction.

        Even if “contact me” is implied, it’s worth giving the information explicitly. This way, you get prospects onto page two without them having to think too much about it. Plus, there’s no confusion, such as whether you’re available for hire.

        2. You include too many CTAs

        Here’s an example with too many CTAs:

        Want to learn more about me? Check out my about page, then take a look at my portfolio to view my samples. If you’re still not convinced you want to hire me, visit my testimonials page to see what past clients have to say.

        Ready to get started? Contact me for a quote!

        Here, you’re giving prospects four choices, but exactly what you want them to do next isn’t clear. Should they follow these steps in this exact order? What is the most important step to take next?

        If prospects explore your first three pages before getting to your contact tab, they may get distracted or run out of time before they get a chance to contact you.

        See where both of these mistakes can point clients in the wrong direction?

        How to develop a clear call-to-action

        If your site is falling victim to one of these common errors, here’s how to fix it.

        Step 1: Determine your website’s goal

        As a freelance writer, your main goal is likely to get clients to contact you for your services. It’s not to get them to read your blog or even to download your free gift, yet many writers stick with these CTAs.

        If building your email list or getting exposure on your blog really is the focus of your writer website, then by all means go with it, but be sure you’re really thinking about what you want your site to do for you.

        Step 2: Explore and decide on a CTA variation

        You can say the same thing in lots of ways, so don’t be afraid to experiment with different wording.

        Look back at step 1. Your main CTA should be some variation of this ultimate goal.

        Here are some examples if you decide to go with the “contact me” CTA:

        • Contact me
        • Shoot me an email
        • Get in touch
        • Let’s chat
        • Drop me a line
        • Get a quote
        • Tell me about your content strategy

        Play with CTAs until you find one that fits your goal and your writing voice.

        contact me example

        Step 3: Place it prominently

        A quality CTA includes an eye-catching design, explains editor Ginny Soskey on Hubspot. As she suggests:

        Your CTAs’ colors should contrast with your website design, yet also appear large enough to be noticed (we’ve seen them perform best around 225px wide and 45px high).

        Lots of writers include a link within their content as their CTA. This isn’t a bad way to go if you’re clear about it.

        However, a well-designed CTA button placed prominently is likely to get more attention than a single link in your content, since it really draws the eyes. If your theme doesn’t feature a button on the homepage, create your own at ButtonOptimizer.com and place it above the fold (i.e. so your potential client doesn’t have to scroll to see it).

        contact me example 2

        Not all prospects will land on your website via your homepage, so be sure your CTA is clear across your website. A sidebar button, for example, can also work well so that it appears on all pages.

        Step 4: Consider your alternative CTAs

        I’m not suggesting that you should have only one CTA; I’m only saying it should be clear what your main call-to-action is. You might go with “contact me” as a primary CTA, while a secondary one could be “join my mailing list.”

        When you have more than one CTA, be conscious of how they work together. If your secondary CTA is higher on the page, has more contrasting colors or features a larger content box, it may appear as your primary CTA when that’s not your intent. Take a look at these web design hierarchical elements to make your primary CTA stand out against the others.

        If you have to ask whether your CTA is clear,  it probably isn’t. Even so, it’s worth asking a friend to take a look at your site and to report back on his or her impression.

        Do you feature a clear call-to-action on your site? Tell us what it is and how you draw attention to it! Does it work well for you?

      • Boost Your Author Platform: How to Host Your Own Radio Show

        Boost Your Author Platform: How to Host Your Own Radio Show

        GIVEAWAY: Dorit is offering a 45-minute slot on her radio show, “Giving Voice to Your Story” for one lucky reader to talk about his or her memoir! See below to enter and you could win a chance to be interviewed in February or April 2015.

        When we talk about author platform, many writers think about print media such as books and blog posts. Based on my own experience building my own author platform, an audio component such as an Internet radio show makes a great addition.

        A radio show adds a different dimension to your writing and generates interest in you and your book. When people read your website and guest posts, they are “reading your voice” and imagining what you sound like. On a radio show, your fans can hear and “feel” you much more directly than they can through an article.

        In addition, a radio show helps you build public speaking and media credits. If you’re looking to get on syndicated news, local radio and news channels and even national television, a radio show will help you share your personality with producers.

        Sound like something you might want to do? Here’s how to develop your own radio show.

        My experience as a radio show host

        My global radio show, “Giving Voice to Your Story,” went live in July 2013 as part of the Creating Calm Network Broadcast Group. I had already established myself as a blogger, but I wanted to create a more solid online platform and prepare for the release of my memoir, even though the publishing date was over a year and a half away.

        I connected online with non-fiction authors and memoirists I liked and to my surprise, many wholeheartedly wanted to be interviewed! It wasn’t long before I’d built a following. Within five months, I was able to bring on board noted authors such as Julia Cameron, author of The Artist’s Way, and Linda Gray Sexton, memoirist and daughter of the Pulitzer-prize-winning poet Anne Sexton.

        Since I launched my radio show, people have started recognizing me as an expert because I associate myself with expert authors.

        Planning your radio show

        As when writing an article, blog post or novel, the first thing you do is plan the subject matter of your radio show. Keep in mind that the topic should be something about which you are knowledgeable and feel passionate about, and one that potential book-buyers will be interested in.

        Your show might include chapter-by-chapter readings of your book, how-to tips or interviews.  In my experience, listeners are a lot less interested in stories than they are in the lessons they can learn from them. Talk about the life lessons you learned or share advice from your experience, and then allude to your book, which of course goes into more detail.

        On my blog as well as on my show, I talk about various craft issues related to memoir such as the voice of experience versus the voice of innocence, how to break the silence and write about challenging emotions or painful parts of life, or how to write about uncomfortable issues so that one’s memoir doesn’t read like a journal, but an actual story.

        I refer to specific scenes to talk about these issues. For example, I finally broke my silence to write about a bullying experience while serving in the Israel Defense Forces, and my next step is to broadcast a “break the silence” radio episode. I shared these insights on a recent LinkedIn discussion along with a previous link to the show and readers were not only grateful, but shared their thoughts behind the challenges. The comments quickly turned into a great discussion and helped create a supportive community.

        Aim for a show between 15 and 60 minutes long. You’ll want people to be able to listen to it in one sitting (or one trip), but you don’t want it to be so short that your listeners will resent the fact they bothered to tune in or download it. Consider adding music to open and close the program. Google “public domain music” or “royalty-free music” for download options.

        How often you choose to put out a new episode is up to you, but I feel the frequency of a radio show follows the same rules as blog posts: Release a new episode as often as you think you can commit to regularly and faithfully. The shorter the show, the more frequent you can be without overloading your audience.

        Interested in interviewing guests?

        You’d be surprised how happy agents are to book one of their authors as a guest on a radio show. You can also put a call out for guests on your social media channels. With self-promotion so necessary to book sales, authors are hungry to spread the word about their work.

        Whenever I finish a great memoir, I immediately connect with the author online and inquire if he or she is interested in being on my show. Almost 99% of the time, the answer is yes. This is how I’ve secured most of my guest appearances. The key is to start with your local community of authors and build your way up. After a while, you’ll build a following and you can quote your number of listeners when you’re approaching bigger-name authors.

        Essential equipment

        To broadcast your radio show, you’ll need a few things:

        • A computer or laptop with high-speed Internet connection. The beauty of hosting your own radio show is that you can do it from the comforts of your own home.
        • A headset with both headphones and microphone. The benefit to the headset is that you can adjust the distance of the mic from your mouth and it stays there.

        That’s it! Easy, right?

        Broadcasting a show

        Blog Talk Radio is the most popular venue for Internet radio and offers an easy start up. There are three tiers of monthly payments, with more benefits as you move up to the account types. There’s also a free account, but it only allows five listeners, so it’s not as useful.

        The main difference between the three packages ($39, $99 and $249) is the number of shows you can broadcast as well as more promotions. With the $249 package, you can live-stream from any website rather than just on Blog Talk Radio’s site.

        I’ve made the switch to Instant Teleseminar, which is user-friendly for both the listener and host. My recordings are immediately available after the show, so I can post them on my site for listeners to download.

        Get ready for your first show

        Here’s a handy checklist of how to prepare before and during the show:

        • Make sure you’re recording in a quiet place. Microphones pick up strange sounds that can easily distract listeners.
        • Write an outline or script for your show before recording. This cuts down on the “ums” and “ahs.”
        • If you’re doing a live recording (a show you’ve promoted with listeners tuning in live, rather than one recorded for later download) make sure you’re comfortable with your equipment and software. Practice beforehand so your first live show goes smoothly. Offer listeners a chance during the show to ask questions.

        Marketing and promoting your radio show

        Now that you’ve finished your first episode, you need a home base to fully capitalize on the marketing potential of your episodes. A blog or writer website is a good option and makes you easier to find. Make sure that your site has the link to your latest show prominently displayed along with your contact information.

        Since I’m part of a network, the show producers help promote all of the network’s shows. My show appears on its own home page and on the network’s social media channels.

        Promote your show on your own by creating tweets and Facebook posts highlighting different points in the radio show. For example, you could mention a lesson you learned in an unlikely situation, then link to your upcoming episode (or recording) for people to learn more.

        Make your latest episodes easy to find, and distribute recordings on established networks such as iTunes or Audible, which let you upload your recordings for wider distribution. Be sure to include your name and URL at the beginning and end of each recording, and consider crafting a short, catchy promo to share on your networks.

        Not ready to host your own show?

        Instead of going it alone, take on a cohost or two. You could either record together for a talk-show-like adventure, or host your own episodes as part of a group show. You’d see many of the same benefits, but without having to record a new episode quite as often.

        If hosting a radio show sounds too daunting, consider being a guest on a show. Choose one that speaks to you. One great way to get started is to check the daily listings over at Help a Reporter Out (HARO). I see requests for radio show guests almost daily. Subscribe to the daily digest to receive updates on all kinds of media requests. You can also set up a Google Alert for “radio show” and “guests wanted/needed” which you can receive up to several times a day straight to your inbox.

        Another option is to search for radio shows in your genres. You’ll find lots of them out there, so again, you’ll need to be choosy. Approach the host or producer and ask if he or she has slots for guests for future interviews. It never hurts to ask! As a guest, you’ll still have to prepare for the show, but you’ll be spreading the word about your book, building your brand and creating a following with less pressure than hosting your own show.

        Hosting your own radio show can be an effective way to round out your online presence while giving you one more way to engage and connect with your audience. Have fun and happy recording!

        Have you tried hosting a radio show? Would you consider adding one to your author platform?

        GIVEAWAY: Leave a comment below with the words “pick me!” to enter to win a 45-minute slot on “Giving Voice to Your Story.” To win, you must have written or be working on a memoir. Leave your comment by January 5, 2015, to enter.

        If you haven’t written a memoir but still want to comment, we’d love to hear your thoughts — just don’t include the words “pick me!” (UPDATE: Lori won!)